This post may contain affiliate links. Please read our disclosure policy.
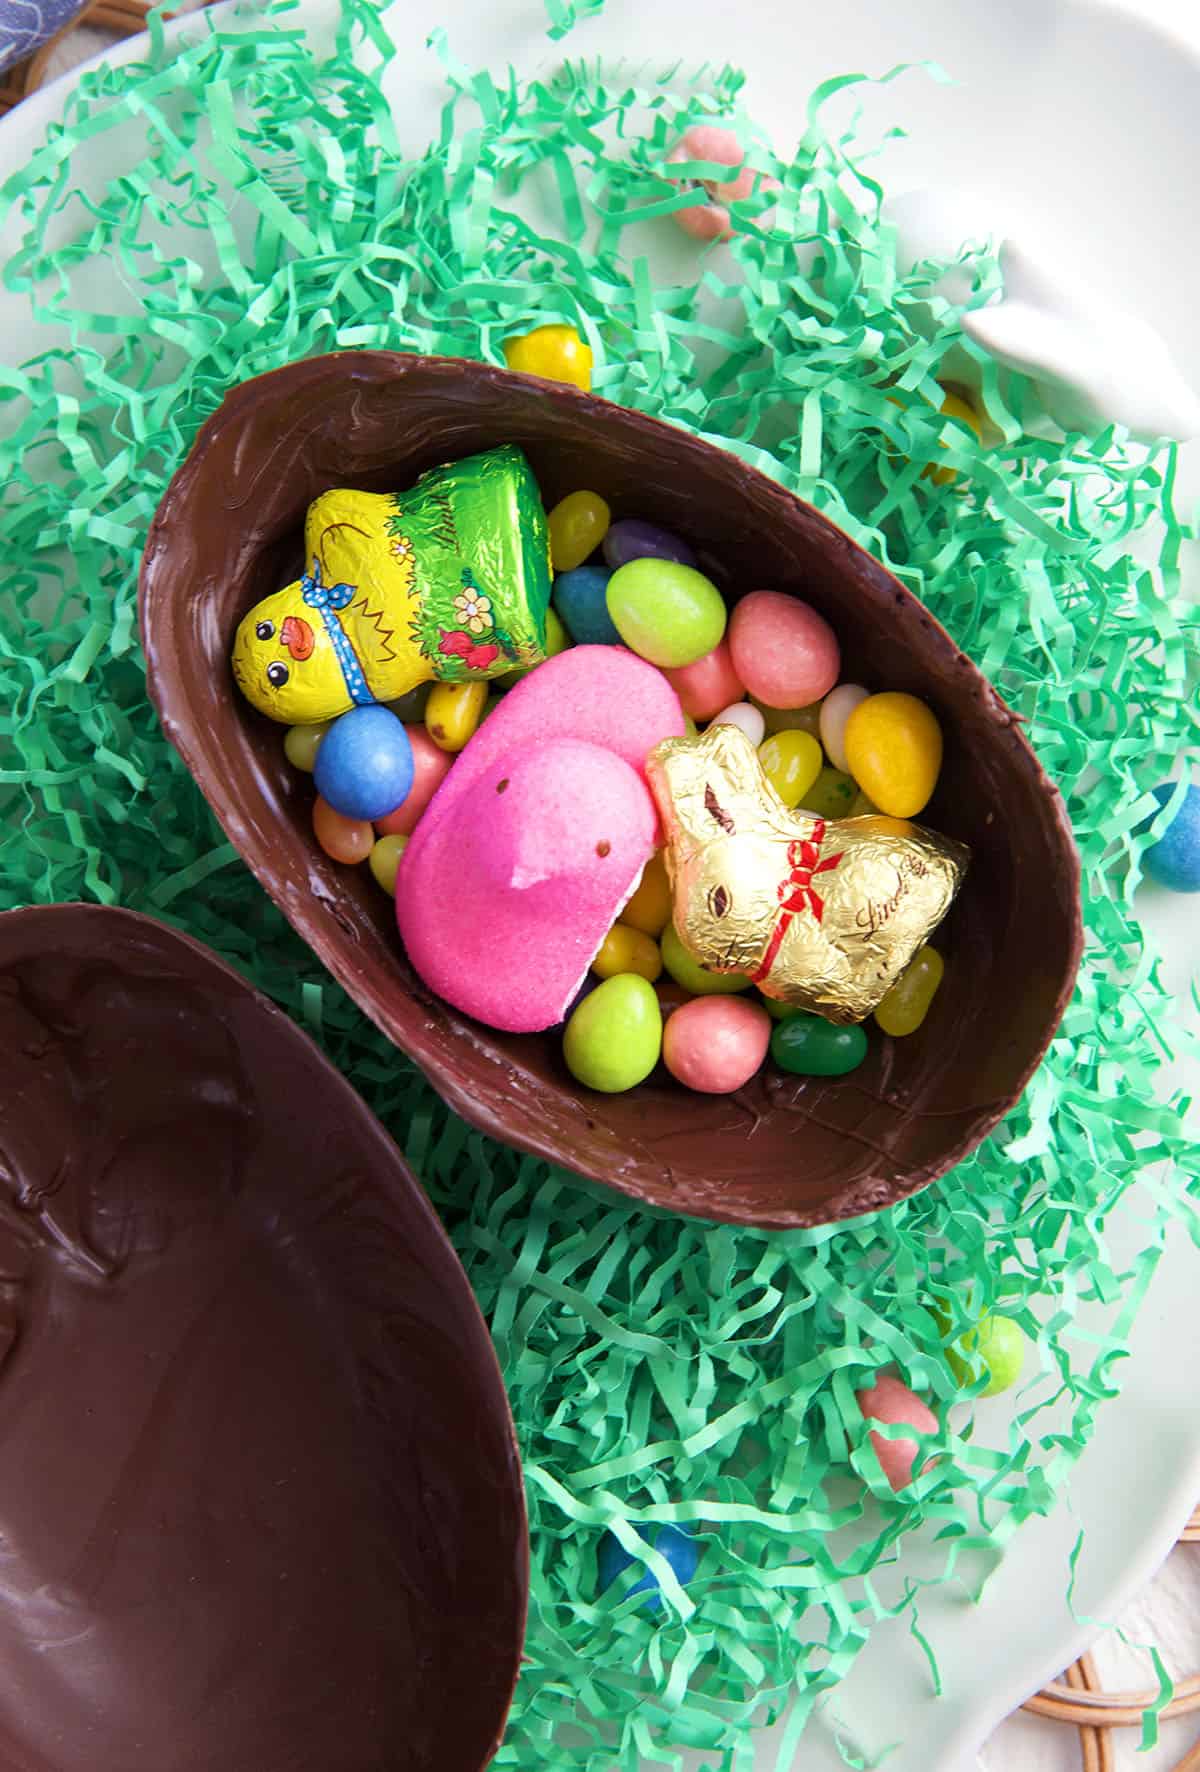
Have fun this Easter with this Breakable Chocolate Easter Egg! This picture perfect chocolate egg is easier to make than you may think. Load it full of Peeps, robins eggs, jelly beans or whatever else your heart desires and let the kids smash it. Fun for the whole family!

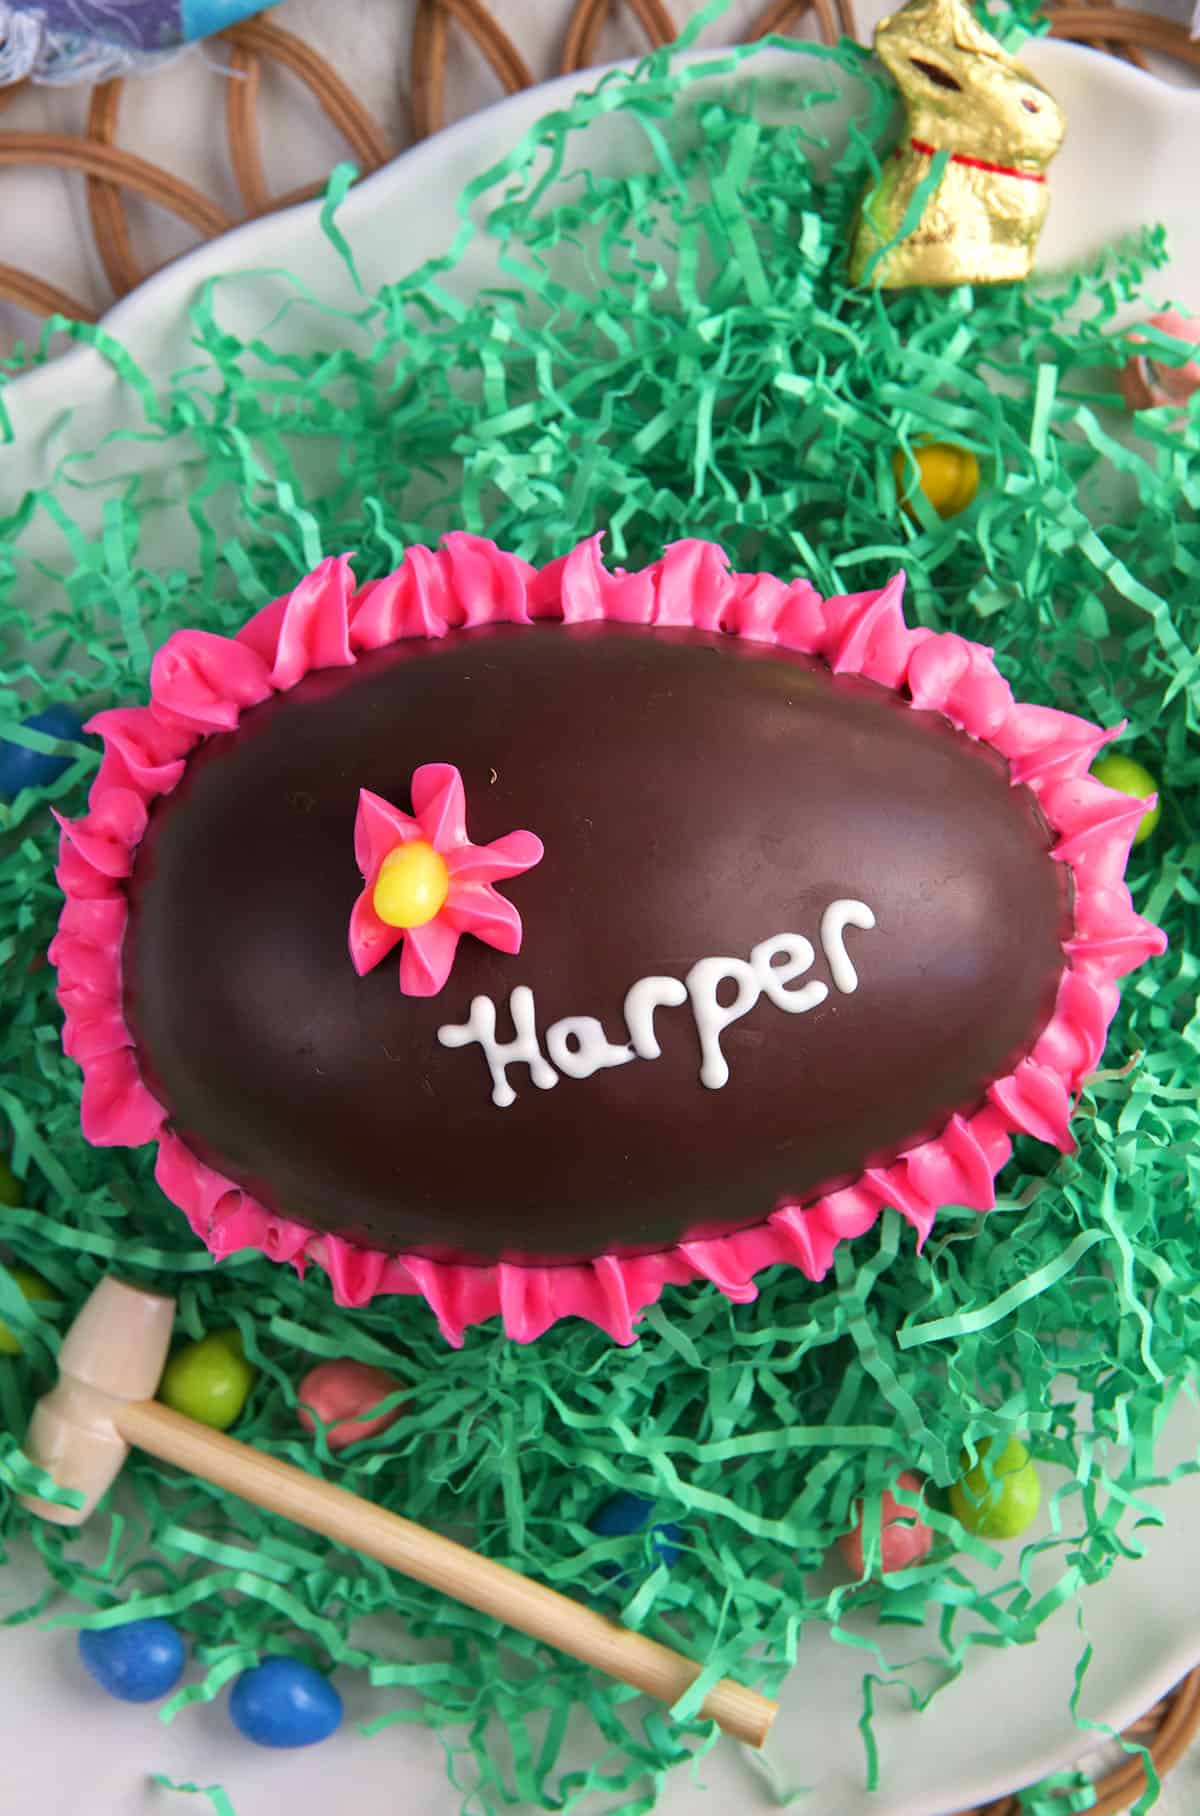
Breakable Chocolate Easter Egg
Ever since I first first made this DIY breakable chocolate egg for Easter, it’s been expected every single year! But honestly, I don’t have any regrets because it’s pretty easy to make and the kids really do love it. I love starting new holiday family traditions… especially when they involve chocolate. You can also stuff the eggs with different things every year to change it up a little bit!
Another thing I like to do is decorate the eggs a little differently each year. You can write each kids name on the eggs if you’re talented with icing work. Adding a little bit of frosting along the edges where the egg is sealed shut is also pretty, especially if the seal looks a little messy! That’s one more thing that’s nice about this DIY recipe – there’s room for error. You can easily fix plenty of little mishaps.
You only need a handful of simple ingredients to make this DIY Easter craft! Milk chocolate (I use Wilton candy melts), confectioners sugar and milk come together to create the cutest chocolate egg. The chocolate itself is entirely what the egg is. The sugar and milk are just needed to create the decorative icing. Oh, and you’ll need some food coloring to make it pop!
How to Make a Breakable Chocolate Easter Egg
This chocolate Easter egg recipe is so easy to make with simple ingredients and a few easy steps! For the full step by step process, scroll down to the recipe card at the bottom of the page.
- Melt the chocolate. Melt half the chocolate in the microwave in 30 second at a time, mixing well each time it stops until the chocolate is smooth.
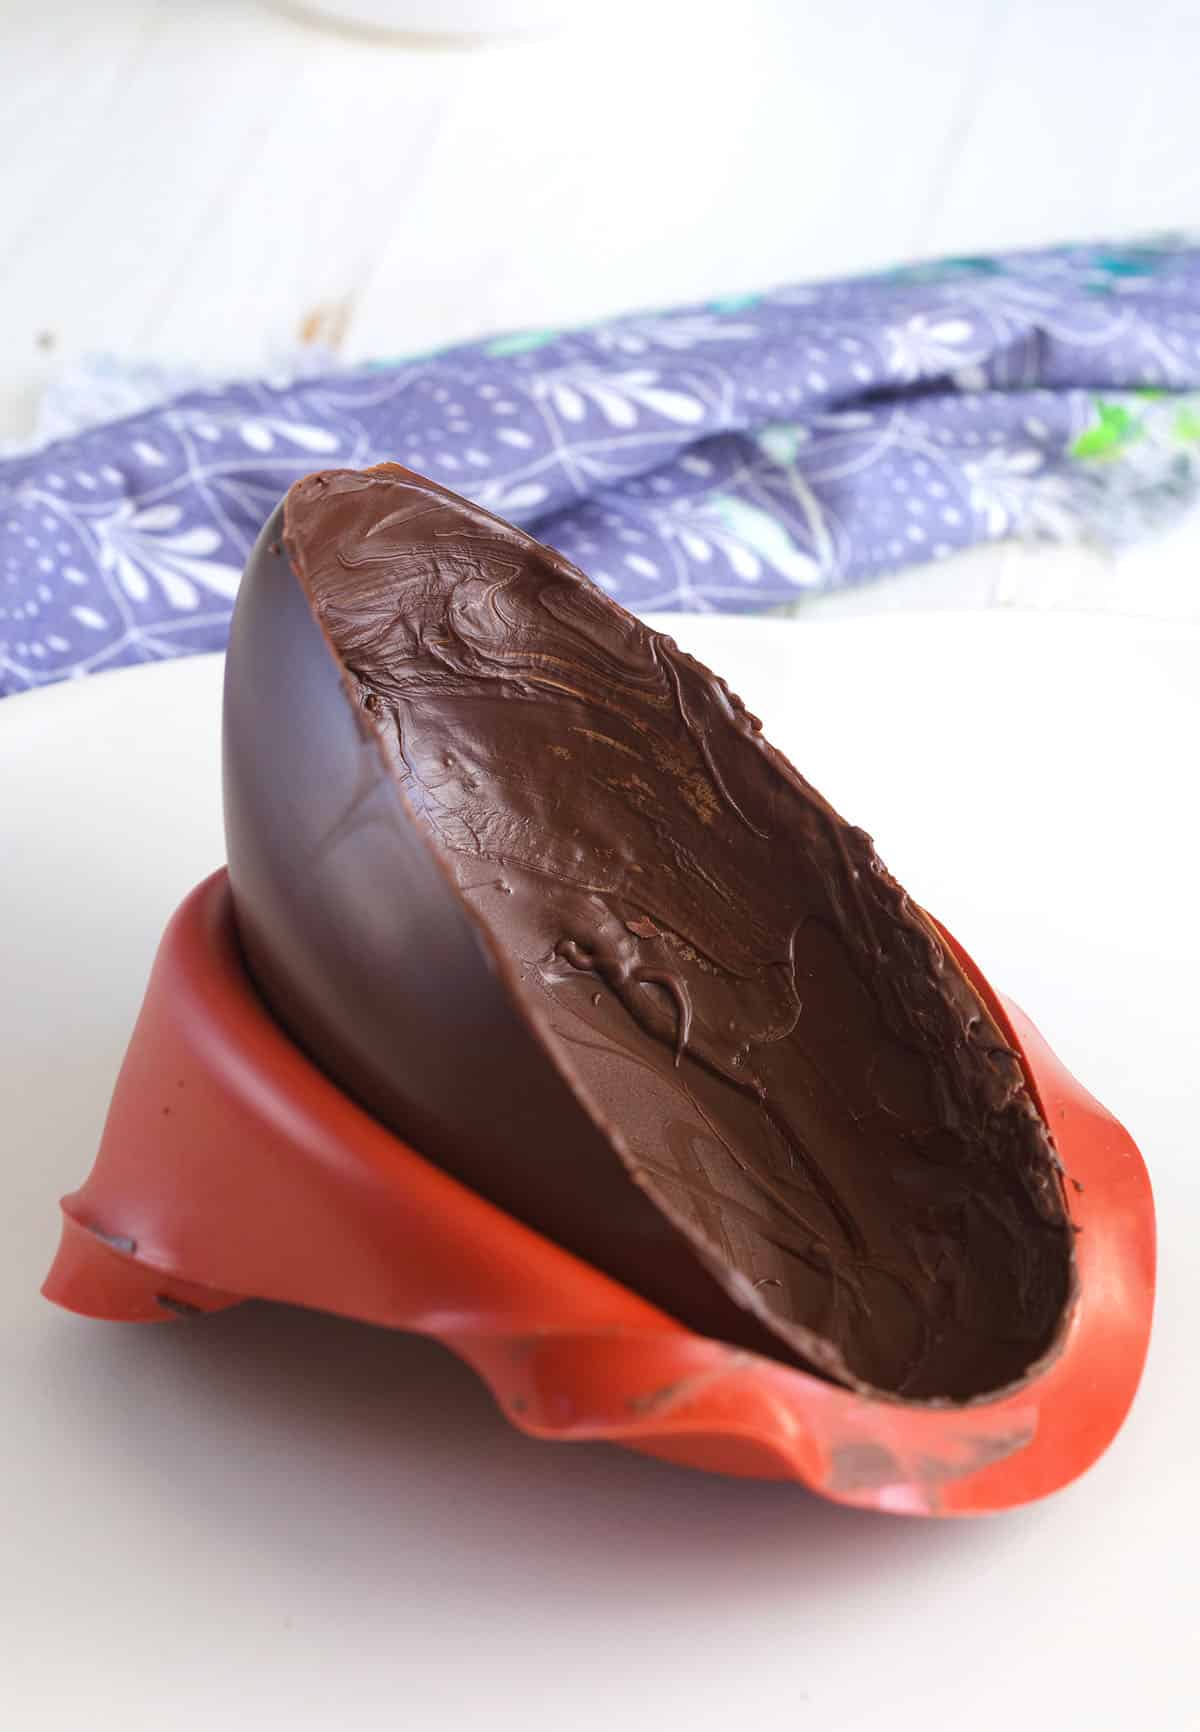
- Form the egg. Spoon about 2-3 tbsp of melted chocolate into each egg mold. Tilt it around until the entire surface of the egg has a light coating of chocolate. Chill it in the fridge until hard. Melt the rest of the chocolate in the microwave. Repeat the process with the rest of the chocolate, chilling in the fridge again until hard. Carefully remove the chocolate from the mold once hardened.
- Add candy. This is the fun part! Fill one half of the egg with your favorite Easier candies.
- Assemble the egg. Use the other half of the chocolate egg to top the candy filled egg. Hold it in place for a few seconds to seal it. Give the chocolate a chance to set before you place it in the fridge to harden.
- Make the icing. This is great to do while the egg is chilling! Use a hand mixer on medium speed to combine the sugar and milk until smooth. If the icing is too loose, add more sugar. If the icing is too crumbly, add more milk. The icing needs to be stiff so it doesn’t slide off the egg. Mix in your favorite color of food coloring!
- Pipe the icing. For the cleanest results, use a pastry bag with a fitted straight tip. Pipe the name on the egg. Change the tip on the pastry bag to a star tip and pipe little stars around the seam of the egg. Allow the icing to harden before packaging or placing in a basket.
PRO TIP: If you have leftover melted chocolate, you can dip the edges into the chocolate to use as the glue. Or, you can heat a pan and lightly touch the edges of the dome to melt slightly. The pan method does ensure a cleaner seam, but you need to be quick and careful that you don’t melt too much of your egg!

You can use this chocolate egg mold for hollow or solid eggs, as well, as the fillable breakable egg. Economical and dishwasher safe.
This post may contain affiliate links which won’t change your price but will share some commission.
Tips for the Best Breakable Chocolate Easter Egg
Get the very best chocolate egg every time with these quick tips and tricks:
- Serve with a mallet. There’s no other way to serve this chocolate egg! Break it up with a wooden hammer. It’s so much fun!
- Don’t burn the chocolate. Melt the chocolate for 30 seconds at a time or less. Stir each time it stops. If you zap it for too long, you can risk scalding it. Alternatively, you can melt the chocolate on the stovetop in a double boiler.
- The icing should be stiff. If it’s too soft or liquidy, it’ll slide right off the egg.
Can I make it ahead of time?
Yes! You can make this chocolate Easter smash egg up to 5 days ahead of time. I don’t recommend icing it until the big day though so it doesn’t harden. Make sure to store it in a cool, dry place out of direct sunlight.
More of the cutest Easter treats!
- Easter White Chocolate Covered Strawberries
- Peeps Stuck in the Mud (Easter Chocolate Bark)
- Easter Dirt Pudding
- Easter Oreo Truffles (Bunny Butt Truffles)
For more easy Easter candy ideas, follow us on Instagram and Facebook!
Breakable Chocolate Egg Recipe

Equipment
- 1 Silicone Egg Mold
- 1 piping bag
Ingredients
- 1 12- ounce package milk chocolate, I used Wilton Candy Melts for this recipe
- 4-6 cups confectioners’ sugar
- 4 tablespoons milk
- 1/4 teaspoon your favorite food coloring
- Candy for filling and decorating
Instructions
- In a microwave safe bowl, melt the 1/2 the chocolate in the microwave in 30 second intervals mixing well each time until the chocolate is smooth.
- Carefully spoon about 2-3 tablespoons into each cavity of the egg mold and tilt around until the entire surface of the egg has a light coating of chocolate. Chill in the refrigerator until hard, approximately 5-10 minutes.
- Melt the remaining chocolate in the microwave and repeat the procedure to coat the mold with another layer of chocolate. Chill until hardened.
- Remove the mold from the refrigerator and carefully remove the chocolate from the mold.
- If you have leftover melted chocolate, you can dip the edges into the chocolate to use as the glue OR you can heat a pan and lightly touch the edges of the dome to melt slightly. The pan method does ensure a cleaner seam but you need to be quick and careful that you don’t melt too much of your sphere.
- Fill half the egg with your favorite candy.
- Using the remaining dome, top your filled halves and seal gently. Hold in place for a few seconds to give the chocolate a chance to set before moving the fridge to harden.
- While the egg is chilling, mix the sugar and milk in a large bowl using a hand mixer on med speed until smooth. If the icing is too loose, add more sugar. If the icing is too crumbly, add more milk. The icing needs to be stiff so it doesn’t slide off the egg. Mix in the food coloring until desired shade is achieved.
- Using a pastry bag fitted with a straight tip, pipe the name on the top of the egg and add a little dot as the “glue” for your decoration, if using. Change the tip on the pastry bag to a star tip and pipe little stars around the seam of the egg. Allow the icing to harden before packaging or placing in a basket.
Notes
Nutrition
Nutrition information is automatically calculated, so should only be used as an approximation.