This post may contain affiliate links. Please read our disclosure policy.
Charcuterie Cups feature all of your favorite elements of a charcuterie board… in a cup! These handheld snacks are ideal for all kinds of events. Everyone gets bites of cheeses, meats, and nuts while still being able to walk around and mingle. These creative cups are always such a huge hit!
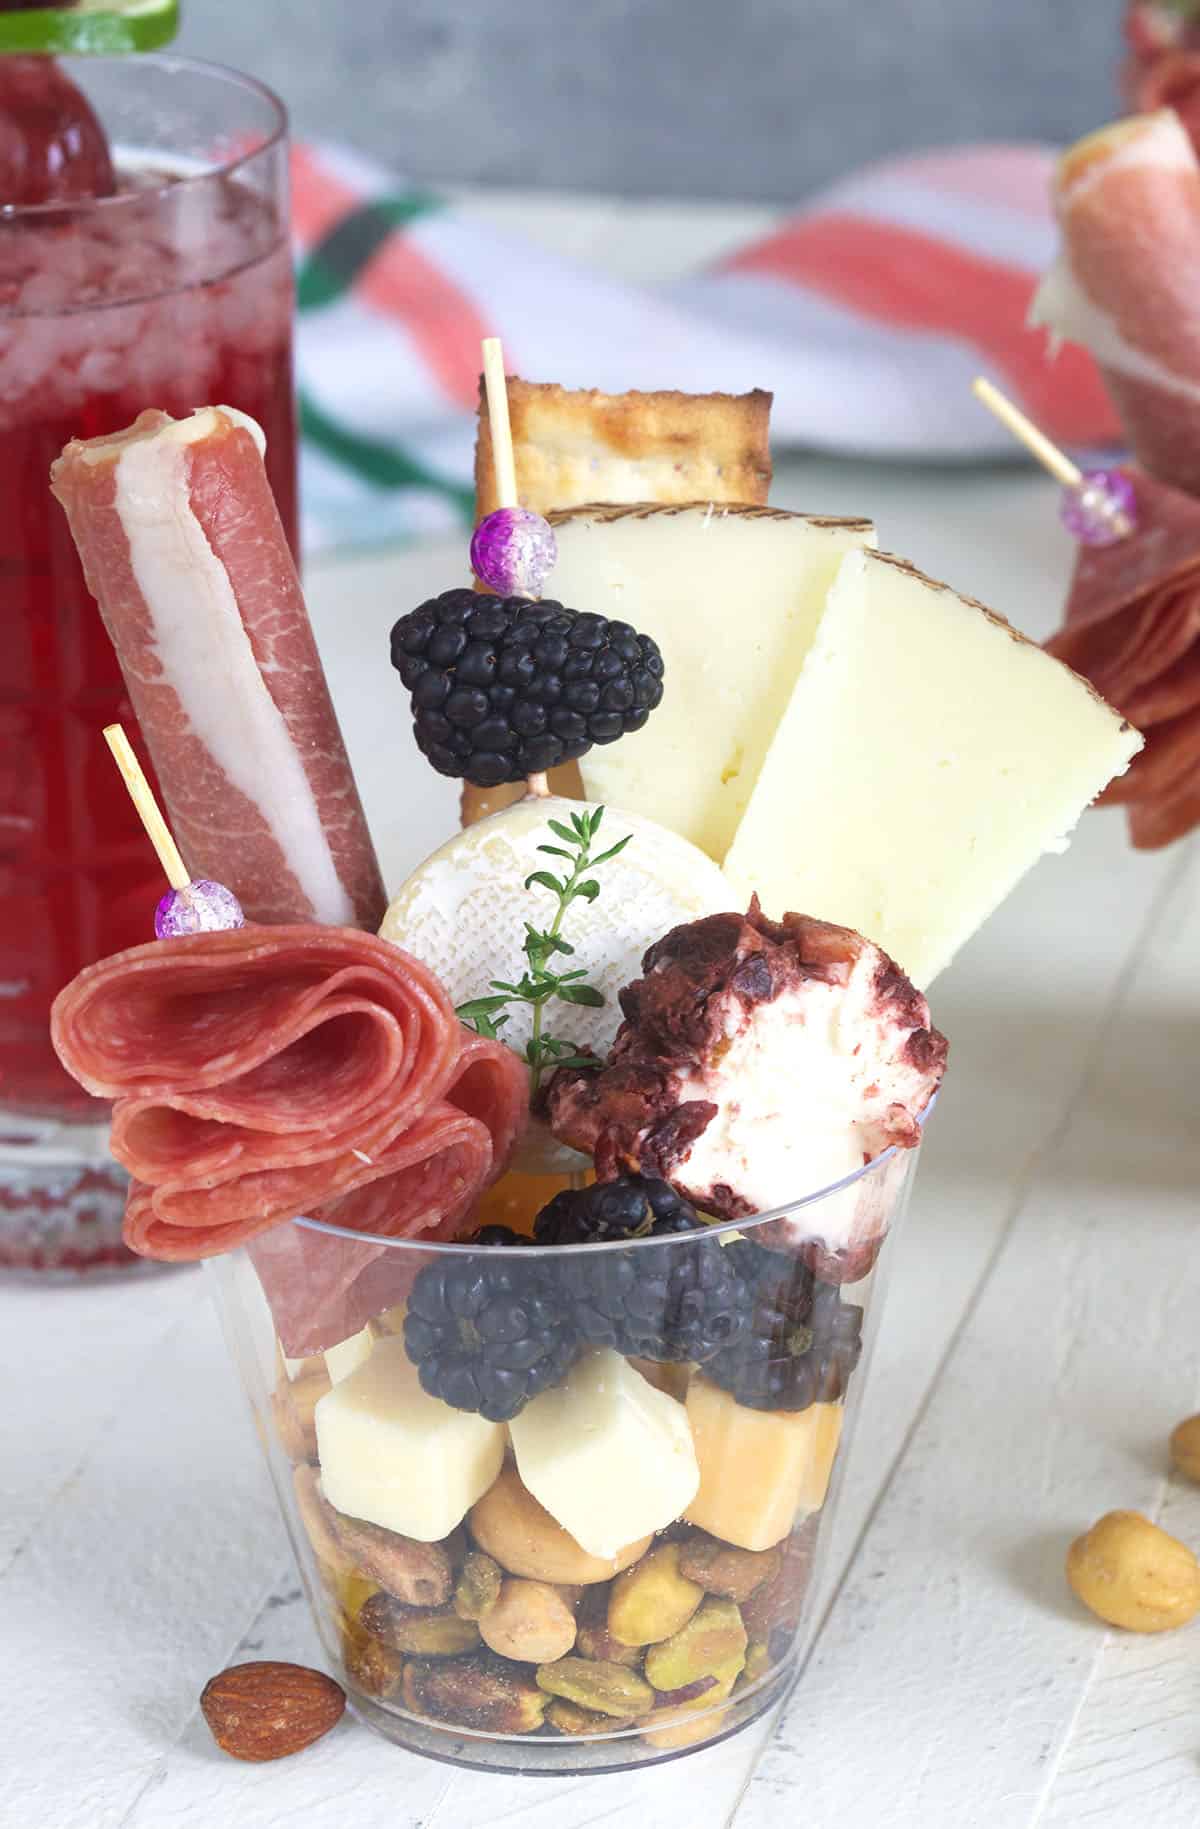
Table of Contents
Charcuterie Cups
Birthdays, baby showers, weddings, and all other events are perfect occasions for serving charcuterie cups! If you didn’t know, I’m pretty much a charcuterie aficionado. In fact, I love snack boards of all kinds so much that I actually wrote a book about dessert boards. There’s just something so amazing about offering all kind of different snacks or sweets on a single board (or cup) at a party!
While I do love myself a good charcuterie board, these cups have me pretty obsessed. The presentation value of a perfectly assembled board may be hard to compete with, but when made just right, these cups give classic boards a run for their money. Of course, the very best thing about a charcuterie cup is the portable aspect of it. Your guests can grab a cup on the go so the party doesn’t need to stop.
Think of it this way. When your friends can grab a charcuterie cup, they’re mobilized! This is an ideal appetizer offering for larger events, so you don’t have to worry about a large group crowding around a single charcuterie board. These cute cups really change the game of event planning! Plus, you can personalize them in so many various ways to fit everyone’s needs. More on that below!
How to Make Charcuterie Cups
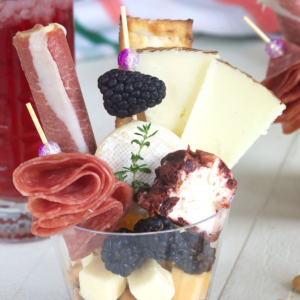
Here’s how I achieved the picture perfect cups you see here! Keep in mind that you can change up your cups however you’d like. Feel free to get creative!
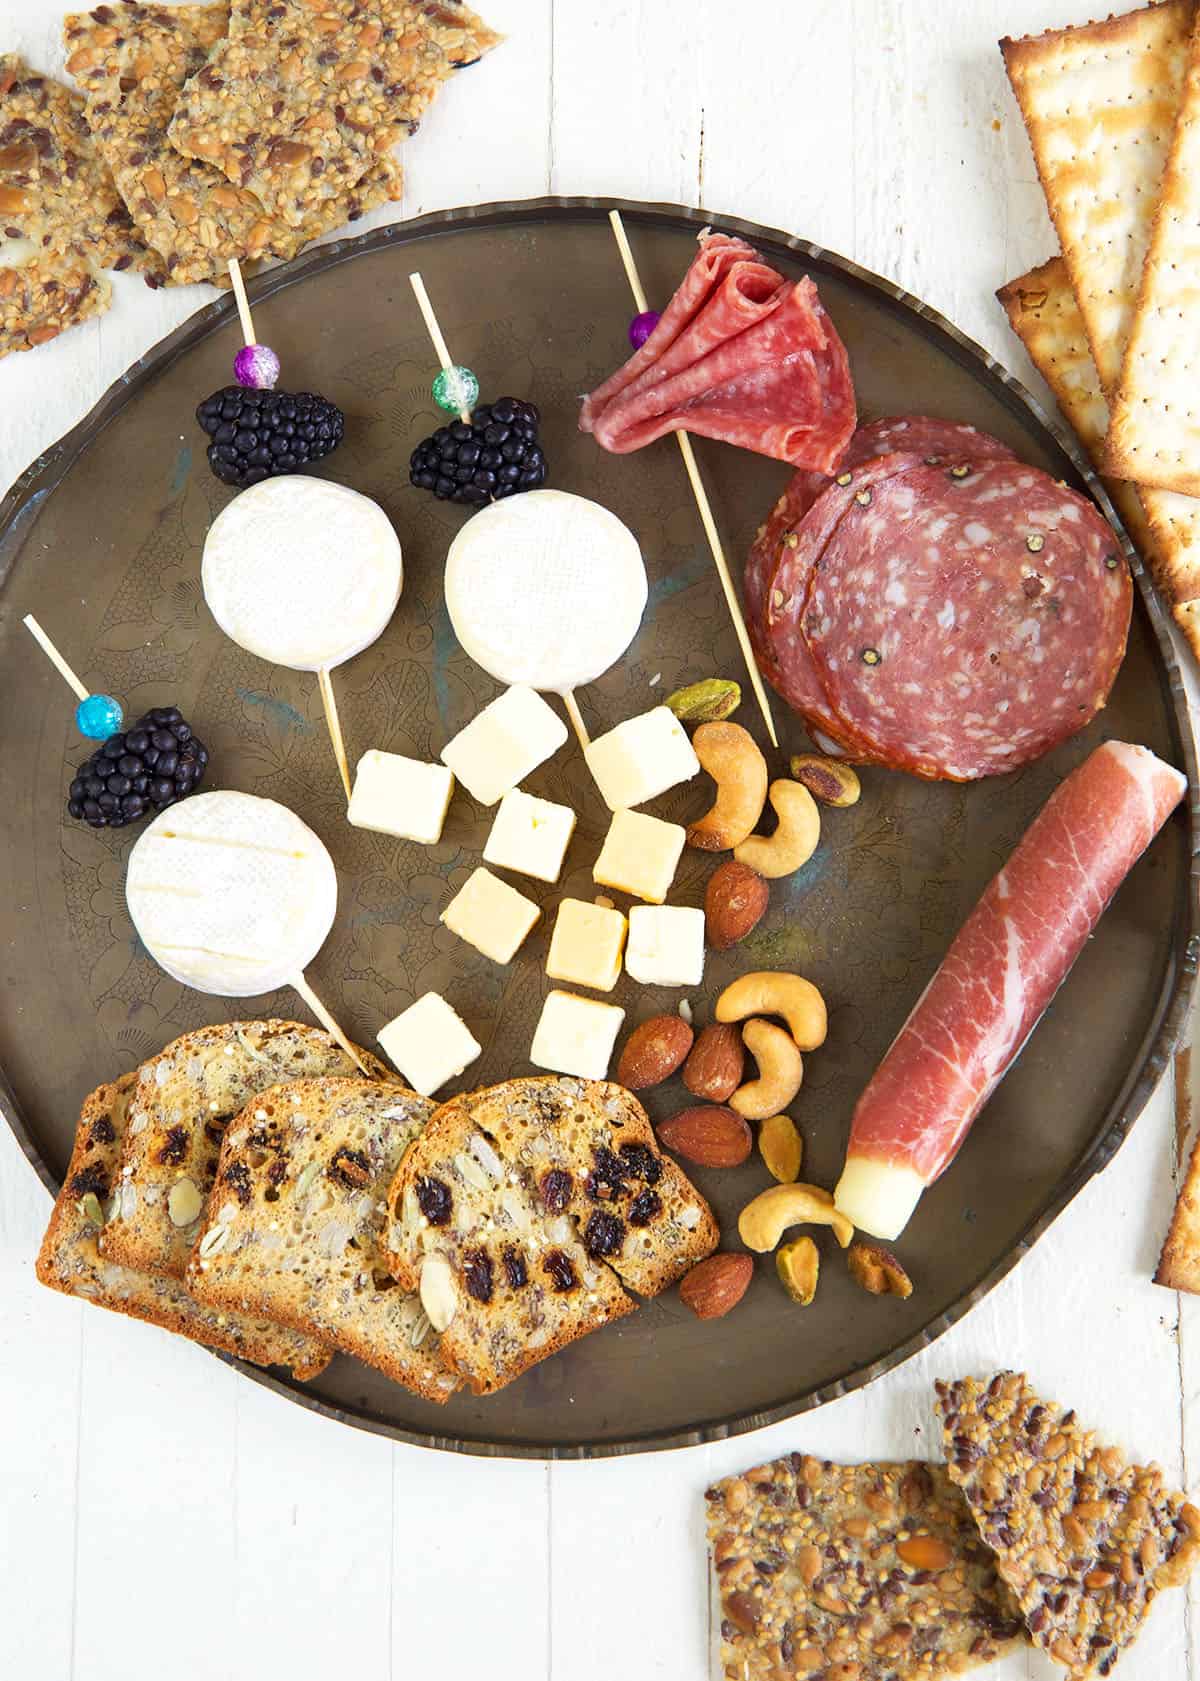
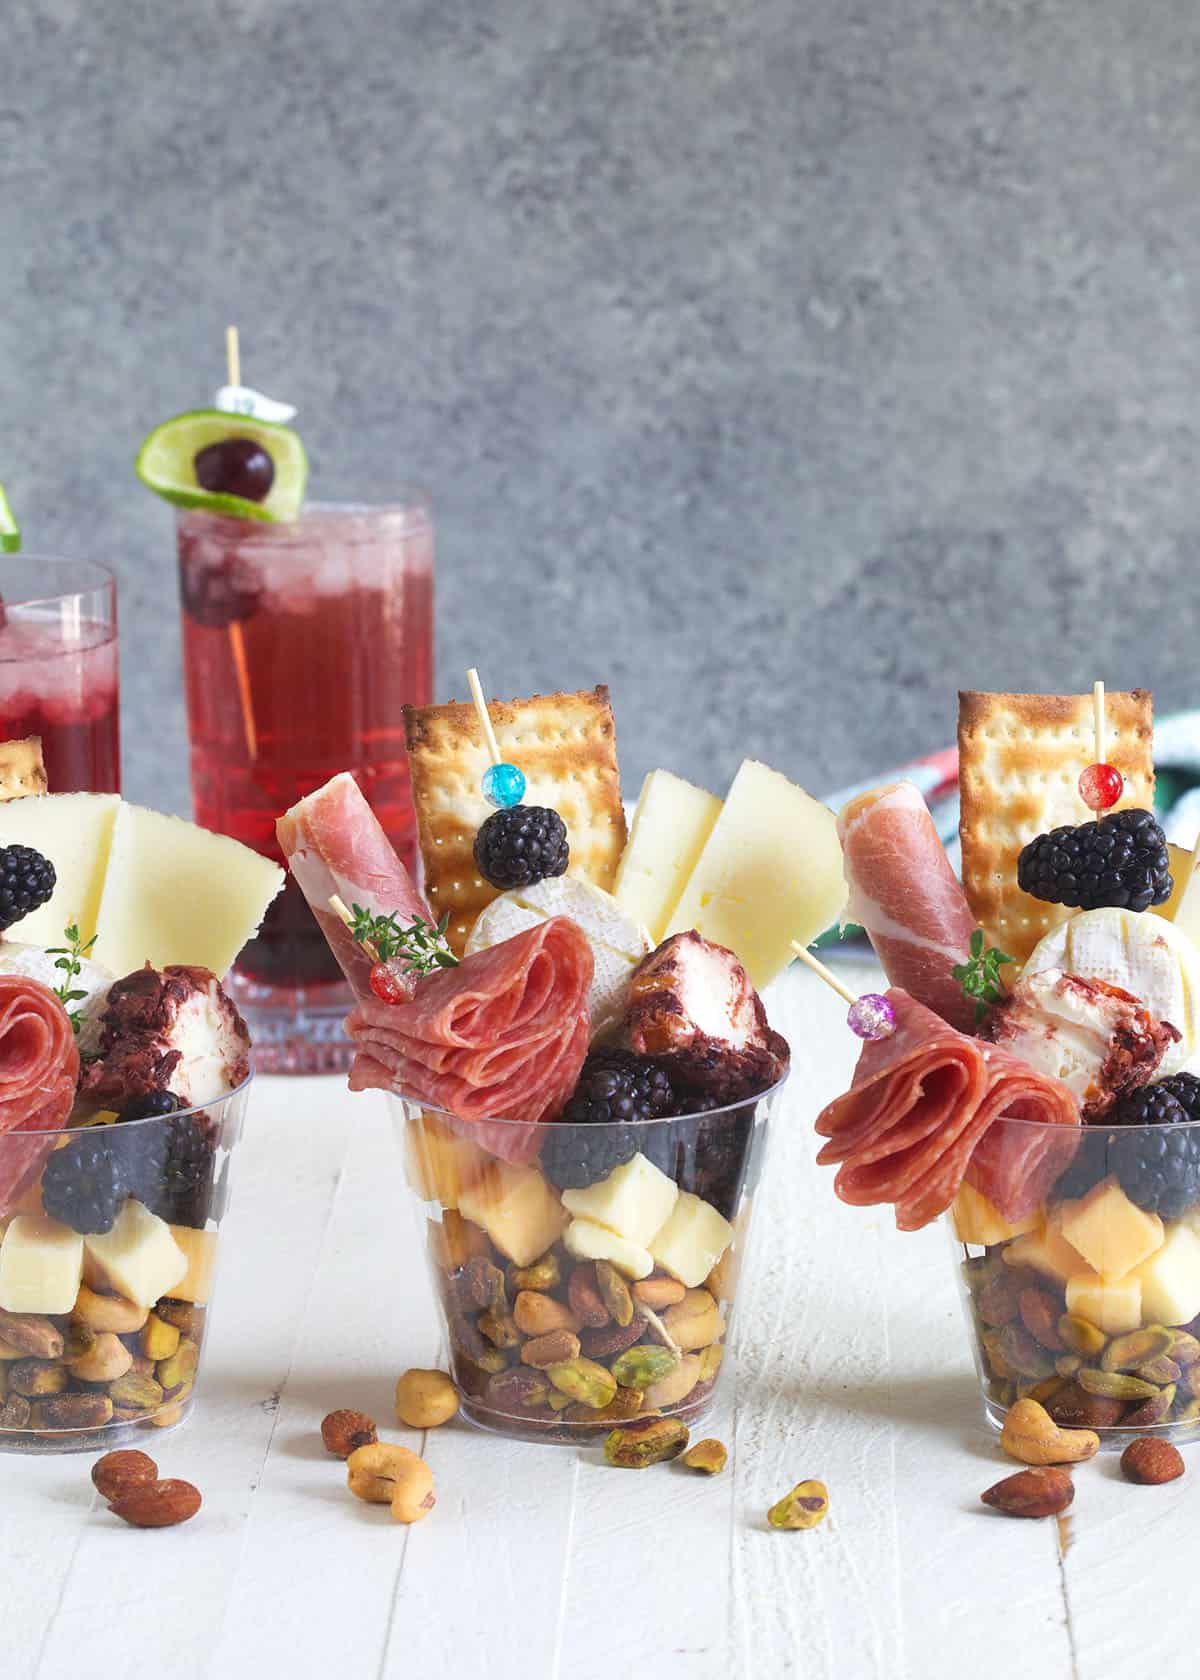
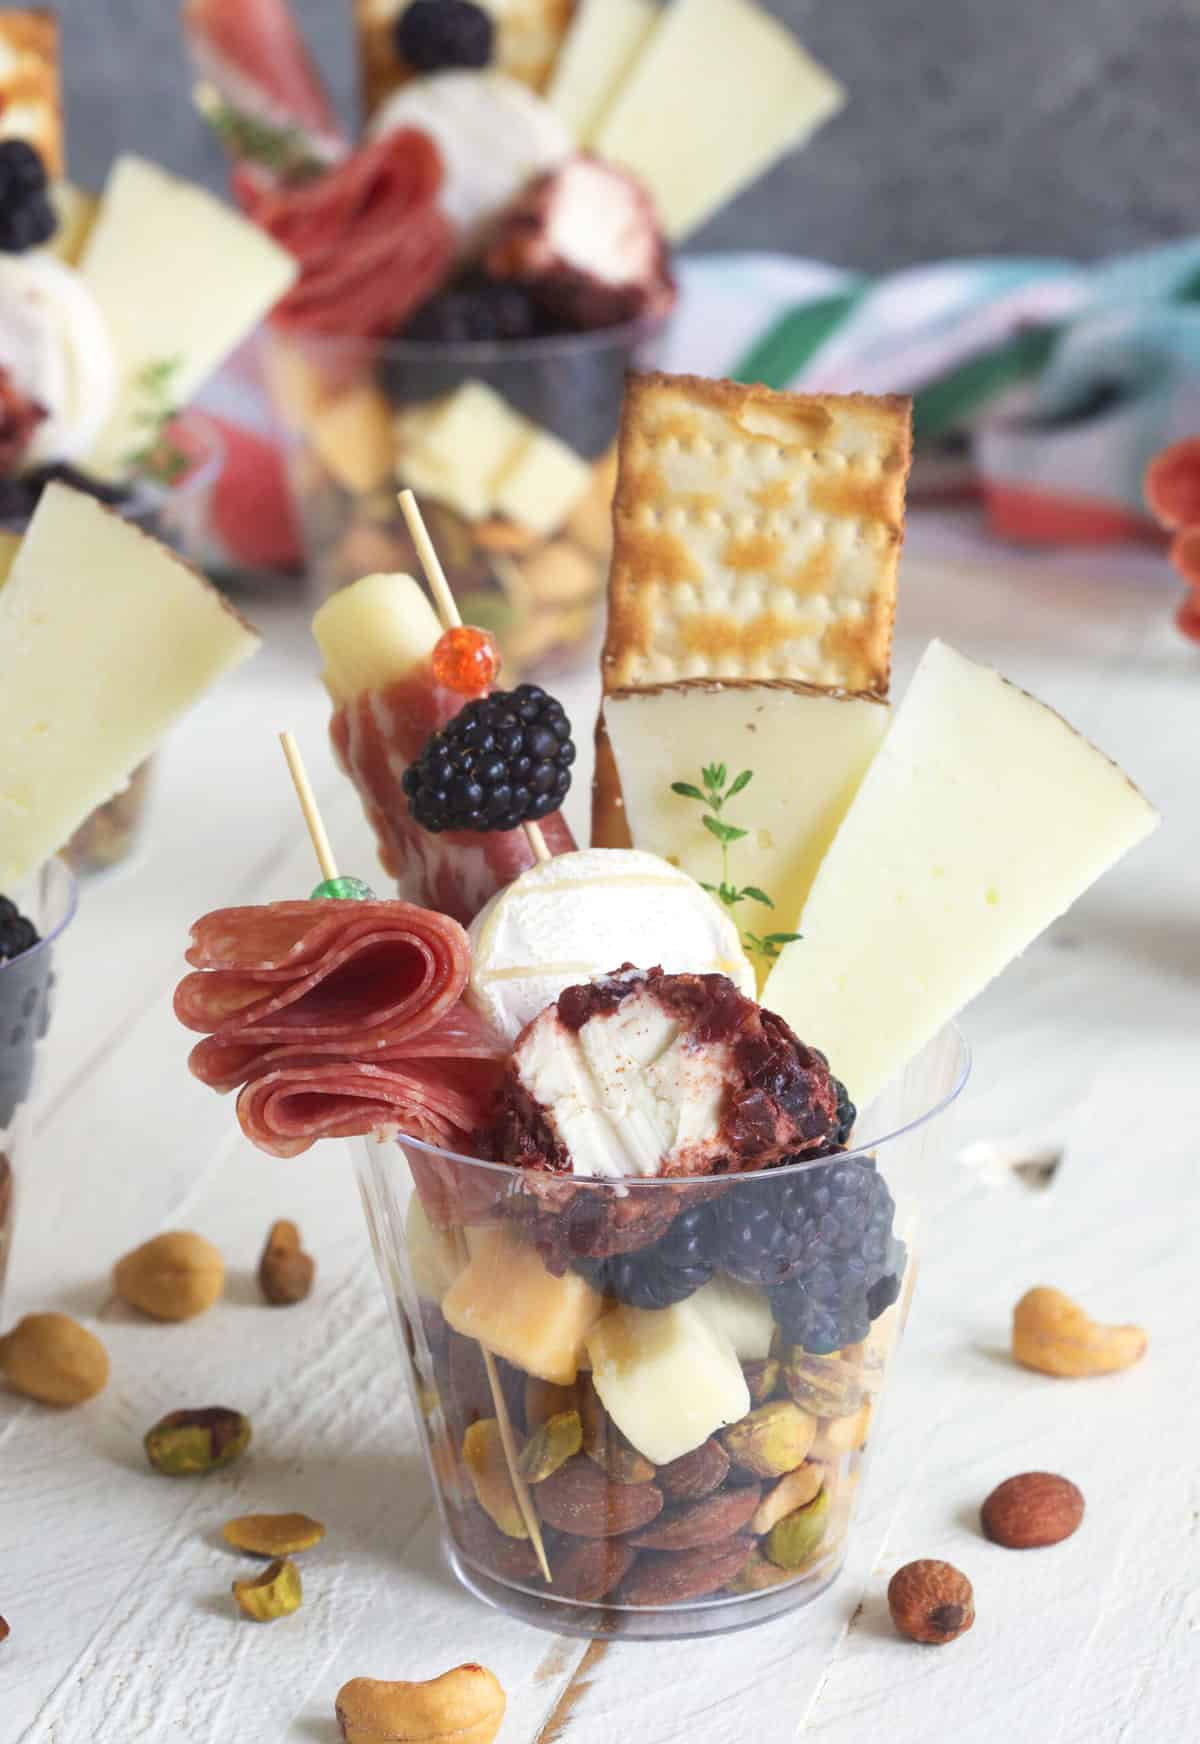
- Start with smaller items. The base of the cups should be small ingredients like nuts and/or grapes.
- Add some crackers. Place them on top of the nuts/grapes towards the back of the cup. Your goal is to create enough space for more ingredients to be added to the front.
- Skewer some ingredients. Use toothpicks to skewer some cheeses, meats, olives, berries, or whatever else your heart desires.
- Add cheeses. Use mini forks or more toothpicks to place cheeses (or other ingredients) strategically around the cups. Insert these items in varying positions to create levels.
- Fill in the gaps. Don’t allow any space in these cups! You want to stuff any gaps with more cheeses, meats, nuts, or olives so there are no empty spaces.
What do you put in the bottom of a charcuterie cup?
I like to put heavier, smaller items in the bottom of the charcuterie cups to help anchor all of the other ingredients. Nuts of all kinds and/or grapes are great options!
How far in advance can charcuterie cups be made?
Once they’re assembled, charcuterie cups can be made about 1 day in advance and be kept in the fridge until ready to serve. The only tricky part is keeping them in an airtight container that’s big enough for optimal freshness. I’d recommend prepping the skewers and keeping them in a separate airtight container, then assembling the cups just before serving.
What else can I add to charcuterie cups?
There is SO much room for creativity here! You can make these cups gluten-free, vegetarian, and even vegan by swapping out the ingredients I use with others of your own choosing. Let me know in the comments how you choose to make your cups best for your needs!
Be the host with the most when you serve these boards!
- How to Make the Best Charcuterie Board
- Snackle Box
- Personal Charcuterie Board Ideas
- Create the Ultimate Cheese Board on a Budget
For more cheese and charcuterie ideas, follow us on Instagram and Facebook!
Charcuterie Cups Recipe
Equipment
- 12 cocktail cups
- 12-24 cocktail picks
Ingredients
- 12 ounces assorted cheeses
- 32 slices assorted cured meats
- 1 cup mixed berries
- 1 cup grapes
- 1/2 cup olives
- 1/2 cup nuts
- 16 long thin crackers or breadsticks
- 12 flatbread type crackers
- 12 pieces fresh herbs
Instructions
- Start by filling your containers with smaller items like nuts and grapes, distributing them evenly.
- Tuck the crackers towards the back of the container, leaving some space in the front for the toothpick-skewered items.
- Using toothpicks, skewer a variety of ingredients such as cheeses, meats, olives, berries, and other desired items.
- Use mini forks or extra picks to present individual pieces of cheese or other specialty items, placing them strategically within the cup.
- Insert the toothpick-skewered items into the container, varying their heights and colors to create visual interest.
- Fill in any remaining gaps in the container with extra ingredients to hold everything securely in place.
Nutrition
Nutrition information is automatically calculated, so should only be used as an approximation.


What a great idea! I would have never thought of that!
Very fun!
Thank you, Diane!