This post may contain affiliate links. Please read our disclosure policy.
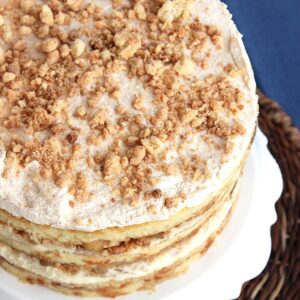
Buttery cake layers sandwich a creamy cheesecake and apple pie filling along with crispy pie crust crumbles in this Apple Pie Layer Cake recipe. A great way to mix up the dessert table this holiday season, this cake has a little something for everyone.
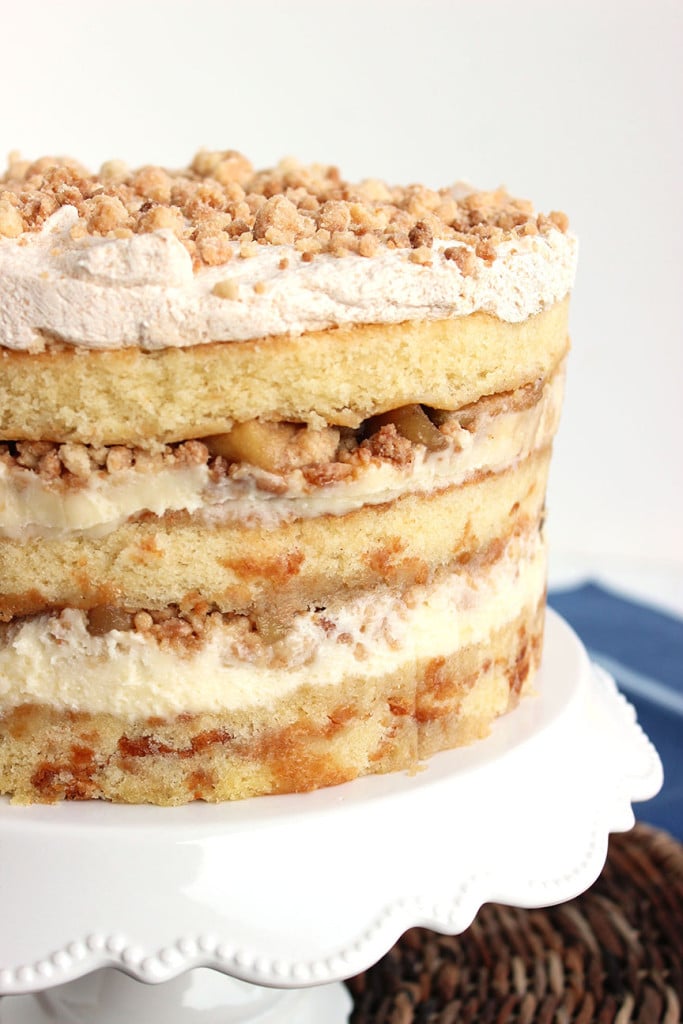
For my last big birthday, I ordered myself a birthday cake. I was 40….I was doing things my way. And since we were going to Manhattan for the weekend I figured I would get something I always wanted but never felt like a bazillion dollars just for shipping was worth it. Milk Bar Birthday Cake is the bee’s knees. Seriously. It is my all-time favorite cake ever…on the entire planet…for reals. I think about it all the time. I want it all the time. I live to far away but sometimes a bazillion dollars just for shipping seems fair and reasonable. I just need to come up with a bazillion dollars and then the price of the cake.
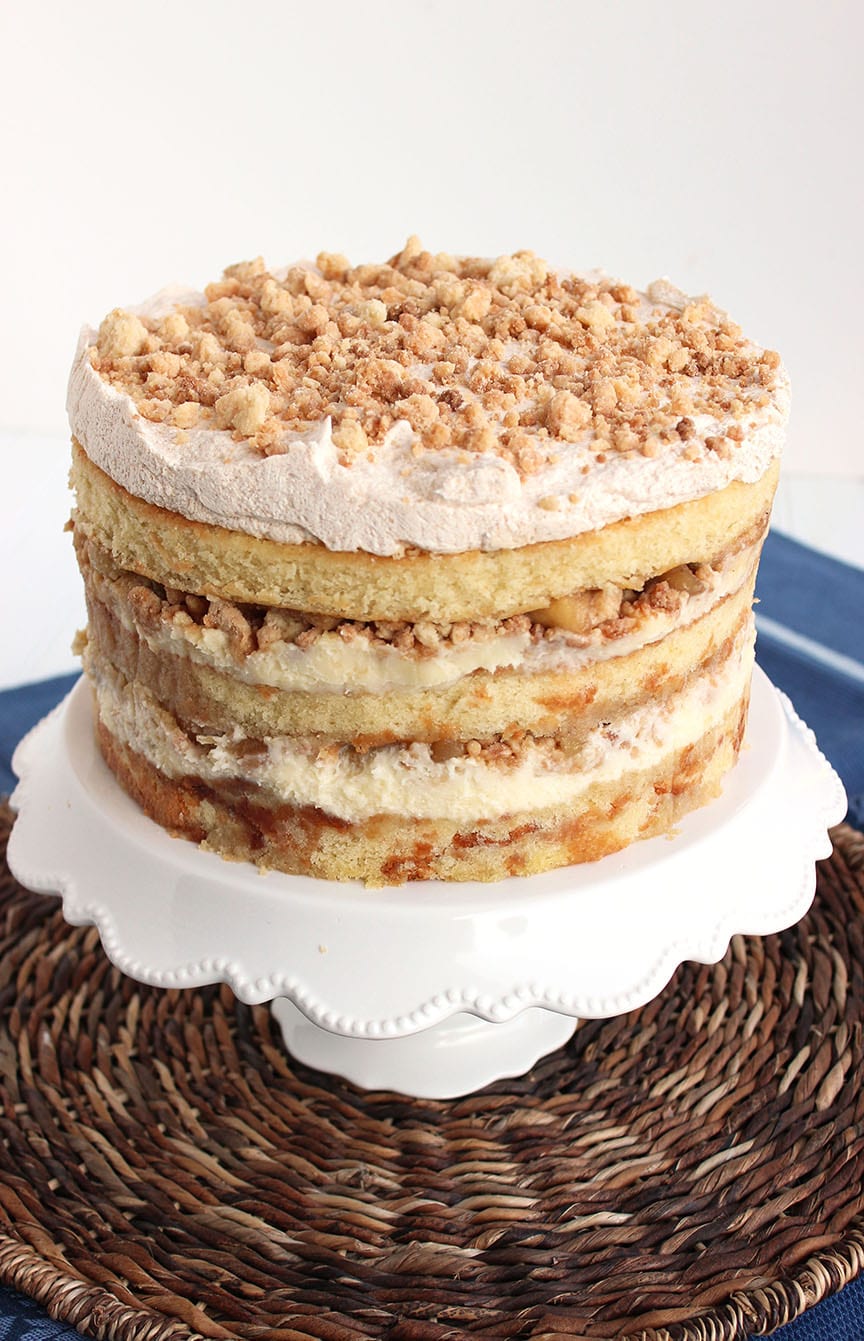
Just out of curiosity…I decided to see if Ms. Christina Tossi at Milk Bar had any holiday layer cakes lying around. She did…Apple Pie Layer Cake. Doesn’t that just sound like something you want to stick your face in? My sentiments exactly. Something a little different than grandma’s apple pie (which is still fabulous by the way…..but let’s do more.) But I still don’t have a bazillion dollars to I retreated to the kitchen to tackle my next baking challenge. I won’t lie….this bugger is time consuming. But hear me out….it’s so worth the time and you can break everything up over a period of several days. You can even make the cake days in advance and FREEZE it! It’s seriously a step in the assembling process so it makes sense to make this the weekend before and just take it out 3 hours before serving. It’s a dessert made for Thanksgiving….and Christmas….and just possibly anytime during the long winter that’s about to bury us under it’s sub-zero temperatures.
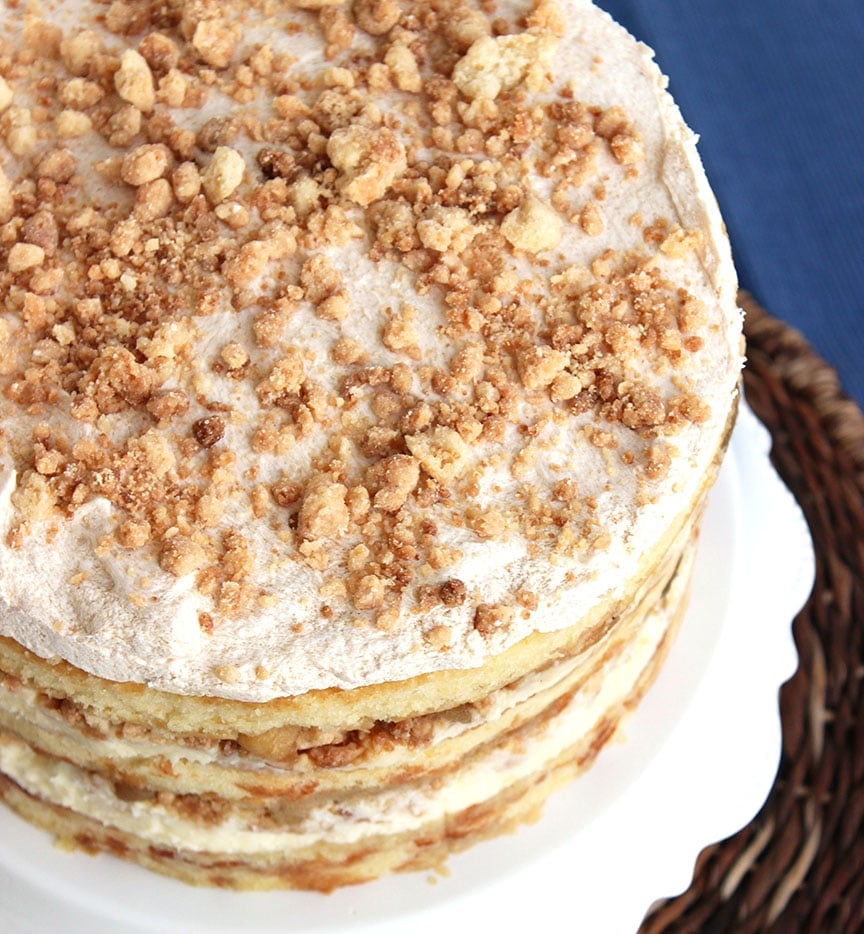
I love that this Apple Pie Layer Cake leaves all it’s secrets unveiled, there’s no frosting covering up all the magic that’s happening between the buttery layers of cake. That’s the way it should be. Let it all hang out, my cake friend. You have nothing to hide.
Every layer is full of buttery, cinnamony, fall flavor. The cheesecake filling is a welcome surprise…after all, it is an apple pie cake. I didn’t see anything in the title that revealed there was cheesecake in there somewhere….but it is. And it’s divine. And you may want to keep it all to yourself but there’s no reason for that. This cake is huge. This cake is for sharing.
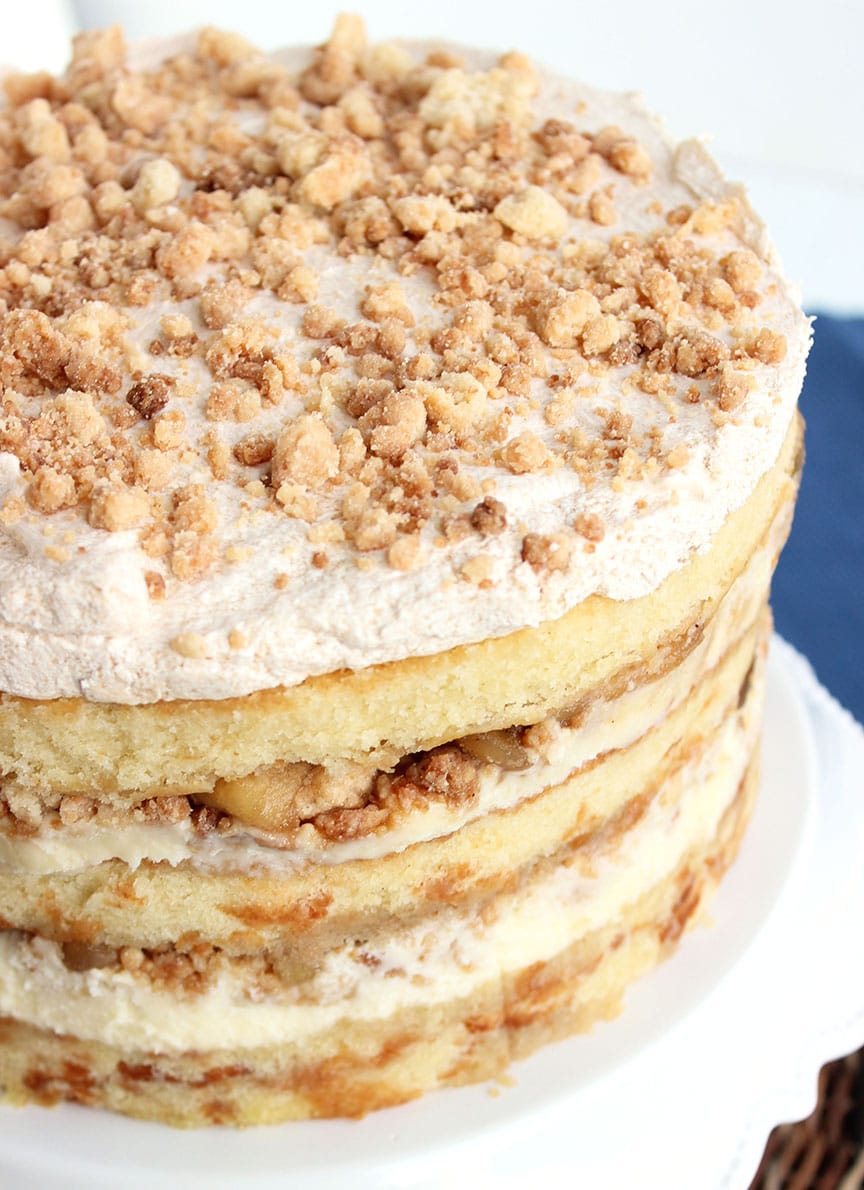
Just a heads up….you will need an 8 inch cake ring for this Apple Pie Layer Cake recipe. You can purchase them online or at Sur la Table which is where I found mine. You will also need 2 strips of acetate 3 inches wide by 26 inches long. I used parchment in place of the acetate with great results but it is a little more cumbersome to work with. This cake is the perfect ending to a holiday meal. Especially epic if served following THIS roasted turkey and totally addicting mashed potatoes. And if you want to see what I’m making this year for Thanksgiving…be sure to follow me on Facebook and Instagram!
Apple Pie Layer Cake
Ingredients
- For the Barely Brown Butter Cake
- makes 1 half sheet pan
- 8 tablespoons butter, 1 stick
- 4 tablespoons brown butter
- 2 1/2 cup granulated sugar
- 1/2 cup light brown sugar, tightly packed
- 6 eggs
- 1 cup buttermilk
- 2/3 cup grapeseed oil
- 1 teaspoon vanilla extract
- 2 cups cake flour
- 2 teaspoons baking powder
- 2 teaspoons kosher salt
- pam or other nonstick
- cooking spray, optional
- For the Apple Cider Soak:
- 1/2 cup apple cider
- 2 teaspoons light brown sugar
- 1/2 teaspoon ground cinnamon
- For the Liquid Cheesecake:
- 16 ounce cream cheese
- 1 1/2 cup sugar
- 1 teaspoon cornstarch
- 1 teaspoon kosher salt
- 4 tablespoons milk
- 2 eggs
- For the Pie Crumb:
- 3 cups flour
- 4 tablespoons sugar
- 1 1/2 teaspoons kosher salt
- 16 tablespoons butter, melted (2 sticks)
- 3 tablespoons water
- For the Apple Pie Filling:
- 2 lemons
- 4 medium granny smith apples
- 2 tablespoons butter
- 1 1/3 cup light brown sugar, tightly packed
- 1 teaspoon ground cinnamon
- 1/2 teaspoon kosher salt
- For the Pie Crumb Frosting:
- ½ recipe pie crumb
- 1 cup milk
- 1 teaspoon kosher salt
- 6 tablespoons butter, at room temperature
- 1 cup confectioners’ sugar
Instructions
- For the Barely Brown Butter Cake:
- 1. heat the oven to 350°f.
- 2. combine the butter and sugar in the bowl of a stand mixer fitted with the paddle attachment and cream together on medium-high for 2 to 3 minutes. scrape down the sides of the bowl, add the eggs, and mix on medium-high for 2 to 3 minutes. scrape down the sides of the bowl once more.
- 3. stream in the buttermilk, oil, and vanilla while the paddle swirls on low speed. increase the speed to medium-high and paddle 5 to 6 minutes, until the mixture is practically white, twice the size of your originally fluffy butter-and-sugar mixture, and completely homogenous. you’re basically forcing too much liquid into an already fatty mixture that doesn’t want to make room for it, so if it doesn’t look right after 6 minutes, keep mixing. stop the mixer and scrape down the sides of the bowl.
- 4. on very low speed, add the cake flour, baking powder, and salt. mix for 45 to 60 seconds, just until your batter comes together and any remnants of dry ingredients have been incorporated. scrape down the sides of the bowl. mix on low speed for another 45 seconds to ensure that any little lumps of cake flour are incorporated.
- 5. pam-spray a quarter sheet pan and line it with parchment, or just line the pan with a silpat. using a spatula, spread the cake batter in an even layer in the pan. bake for 40-45 minutes. the cake will rise and puff, doubling in size, but will remain slightly buttery and dense. at 30 minutes, gently poke the edge of the cake with your finger: the cake should bounce back slightly and the center should no longer be jiggly. leave the cake in the oven for an extra 3 to 5 minutes if it doesn’t pass these tests.
- 6. take the cake out of the oven and cool on a wire rack or, in a pinch, in the fridge or freezer (don’t worry, it’s not cheating). the cooled cake can be stored in the fridge, wrapped in plastic wrap, for up to 5 days.
- For the Apple Cider Soak:
- whisk together cider, brown sugar, and cinnamon in a small bowl until the sugar is completely dissolved.
- For the Liquid Cheesecake:
- 1. heat the oven to 300°f.
- 2. put the cream cheese in the bowl of a stand mixer fitted with the paddle attachment and mix on low speed for 2 minutes. scrape down the sides of the bowl with a spatula. add the sugar and mix for 1 to 2 minutes, until the sugar has been completely incorporated. scrape down the sides of the bowl.
- 3. whisk together the cornstarch and salt in a medium bowl. whisk in the milk in a slow, steady stream, then whisk in the egg until the slurry is homogenous.
- 4. with the mixer on medium-low speed, stream in the egg slurry. paddle for 3 to 4 minutes, until the mixture is smooth and loose. scrape down the sides of the bowl.
- 5. line the bottom and sides of a 6 x 6-inch baking pan with plastic wrap. pour the cheesecake batter into the pan, put the pan in the oven, and bake for 15 minutes. gently shake the pan. the cheesecake should be firmer and more set toward the outer boundaries of the baking pan but still be jiggly and loose in the dead center. if the cheesecake is jiggly all over, give it 5 minutes more. and 5 minutes more if it needs it, but it’s never taken me more than 25 minutes to underbake one. if the cheesecake rises more than a ¼ inch or begins to brown, take it out of the oven immediately.
- 6. cool the cheesecake completely, to finish the baking process and allow the cheesecake to set. the final product will resemble a cheesecake, but it will be pipeable and pliable enough to easily spread or smear, while still having body and volume. once cool, the cheesecake can be stored in an airtight container in the fridge for up 1 week.
- For the Pie Crumb:
- 1. heat the oven to 350°f.
- 2. combine the flour, sugar, and salt in the bowl of a stand mixer fitted with the paddle attachment and paddle on low speed until well mixed.
- 3. add the butter and water and paddle on low speed until the mixture starts to come together in small clusters.
- 4. spread the clusters on a parchment- or silpat- lined sheet pan. bake for 25 minutes, breaking them up occasionally. the crumbs should be golden brown and still slightly moist to the touch at that point; they will dry and harden as they cool.
- 5. let the crumbs cool completely before using in a recipe or eating. stored in an airtight container, the crumbs will keep fresh for 1 week at room temperature or 1 month in the fridge or freezer.
- For the Apple Pie Filling:
- 1. fill a medium bowl halfway with cold tap water. juice the lemon into it. fish out and discard any seeds. you will use this lemon water to keep your apple pieces looking fresh and pert.
- 2. peel the apples, then halve and quarter them. put each apple quarter on its side and cut a small slice down the length of the apple to remove the seeds and core. cut each apple quarter lengthwise into thirds and then crosswise into fourths, leaving you with 12 small pieces from every apple quarter. transfer these pieces to the lemon water as you go.
- 3. when you’re ready to cook, drain the apples (discard the lemon water) and combine them in a medium pot with the butter, brown sugar, cinnamon, and salt. slowly bring to a boil over medium heat, using a spoon to gently stir the mixture as it heats up and the apples begin to release liquid. reduce the heat and simmer the apples gently for 3 to 5 minutes. be careful not to cook the apples so much that they turn into applesauce.
- 4. transfer to a container and put in the fridge to cool down. once completely cooled, the filling can be stored in the fridge in an airtight container for up to 1 week; do not freeze.
- For the Pie Crumb Frosting:
- 1. combine the pie crumbs, milk, and salt in a blender, turn the speed to medium-high, and puree until smooth and homogenous. it will take 1 to 3 minutes (depending on the awesomeness of your blender). if the mixture does not catch on your blender blade, turn off the blender, take a small teaspoon, and scrape down the sides of the canister, remembering to scrape under the blade, then try again.
- 2. combine the butter and confectioners’ sugar in the bowl of a stand mixer fitted with the paddle attachment and cream together on medium-high for 2 to 3 minutes, until fluffy and pale yellow. scrape down the sides of the bowl with a spatula.
- 3. on low speed, paddle in the contents of the blender. after 1 minute, crank the speed up to medium-high and let her rip for another 2 minutes. scrape down the sides of the bowl. if the mixture is not a uniform, very pale, barely tan color, give the bowl another scrape-down and another minute of high-speed paddling.
- 4. use the frosting immediately, or store it in an airtight container in the fridge for up to 1 week.
- To assemble the cake:
- 1. put a piece of parchment or a silpat on the counter. invert the cake onto it and peel off the parchment or silpat from the bottom of the cake. use the cake ring to stamp out 2 circles from the cake. these are your top 2 cake layers. the remaining cake “scrap” will come together to make the bottom layer of the cake.
- layer 1, the bottom
- 2. clean the cake ring and place it in the center of a sheet pan lined with clean parchment or a silpat. use 1 strip of acetate to line the inside of the cake ring.
- 3. put the cake scraps together inside the ring and use the back of your hand to tamp the scraps together into a flat even layer.
- 4. dunk a pastry brush in the apple cider soak and give the layer of cake a good, healthy bath of half of the oil.
- 5. use the back of a spoon to spread half of the liquid cheesecake in an even layer over the cake.
- 6. sprinkle one-third of the pie crumbs evenly over the liquid cheesecake. use the back of your hand to anchor them in place.
- 7. use the back of a spoon to spread one-half of the apple pie filling as evenly as possible over the crumbs.
- layer 2, the middle
- 8. with your index finger, gently tuck the second strip of acetate between the cake ring and the top ¼ inch of the first strip of acetate, so that you have a clear ring of acetate 5 to 6 inches tall – high enough to support the height of the finished cake. set a cake round on top of the frosting, and repeat the process for layer 1 (if 1 of your 2 cake rounds is jankier than the other, use it here in the middle and save the prettier one for the top).
- layer 3, the top
- 9. nestle the remaining cake round into the apple pie filling. cover the top of the cake with all of the pie crumb frosting. give it volume and swirls, or do as we do and opt for a perfectly flat top. garnish the frosting with the remaining pie crumbs.
- 10. transfer the sheet pan to the freezer and freeze for a minimum of 12 hours to set the cake and filling. the cake will keep in the freezer for up to 2 weeks.
- 11. at least 3 hours before you are ready to serve the cake, pull the sheet pan out of the freezer and, using your fingers and thumbs, pop the cake out of the cake ring. gently peel off the acetate, and transfer the cake to a platter or cake stand. let it defrost in the fridge for a minimum of 3 hours (wrapped well in plastic, the cake can be refrigerated for up to 5 days).
- 12. slice the cake into wedges and serve.
Notes
Nutrition
Nutrition information is automatically calculated, so should only be used as an approximation.



I plan to make this dessert. However, did you really mean to use plastic wrap to line the pan for the cheesecake? Two teaspoons of salt to 2 cups of flour?? Shouldn’t that be 1 teaspoon? I bake from scratch a lot and that seems like too much.
I did! You can skip the plastic wrap but it does help it come out of the pan easier.
Hi, I just got the cook book and it says to use apple juice as the soak.
Does the apple cider vinegar soak taste better?
She’s changed the recipe since I posted this one. I’ll have to take a look at it!
Apple cider and apple cider VINEGAR are 2 completely different things! Please do not soak your cake with vinegar!
Yeah, I don’t understand how it’s so confusing to some people. Vinegar is not good on this cake.