Milk Bar Birthday Cake
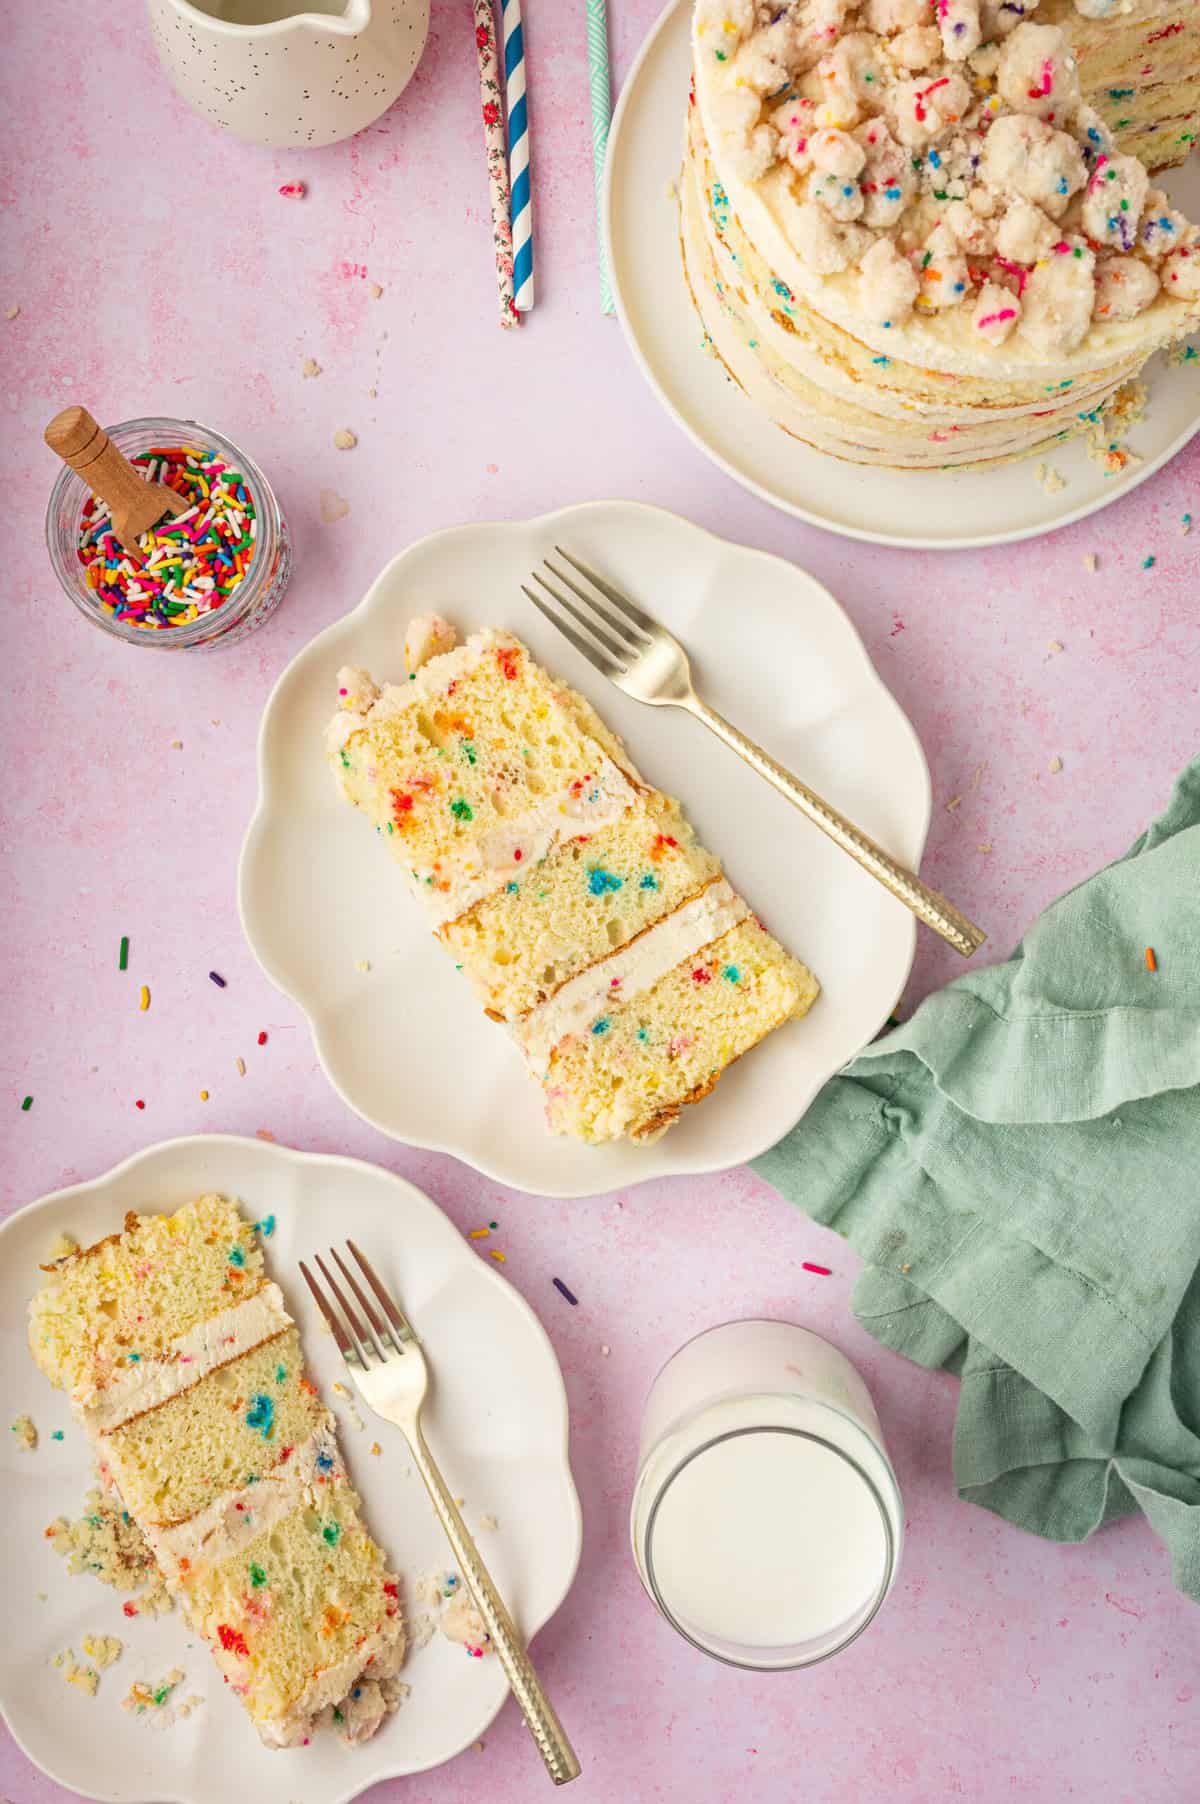
The Milk Bar Birthday Cake is famous for a reason—it’s pretty dang epic and it’s NOT just for birthdays! Funfetti cake is stacked sky-high, filled with cream cheese frosting and topped with crunchy Funfetti crumbles to create a dessert you’ll crave all year long.
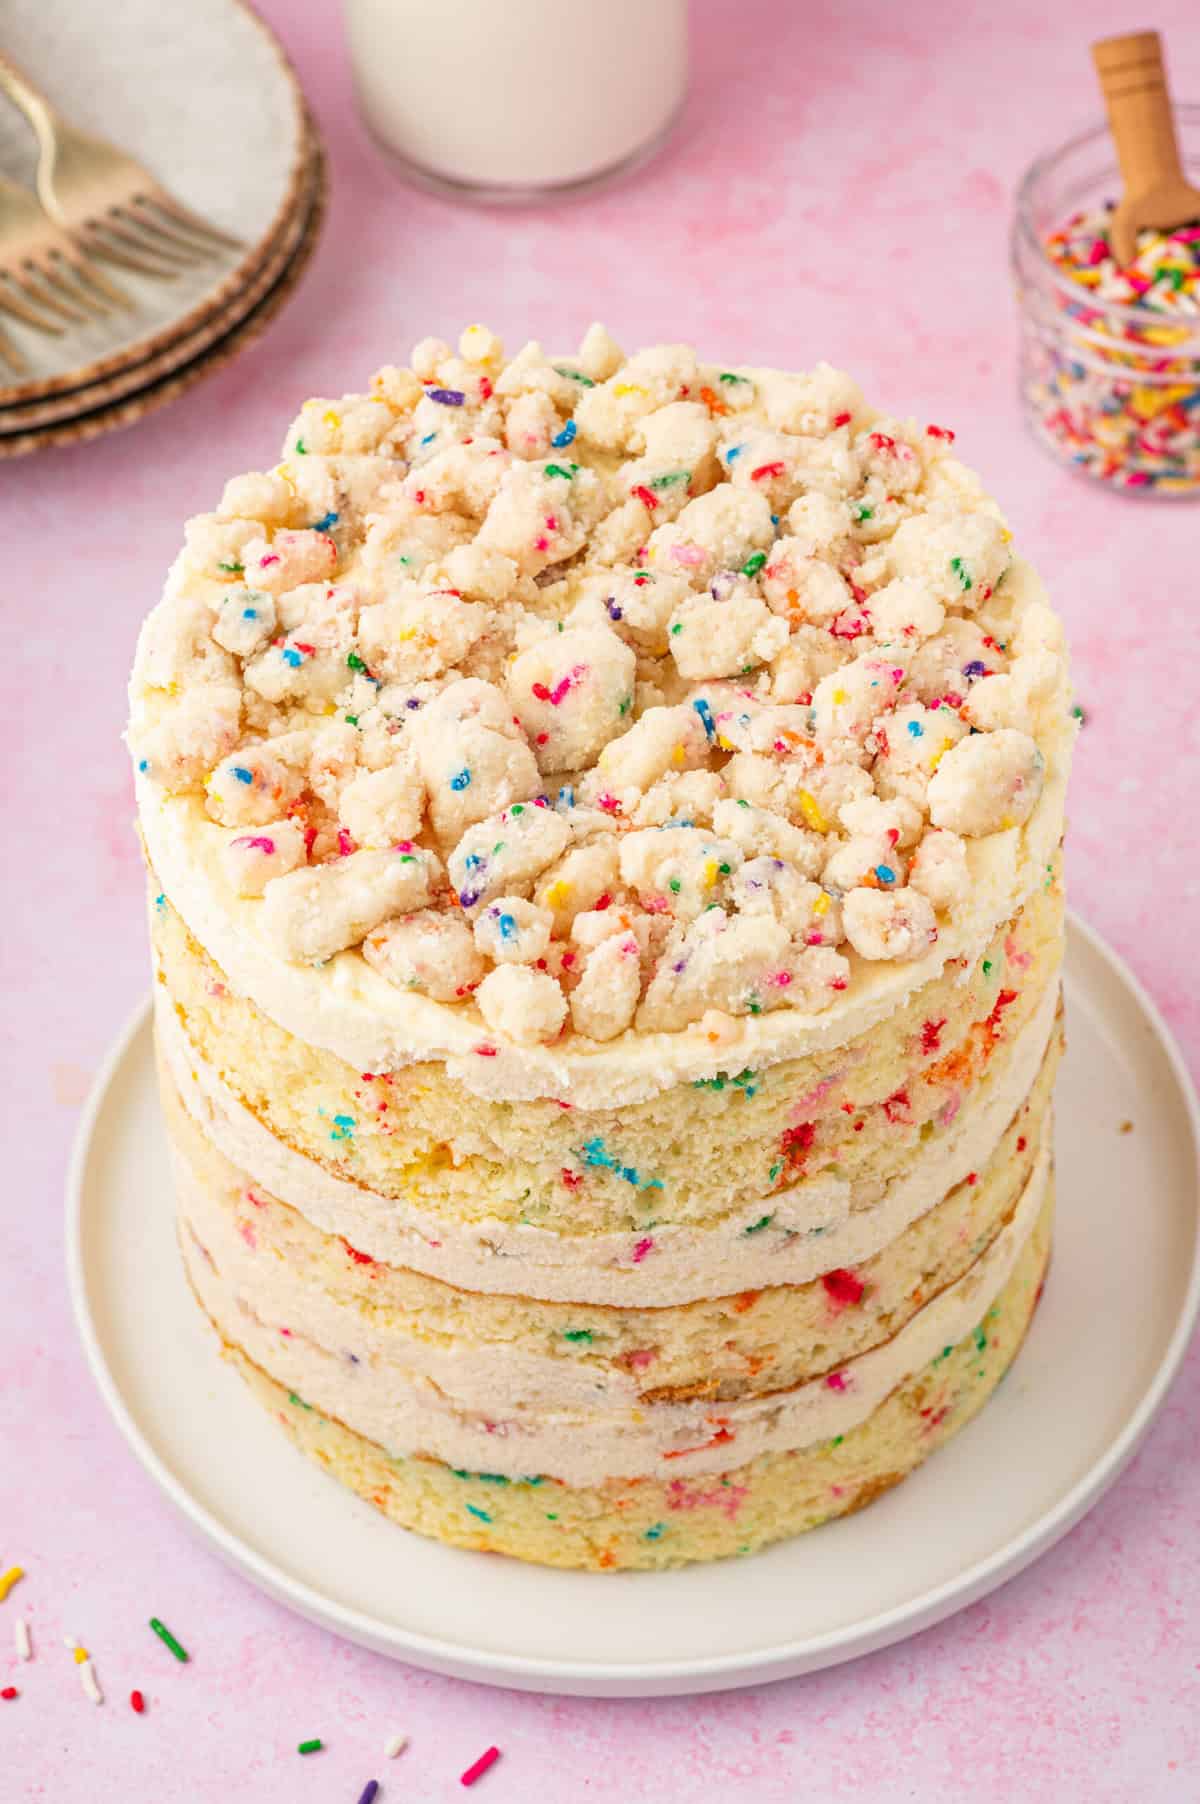
For my 40th birthday, I ordered the Birthday Cake from Milk Bar in New York City. I trekked down 5th avenue in sub-zero temps, picked up my cake and hauled it back to the hotel where I proceeded to take the obligatory Instagram photo and immediately dove in with a fork. Heaven. I wanted to buy another and have it shipped to my home when we returned but the tally, including shipping, would have been a whopping $100. For a cake. A naked cake. One that I could easily make at home. One that I could make with a little bit of cheating, if you will—like boxed Funfetti cake mix.
Deciding not to spend that $80 was the best decision because when you feed a woman a Milk Bar birthday cake, she eats for a day, but when that woman learns how to make the cake herself, she eats for a lifetime. (That’s how the saying goes, right?)
So yes, this copycat Milk Bar cake uses cake mix, but I promise you’re not going to care. Why reinvent the wheel when you’re going to load up the thing with a cake soak, whipped cream cheese frosting and ridiculously amazing cake crumbles anyway? This cake is a little labor intensive because there are four components but it is really easy to make…so easy I made two in a week.
Let me tell you, this cake is incredible. If you can hold off on eating everything before assembling it will be the most epic birthday cake ever. Those cake crumbles are tough though—I was shoveling them in by the fistful. (Better make double next time.) The only thing that could rival this birthday cake is the Milk Bar Apple Pie Layer Cake which they don’t even sell anymore.
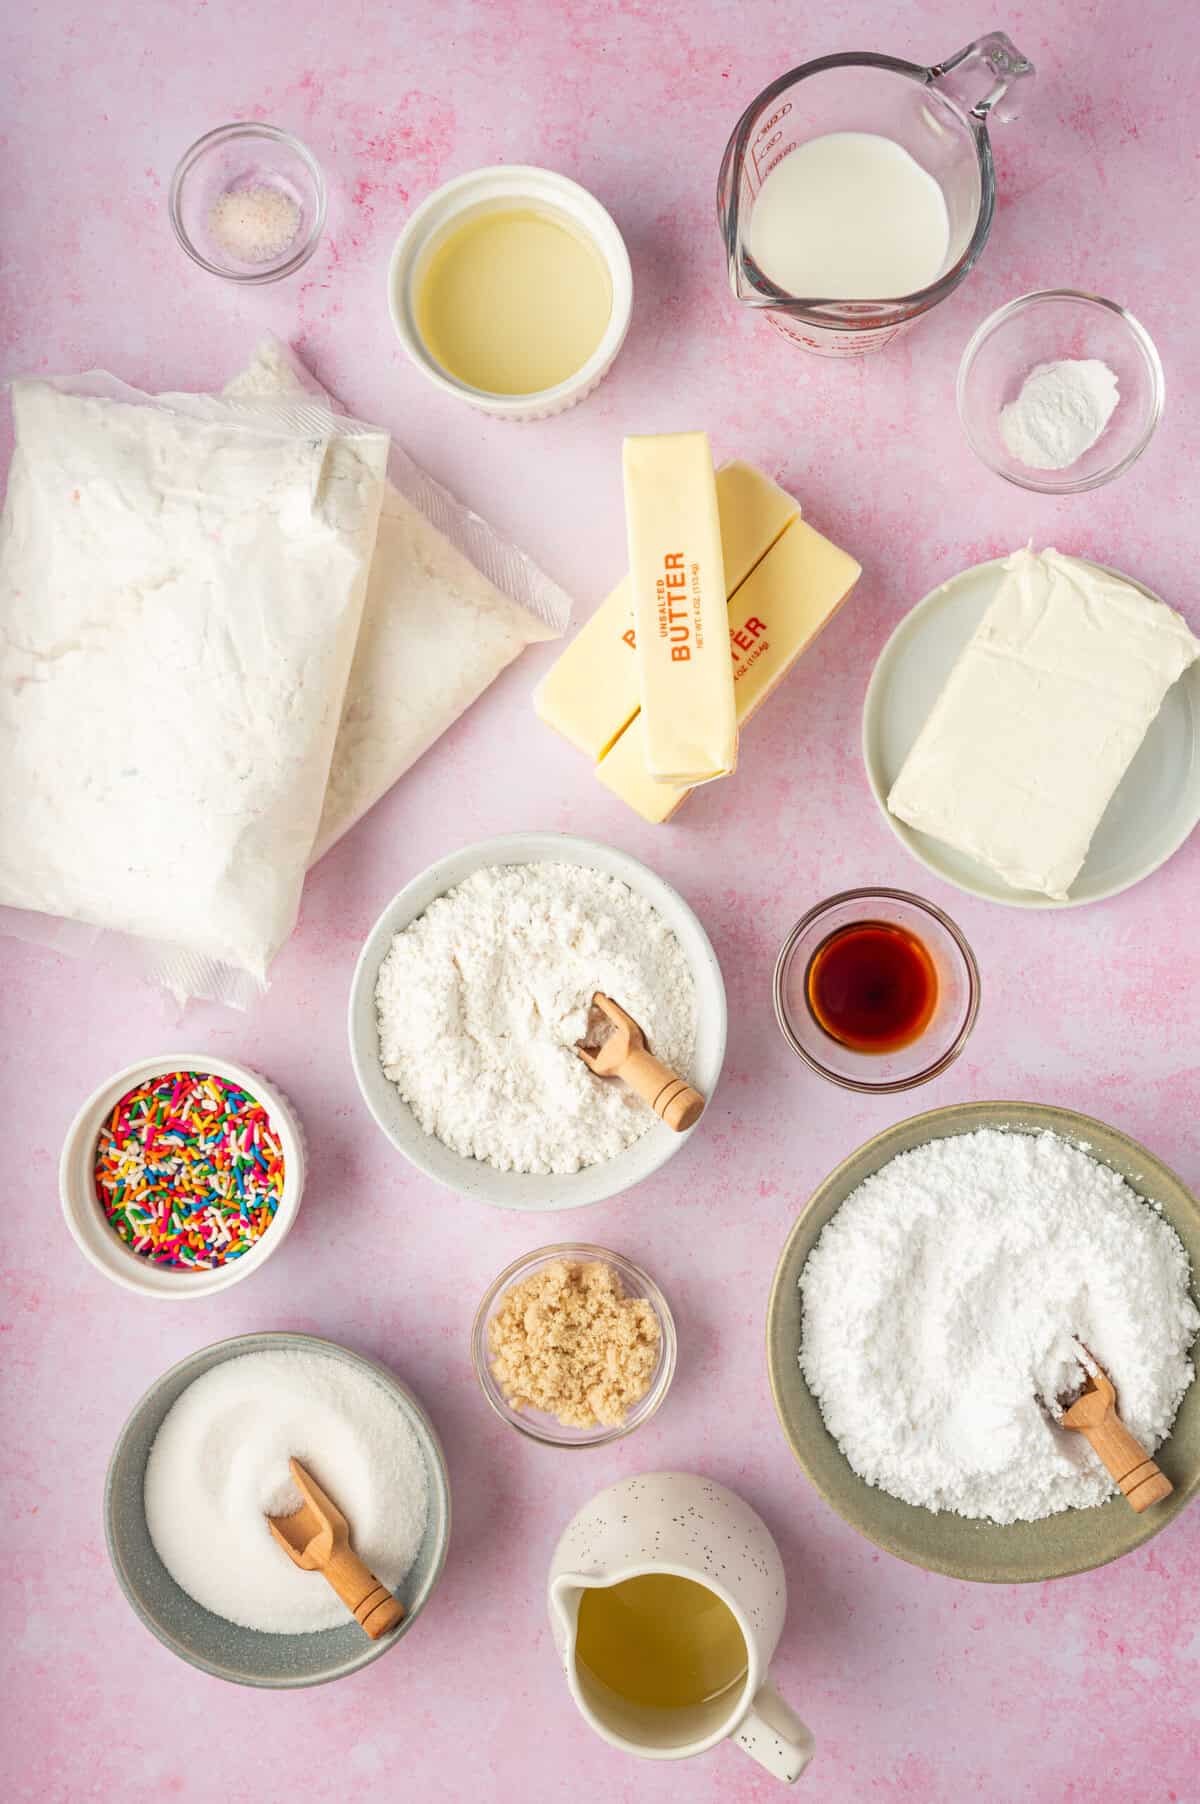
Ingredients for Milk Bar Birthday Cake
Here’s a quick rundown of what you’ll need for this recipe. For the full measurements, scroll down to the recipe card.
- Funfetti Cake Mix – You’ll also need all the ingredients listed on the package for making the cake mix.
Birthday Cake Soak:
- Whole Milk – You could use a lower fat milk, but whole milk adds a lot of richness.
- Vanilla Extract – Use a good one! Pure vanilla extract tastes better than imitation.
Frosting:
- Unsalted Butter – Let this soften so it’s easy to mix.
- Cream Cheese – This should also be softened; use a block of full-fat cream cheese, not the kind that comes in a tub.
- Corn Syrup – Use light corn syrup.
- Vanilla Extract – Light corn syrup already has a light vanilla flavor, and vanilla extract amps it up.
- Confectioners’ Sugar – This mixes smoothly into the frosting.
- Kosher Salt – Just a bit for balance.
- Baking Powder – Although it’s not a typical frosting ingredient, it’s in the original Milk Bar birthday cake recipe, so we’re going to go with it.
Birthday Cake Crumb:
- Sugar – You’ll need both granulated sugar and light brown sugar.
- Cake Flour – This has a finer texture than all-purpose flour.
- Baking Powder and Kosher Salt – Two essentials for baking!
- Rainbow Sprinkles – You can’t have a birthday cake without colorful sprinkles!
- Grapeseed Oil – Or another oil you like to use for baking.
- Vanilla Extract – For classic birthday cake flavor.
How to Make Milk Bar Birthday Cake
Buckle up, friends! This cake is a journey, but it’s one worth taking. And while there are a lot of components, there’s nothing hard about the process of making a Milk Bar birthday cake. (Be sure to grab the full instructions in the recipe card below.)
- Make the Soak. Whisk the milk and vanilla in a small bowl.
- Start the Frosting. Cream the butter and cream cheese until fluffy, then add the corn syrup and vanilla.
- Finish the Frosting. Beat in the sugar, salt, and baking powder.
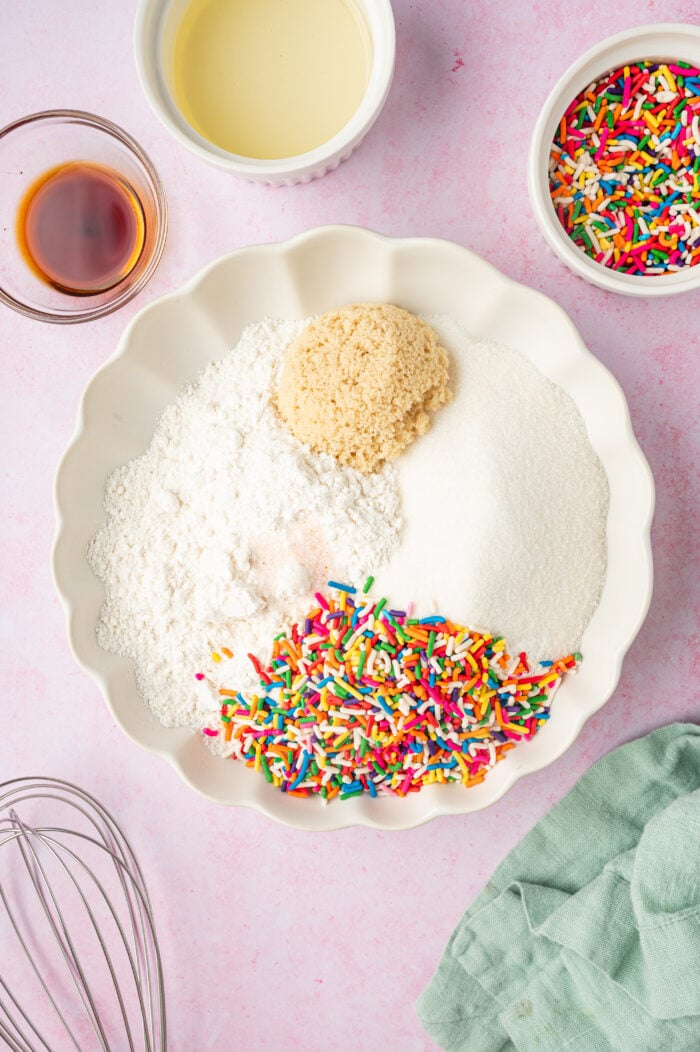
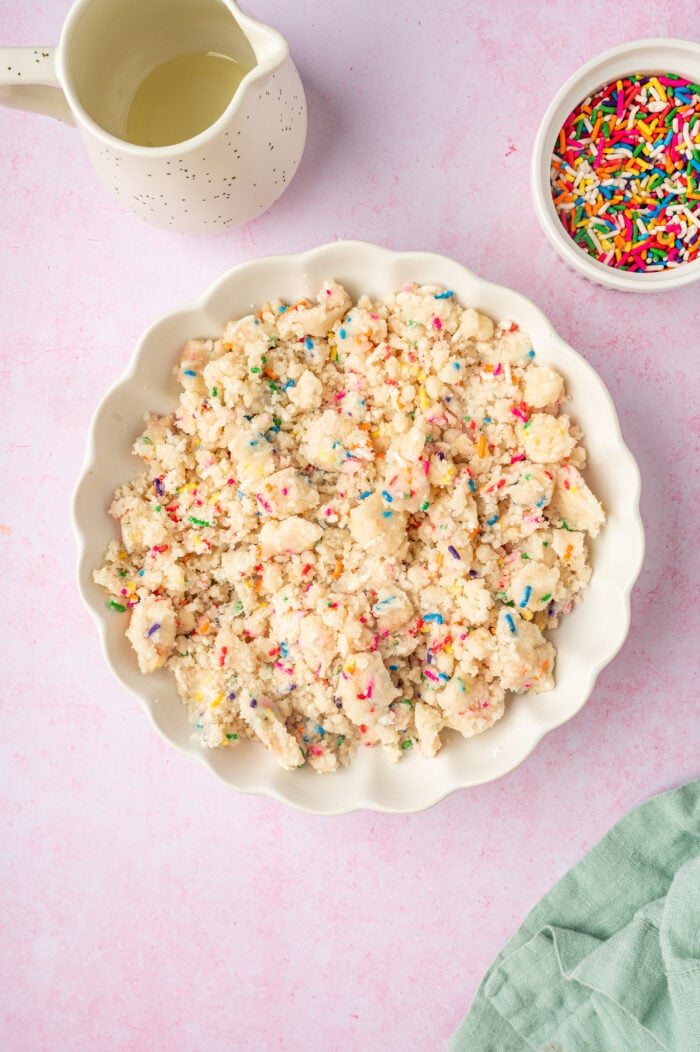
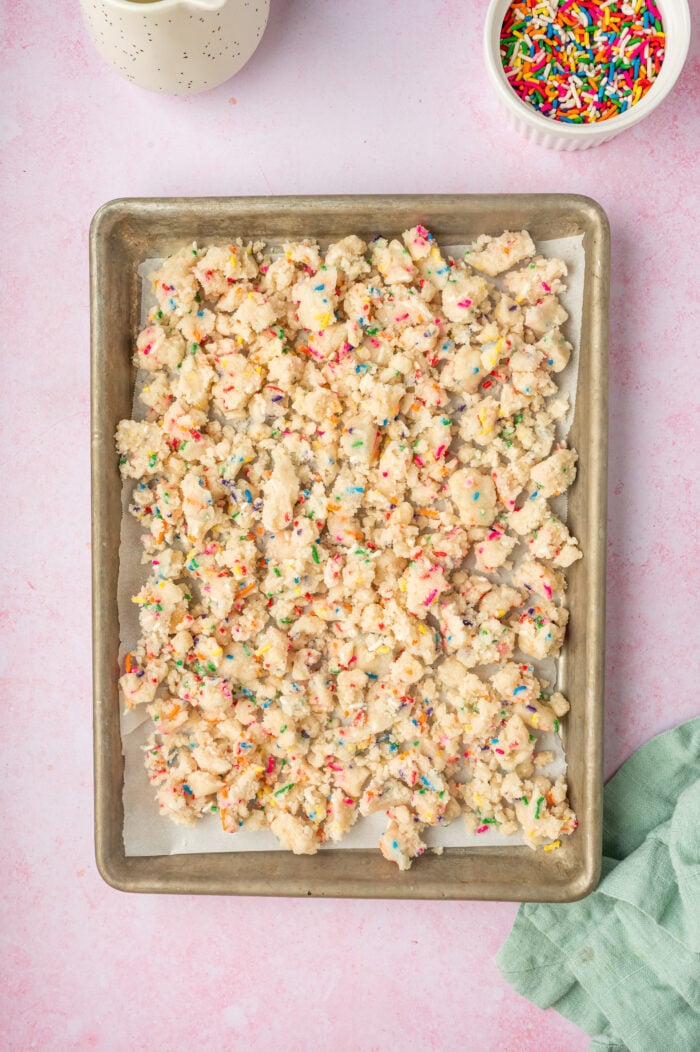
- Make the Cake Crumble Mixture. Combine the dry ingredients in a stand mixer bowl, then add the oil and vanilla and mix until clusters form.
- Bake the Crumbles. Spread them on a sheet pan and bake for 15 minutes at 300ºF.
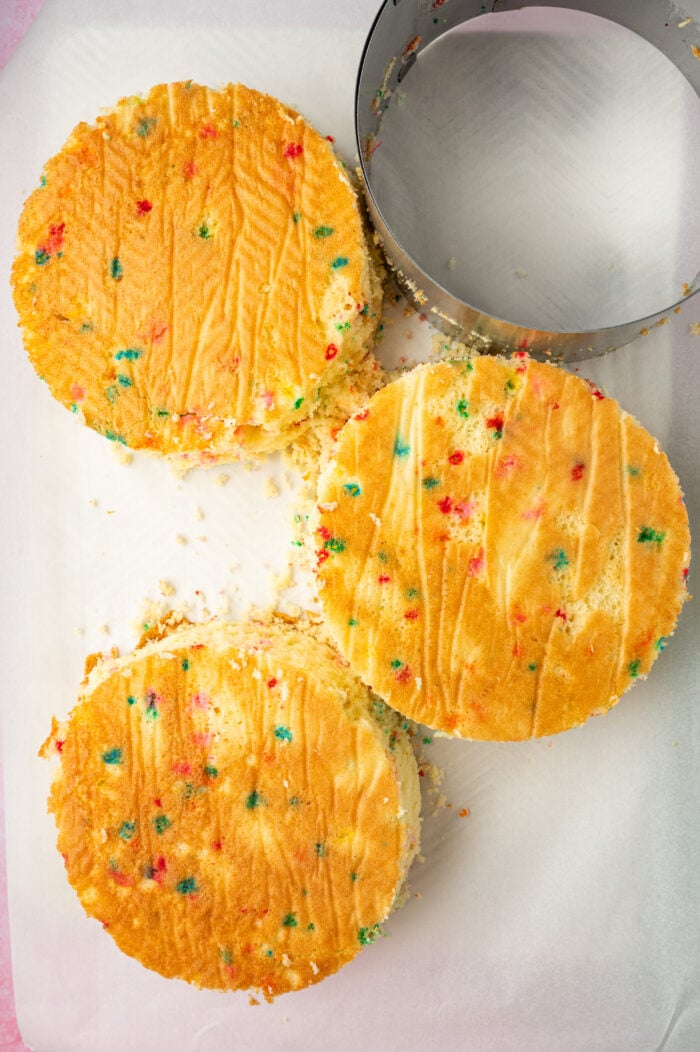
- Make the Layers. Cut two layers of cake with a cake ring. Save the scraps!
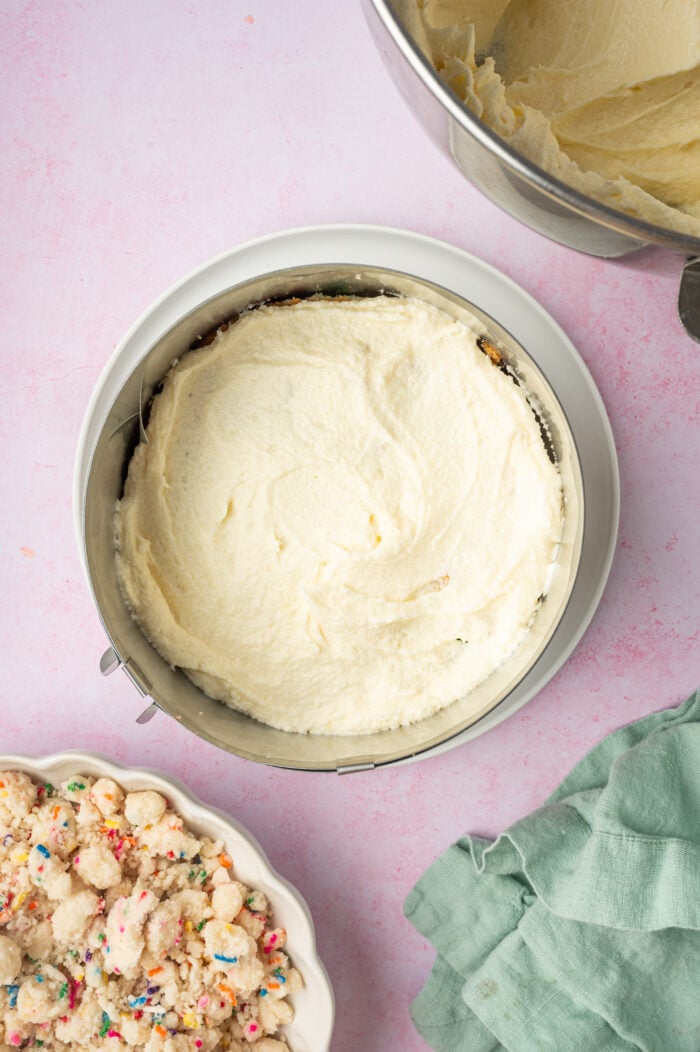
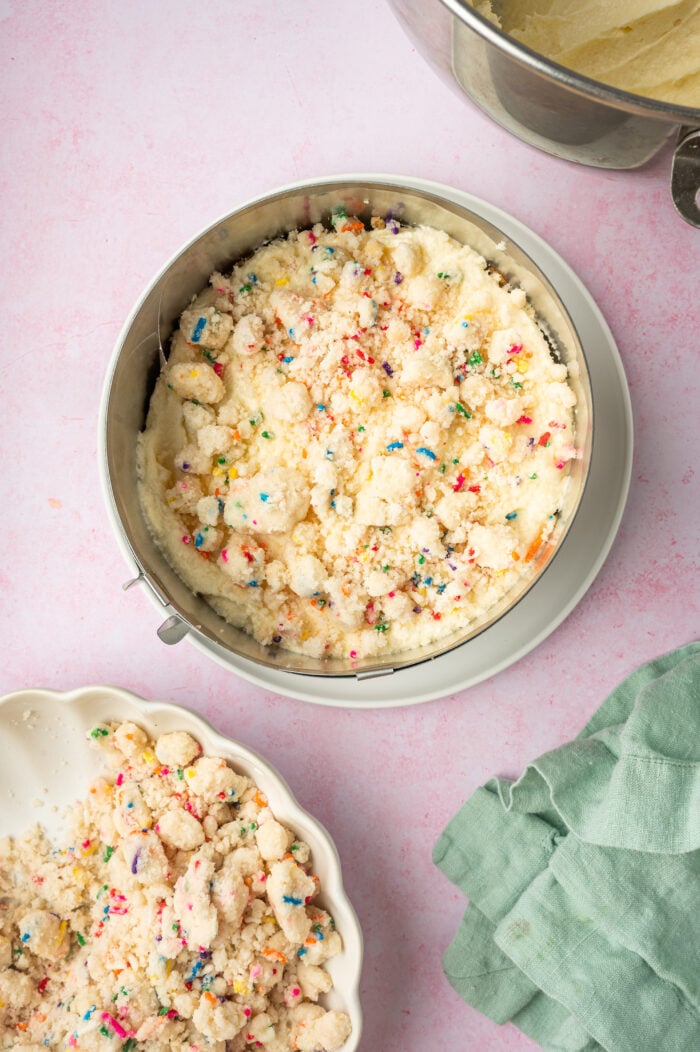
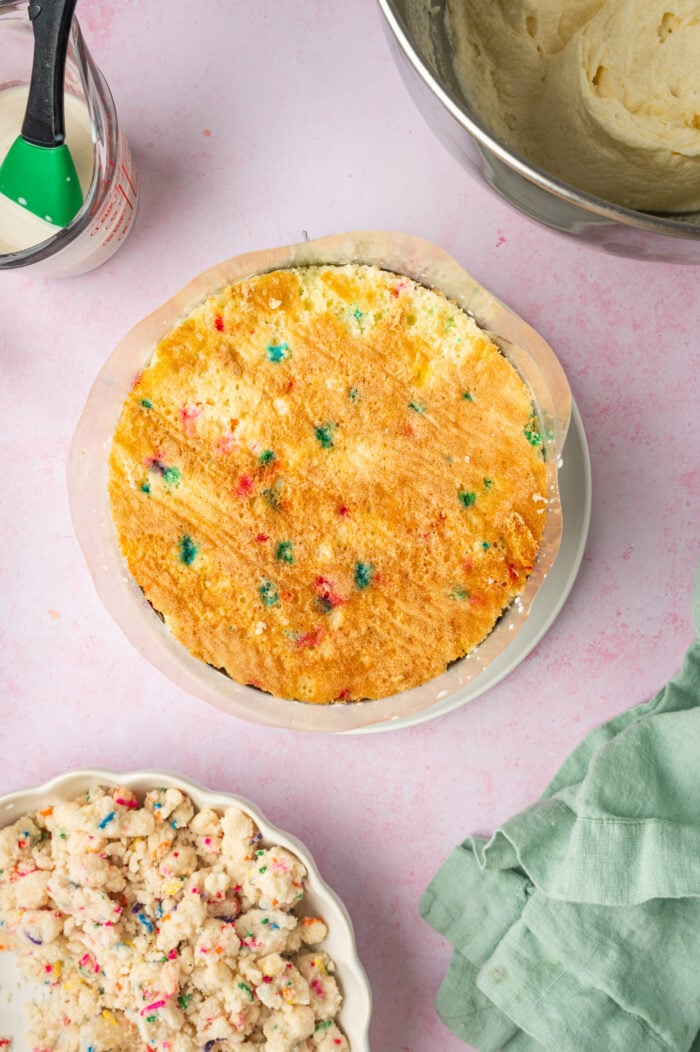
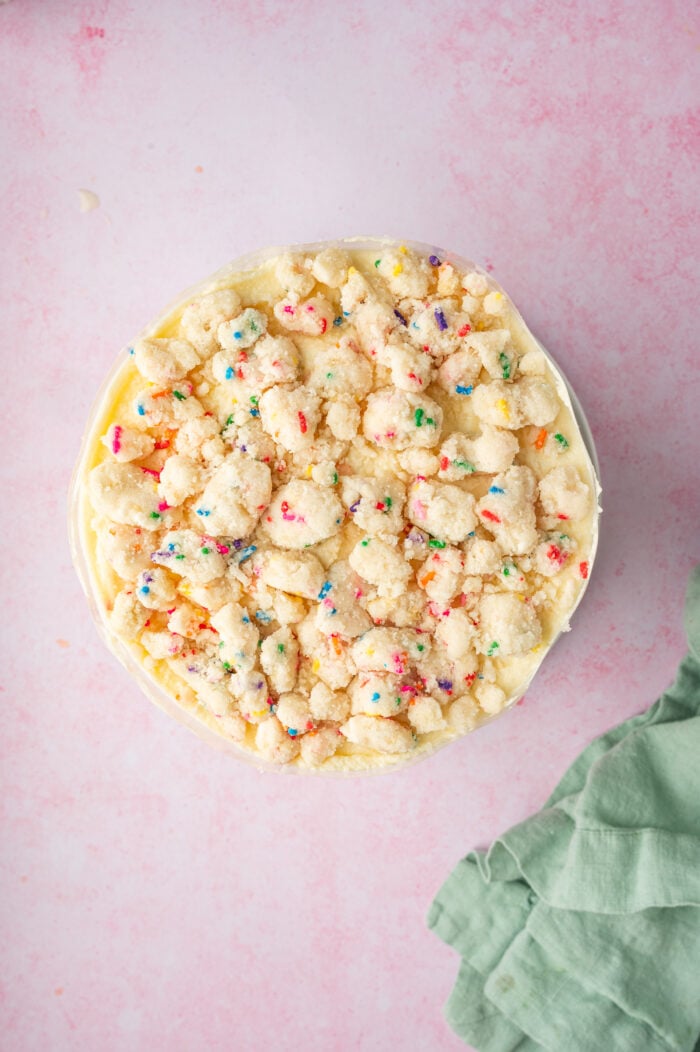
- Form the Bottom Layer. Press the scraps into the cake ring and brush with the cake soak. Spread frosting over the top, then add the crumbles and more frosting.
- Add the Second Layer. Place the second layer on top. Repeat the process from the first layer.
- Add the Third Layer. Set the last cake round on top, frost, and add the crumbles.
- Freeze. Place the cake in the freezer and freeze for at least 12 hours to set.
- Serve. Thaw for at least 3 hours in the refrigerator before serving.
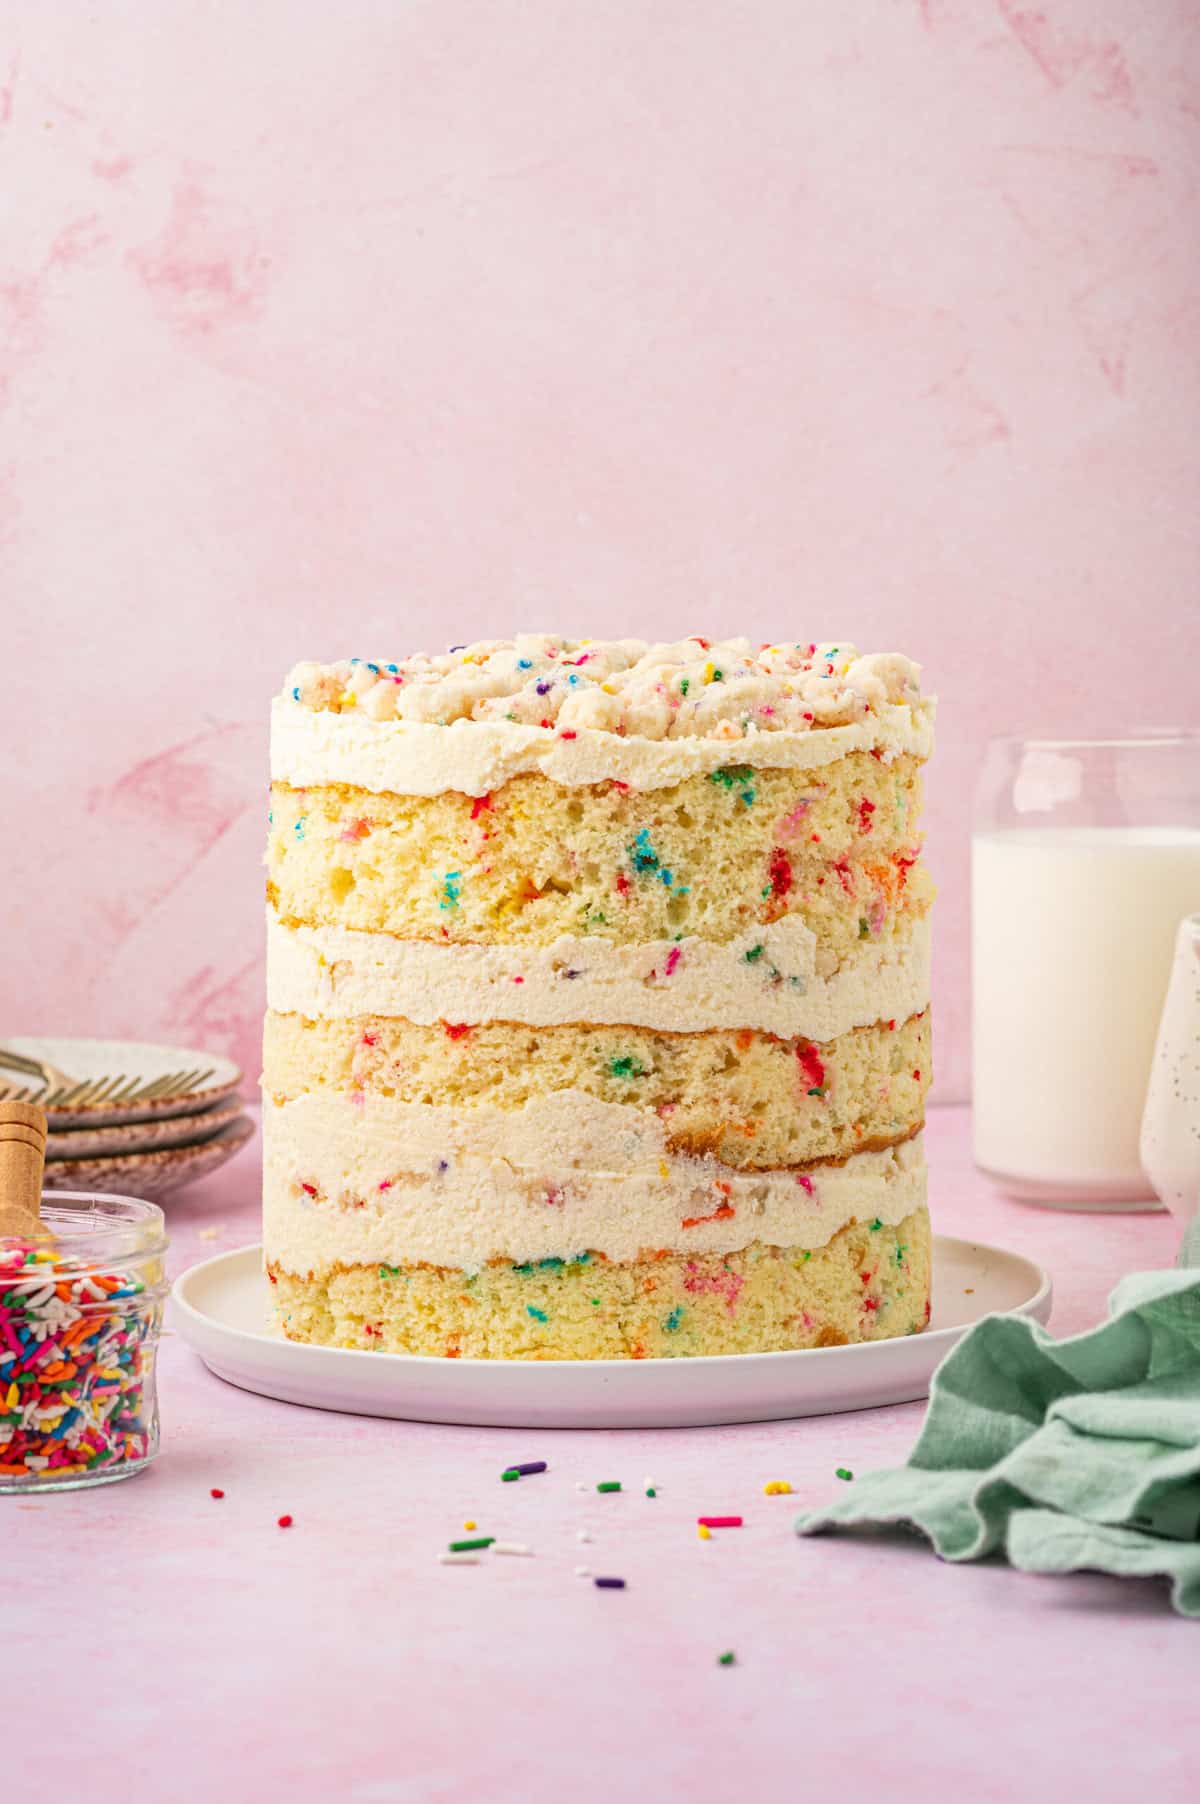
Tips for Making Milk Bar Birthday Cake
This recipe is pretty self-explanatory, but here are a few simple tips to help guide you.
- Use room temperature ingredients. Ensure that your butter and cream cheese are at room temperature before starting. This helps everything mix together smoothly.
- Don’t stress about the details. A Milk Bar birthday cake is beautiful, but it’s not particularly fussy and imperfections aren’t very noticeable. This is not a cake where you have to be an expert decorator or have dozens of piping tips to master.
- You do need a cake ring (sorry). You can simply invert a cake pan onto the cake and use a knife to cut around it to form the top two layers, but it’s going to take a lot more inventiveness than I can muster to figure out how to form the base layer without a ring.
- Store it properly. You can keep your Milk Bar birthday cake in the freezer for up to 2 weeks if you’re not serving it right away. Once you take it out of the freezer, it will last in the fridge for up to 5 days.
More Reader Favorite Cake Recipes
- Blueberry Dump Cake
- New York Crumb Cake
- Zucchini Cake with Cream Cheese Frosting
- The Best Strawberry Shortcake
- Gooey Butter Cake
- Lemon Ricotta Cake
- Red Velvet Coconut Cake
For more dessert ideas, follow us on Instagram and Facebook!
Get the Recipe: Milk Bar Birthday Cake
Ingredients
- 30.5 ounce Funfetti Cake Mix, 2 15.25 ounce boxes. Prepare according to package instructions and bake in a half sheet pan
For the Cake Soak
- 1/2 cup whole milk
- 2 teaspoons vanilla
For the Birthday Cake Frosting
- 12 ounces unsalted butter, 3 sticks or 1 1/2 cups
- 8 ounces cream cheese
- 4 tablespoons corn syrup
- 2 tablespoons vanilla extract
- 3 1/2 cups confectioners’ sugar
- 1 teaspoon kosher salt
- 1/8 teaspoon baking powder
For the Birthday Cake Crumbs
- 1 cup granulated sugar
- 3 tablespoons light brown sugar
- 1 1/2 cups cake flour
- 1 teaspoon baking powder
- 1 teaspoon kosher salt
- 4 tablespoons rainbow spinkles
- 1/2 cup grape seed oil
- 2 tablespoons vanilla extract
Equipment
- half baking sheet
- cake ring
- acetate strips or parchment strips
Instructions
For the Cake Soak
- Whisk together the milk and vanilla in a small bowl. Set aside
For the Frosting
- Combine the butter and cream cheese in the bowl of a stand mixer fitted with the paddle attachment and beat on medium-high for 2 to 3 minutes until the mixture is smooth and fluffy. Scrape down the sides of the bowl.
- With the mixer on low, stream in the corn syrup and vanilla. Turn the mixer up to medium-high and beat for 2 to 3 minutes, until the mixture is smooth. Scrape down the sides of the bowl.
- Slowly add the confectioners’ sugar, salt, and baking powder and mix on low speed just to incorporate them into the batter. Turn the speed up to medium-high and beat for 2 to 3 minutes, until you have a smooth frosting. Use the frosting immediately, or store it in an airtight container in the fridge for up to 1 week.
For the Cake Crumbles
- Preheat the oven to 300°.
- Combine the sugars, flour, baking powder, salt, and sprinkles in the bowl of a stand mixer fitted with the paddle attachment and mix on low speed until well combined.
- Slowly add the oil and vanilla and mix again to combine. Mix until small clusters begin to form.
- Bake for 15 minutes at 300°.
- Allow the crumbs cool completely before using in a recipe Stored in an airtight container, the crumbs will last for 1 week at room temperature or 1 month in the fridge or freezer.
To assemble the Cake
- Lay a piece of parchment on the counter. Turn the cake onto it and peel off the parchment or silpat from the bottom of the cake. Use an 8 inch cake ring to stamp out 2 circles from the cake. These will be your top 2 cake layers. the remaining cake scraps will come together to make the bottom layer of the cake.
- layer 1, the bottom – Clean the cake ring and place it in the center of a sheet pan lined with clean parchment or a silpat. Use 1 strip of parchment (4 inches wide x 24 inches long) to line the inside of the cake ring.
- Place the cake scraps together inside the ring and use the back of your hand to press the scraps together into a flat even layer.
- Dip a pastry brush in the cake soak and brush the soak over the cake scraps.
- Use the back of a spoon to spread one-fifth of the frosting in an even layer over the cake.
- Sprinkle one-third of the birthday crumbs evenly over the frosting. Use the back of your hand to press them in place.
- Use the back of a spoon to spread a second fifth of the birthday cake frosting as evenly as possible over the crumbs.
- layer 2, the middle – With your index finger, gently tuck the second strip of parchment (same size) between the cake ring and the top ¼ inch of the first strip of acetate, so that you have a clear ring of acetate 5 to 6 inches tall – high enough to support the height of the finished cake.
- Set a cake round on top of the frosting, and repeat the process for layer 1 (if 1 of your 2 cake rounds is uglier than the other, use it here in the middle and save the prettier one for the top).
- layer 3, the top – Place the remaining cake round into the frosting. Cover the top of the cake with the remaining frosting. Garnish the frosting with the remaining birthday crumbs.
- Transfer the sheet pan to the freezer and freeze for a minimum of 12 hours to set the cake and filling. The cake will keep in the freezer for up to 2 weeks.
- At least 3 hours before you are ready to serve the cake, pull the sheet pan out of the freezer and, using your fingers and thumbs, pop the cake out of the cake ring.
- Gently peel off the parchment, and transfer the cake to a platter or cake stand. Allow it defrost in the fridge for a minimum of 3 hours (wrapped well in plastic, the cake can be refrigerated for up to 5 days).
Notes

32 Comments on “Milk Bar Birthday Cake”
What size of pan do you cook the cake mixes in? You cook two boxes of funfetti, 1 per what size of pan please..
It’s a 18×26″ sheet pan for the cake but others have used 9 inch round cake pans (3 of them).
Made this but I simplified. Instead of using 2 cake mixes I used 1 as well as of instead using a sheet pan I used 2 8 inch pans. Worked great as I didn’t have to worry about a 3rd layer. You could also use 3 6″ pans as well
That’s a great tip! I’m so happy you liked it!
Hmm I bought 1/4 cake sheet & 6 inch cake ring like in the Milk cookbook instruction but I want to use the cake mix.. 1 box?
Yes, 1 box will work.
I’m excited to try this recipe this weekend. Do you have any guidance on step 23? The acetate size? How many sheets of it? Do I only need one 8 inch round cutter?
You only need on 8 inch cutter and I used 16 inch long acetate then just cut it to size. It’s best to buy bigger, longer pieces than you think you need than going too short.
I am very excited to make this cake for an upcoming birthday. I am confused with step 23 and the acetate. What size of acetate?
.
Hi! Wondering if you have suggestions for replacing the corn syrup and grapeseed oil? Thank you! Love the idea of making this cake and secretly cheating a little. Presentation and taste that counts!
I’m sorry, I don’t have any suggestions that I’m confident wouldn’t mess with the chemistry of the baking.
I just made this. I had to tie my hands in order to stop picking up that delicious crumble and stuffing my face with it. Tomorrow, my dear friend will give me the verdict on how it tasted. Thanks for sharing, i love your writing!
Thank you so much, Barbara! Those crumbles are a challenge to keep my hands off. I make a little extra just in case I have trouble practicing restraint. I hope your friend loves the cake!
Happy couple days late birthday. It looks like you picked the most whimsical, decadent cake to honor your special day. It looks delicious. ..well worth the strangled waistline.
This cake is out of this world amazing! That crumbly looking topping is calling my name.
Heck yeah, those crumbles! The whole cake is so much fun, I’d have it for my 40th next (zoinks, I mean this) year in a heartbeat. Happy Belated Birthday!