This post may contain affiliate links. Please read our disclosure policy.
Rich, creamy and sweet, Homemade Vanilla Pudding is the epitome of comfort food. So simple to make with just cream, butter, vanilla, sugar and cornstarch, you’ll never reach for the instant stuff again. Fantastic for an every day treat but elegant enough for entertaining.
This homemade vanilla pudding recipe is a rich, creamy stovetop pudding made completely from scratch with pantry staples – no boxed mix, no eggs, and ready in about 15 minutes.
One of the first things I ever learned to make was vanilla pudding. It’s so simple, especially when you buy a package of instant pudding mix, you, literally, have dessert in a matter of minutes. I always preferred the stovetop instant pudding over the “mix and stir” variety, there was something about the whole process of steaming the milk and then whisking in the powder that made me feel totally like a culinary wizard even at the ripe old age of 8.
Homemade Vanilla Pudding isn’t that much more difficult to make and once you make your first batch I can guarantee you’ll never buy it in a box of vanilla pudding mix again. It’s so easy I even made a homemade chocolate pudding and butterscotch pudding, too!
I love the first bite of the pudding, still warm from the saucepan, like a sweet custard that was supposed to be filling a pie or a mountain of cream puffs. But I could eat it out of the bowl, just with a spoon, and enjoy everything about that simple dessert without the mess of a pie crust or pastry getting in the way.

Why This Pudding Recipe Works
- Uses half-and-half for a rich, custard-like texture without dealing with eggs.
- Cornstarch thickens quickly and makes the pudding foolproof for beginners.
- Technique: heat part of the dairy first, then whisk in a slurry so it thickens evenly and doesn’t scorch.
- Built-in flexibility: easy to make dairy-free, lighter, or extra-rich with simple swaps.
- Works as both a stand-alone dessert and a base for banana pudding and cream pies.
Ingredients for Vanilla Pudding
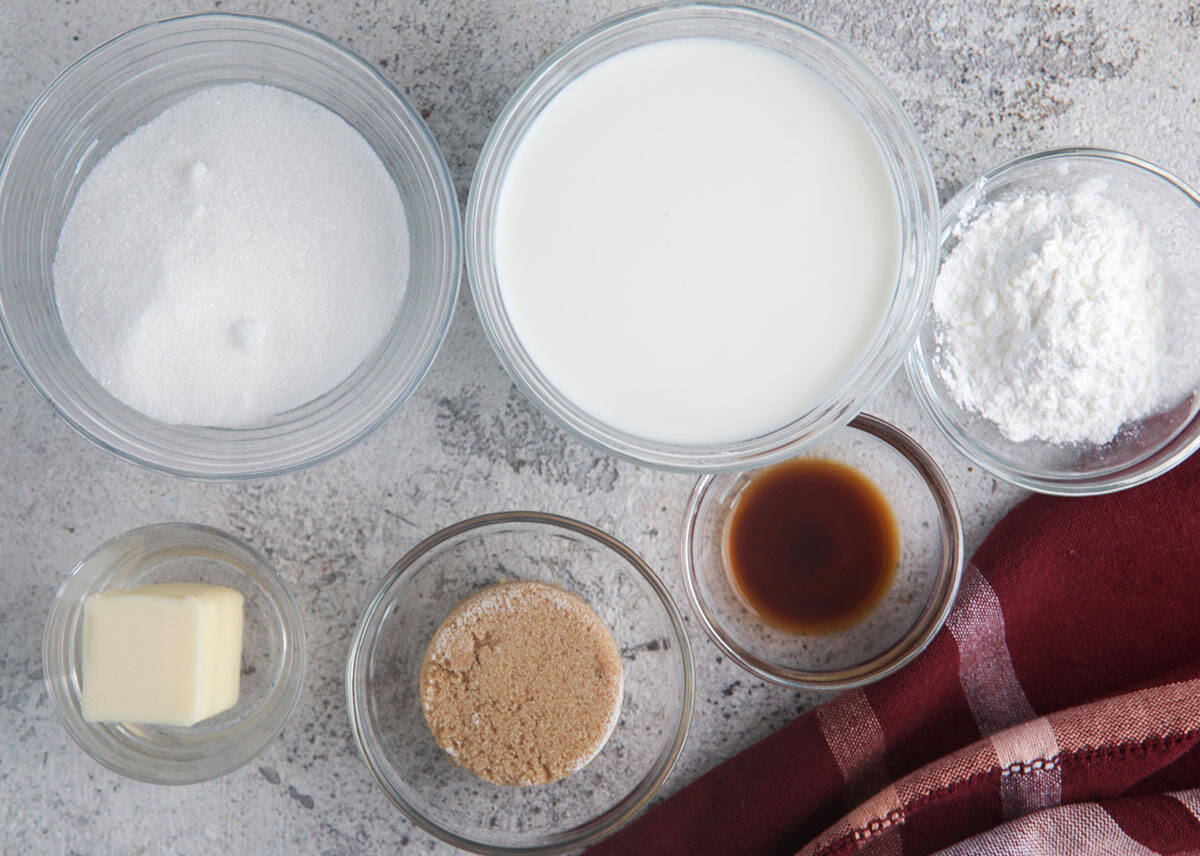
- Half and half – I use Half and Half, it makes the pudding rich and creamy without being too heavy; substitutions: use the same amount of whole milk (add 1-2 extra teaspoons cornstarch), 2% milk (expect a bit thinner texture, add 1 extra teaspoon cornstarch if you like it thicker), or half whole milk and half heavy cream for an extra-luxurious pudding (no cornstarch change needed).
- Granulated sugar – Sweetens the pudding and helps with silky texture; substitutions: light brown sugar for a slightly darker pudding with mild caramel notes, or coconut sugar for a deeper flavor and darker color (less “pure vanilla” in taste).
- Cornstarch – The main thickener that lets the pudding set without eggs; substitutions: arrowroot starch in the same amount (remove from heat as soon as it thickens to avoid gumminess), or all-purpose flour using about 2x the amount of cornstarch (texture will be a bit less silky and more custard-like).
- Butter – Unsalted butter adds richness and a smooth, velvety texture. Substitutions: salted butter in the same amount (reduce or omit added salt), or dairy-free butter/coconut oil in the same amount for a dairy-free option (coconut oil adds a faint coconut flavor).
- Vanilla – The star flavor of the pudding; options: pure vanilla extract (most common and easy), vanilla bean paste in the same amount for stronger flavor and pretty specks, or 1 whole vanilla bean (split, scrape seeds, simmer in the half and half, then remove the pod before thickening).
- Salt – Salt balances sweetness and makes the vanilla flavor pop; substitutions: kosher salt or fine sea salt both work well (avoid iodized table salt if possible since it can taste a bit sharp).
- Optional flavor boosters – Customize the flavor; a tiny splash of almond extract for a bakery-style flavor (go light, it’s strong), or a small knob of cream cheese whisked in at the end for a slightly tangy, cheesecake-like pudding.
For the full ingredient list and instructions, see the recipe card below.
What is vanilla pudding?
Vanilla pudding is a simple stovetop dessert thickened with cornstarch (and sometimes eggs) and flavored with vanilla. It’s creamier and richer than boxed mix, and can be served on its own or used as a base for banana pudding, parfaits, and cream pies.
How To Make Vanilla Pudding From Scratch
Homemade pudding is made without whole eggs because eggs are typically used in a custard or creme brûlée. This pudding is thickened with cornstarch keeping it light and creamy but still rich.
- In a medium saucepan, simmer the half and half, or milk, over medium heat.
- Stir the sugar and vanilla into the hot milk mixture.
- Cook until the sugar is dissolved.
- Stir in the butter.
- Whisk the cornstarch with the remaining half and half.
- Add the cornstarch mixture to the pudding stirring with a rubber spatula and scraping the bottom of the pan to avoid scorching.
- Reduce to low heat. Continue cooking until the mixture had thickened.
- Cover with plastic wrap with the plastic wrap touching the surface of the pudding to prevent a skin from forming and refrigerate for 2 hours.
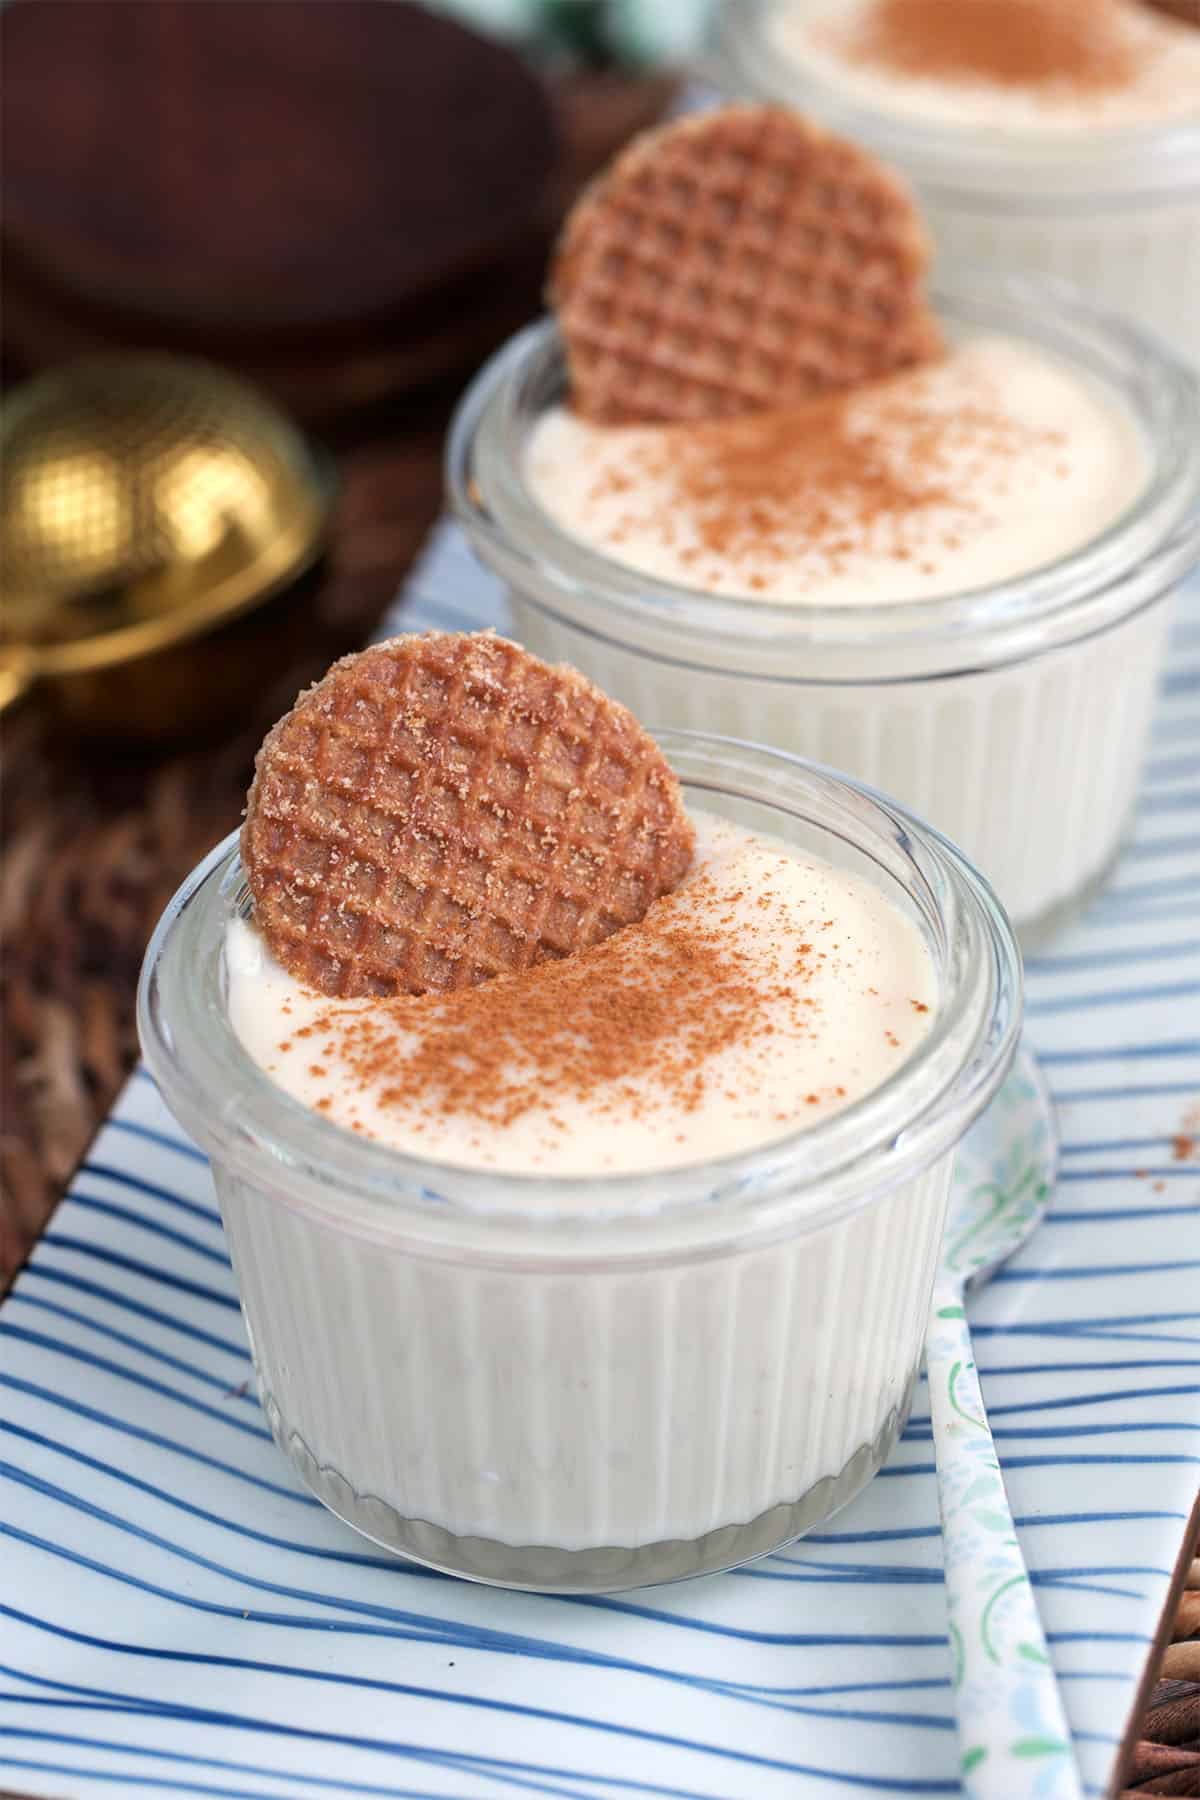
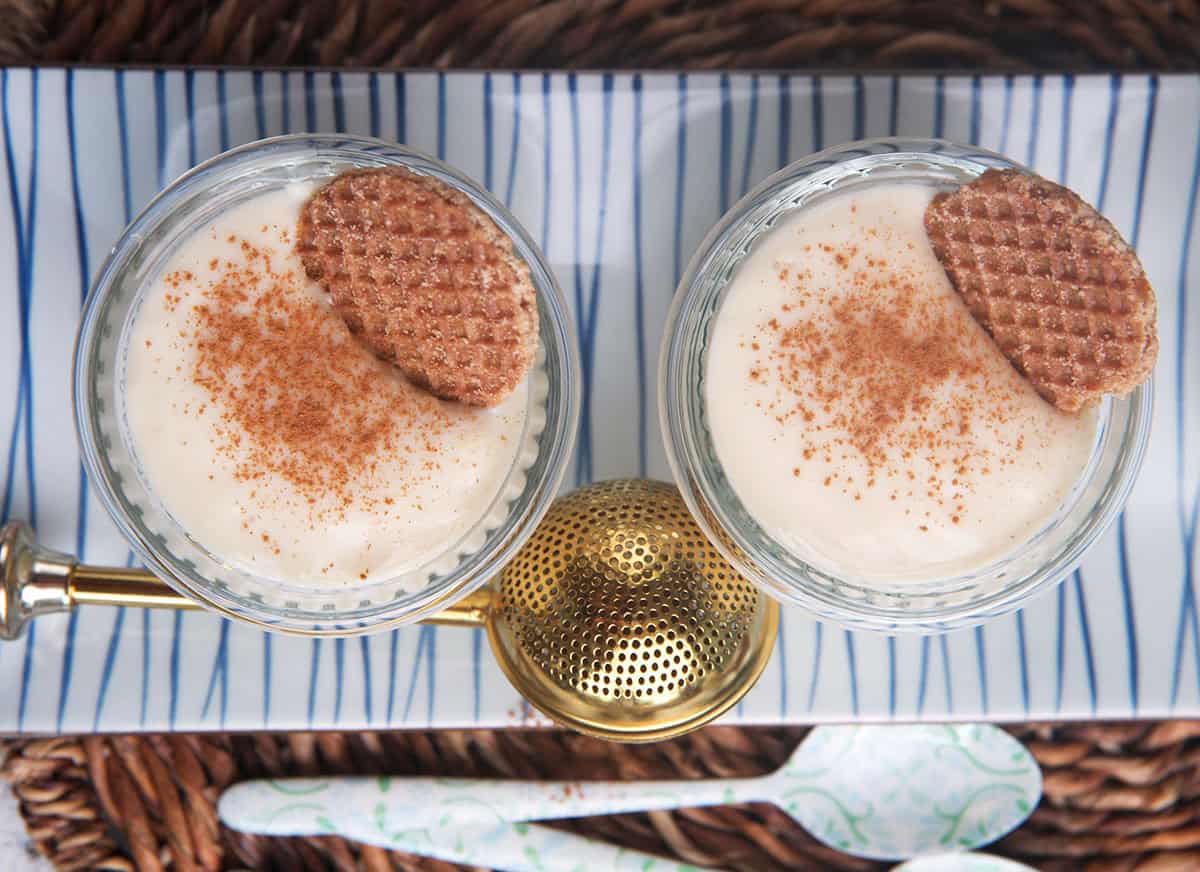
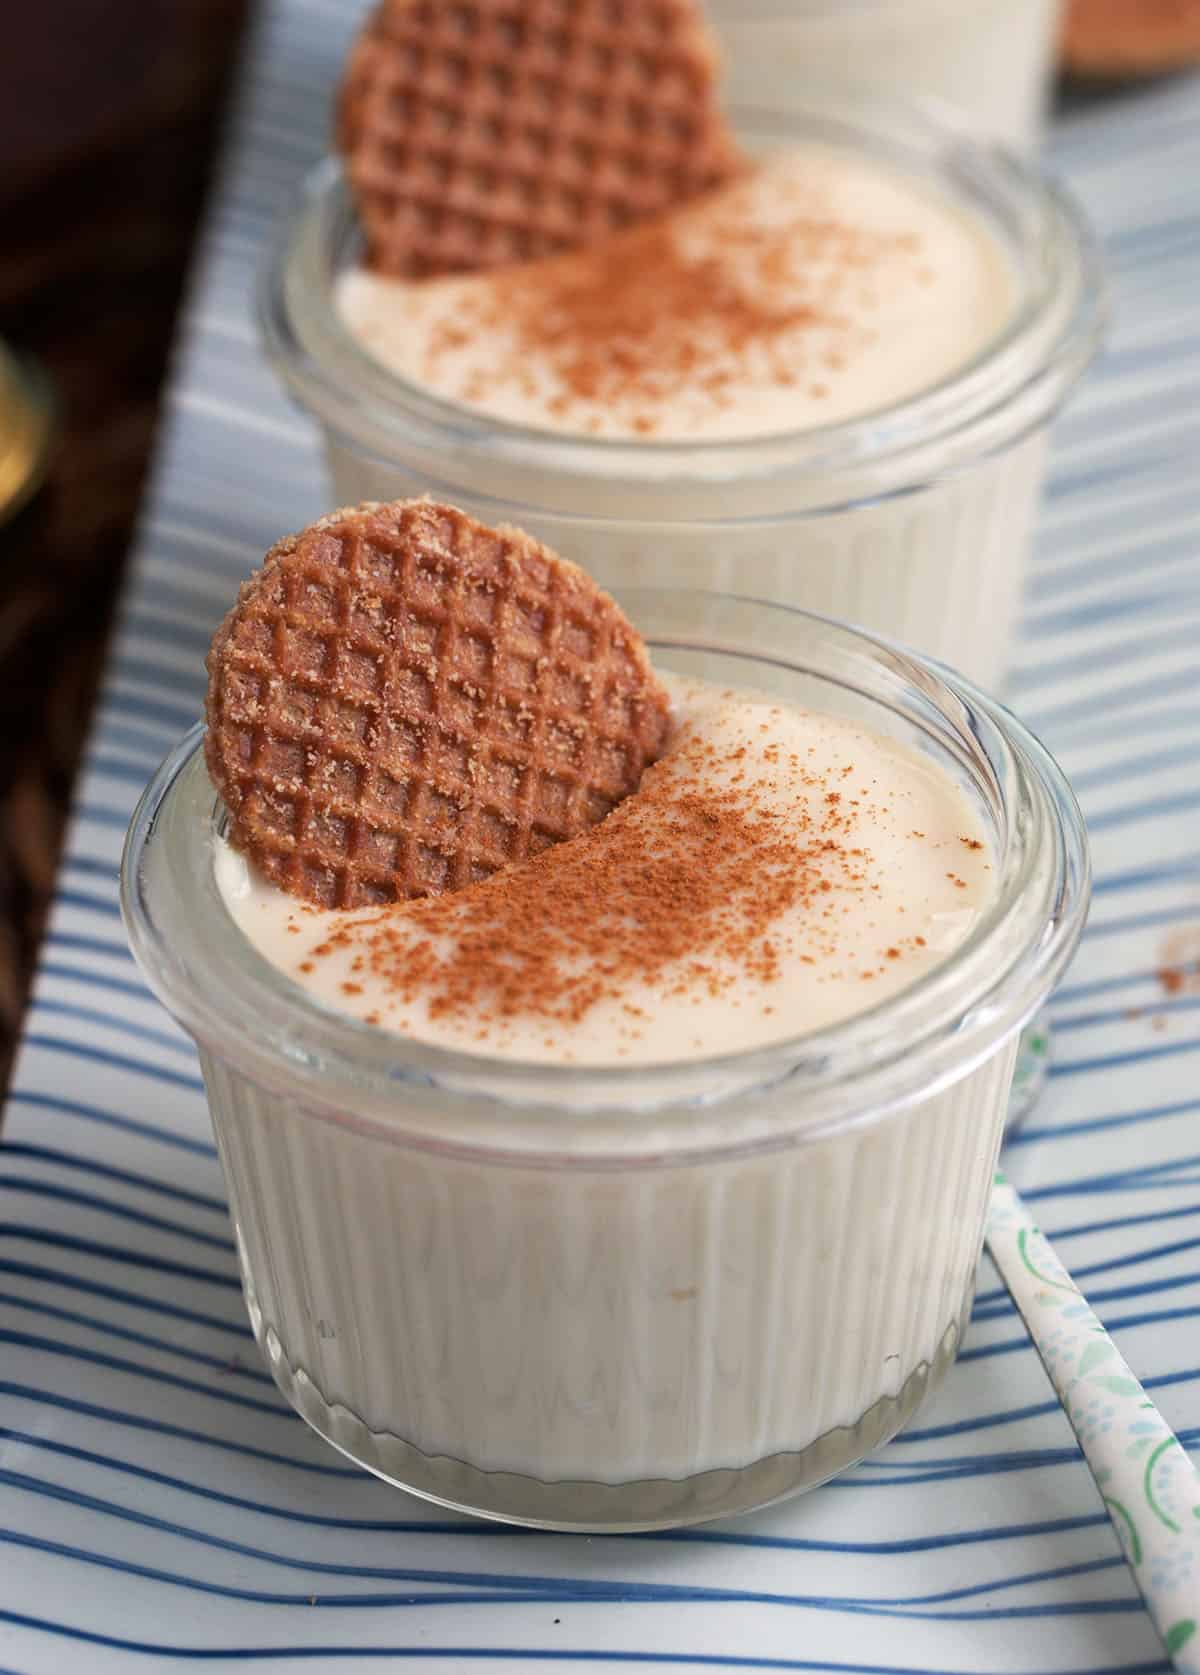
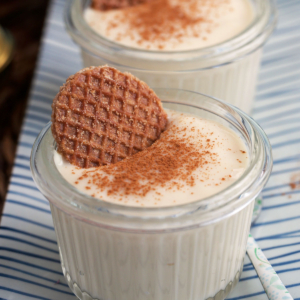
- Serve with stroopwafels, pizzelles or use for your favorite recipes. I like to spoon into individual serving bowls for perfect portioned treats topped with fresh berries.
This recipe for the Best Vanilla Pudding takes less than 15 minutes to make, about the same time it would take you to make it from the pudding mixes. The instant vanilla pudding is filled with preservatives and additives that I can’t even pronounce.
And you’ll save some money too because I bet you have everything you need to make this Vanilla Pudding right in your kitchen. The rich, cream is studded with vanilla bean flecks and is smooth like a pudding should be. One spoonful of this and you’ll never buy it in the box again.
STORAGE AND MAKE-AHEAD Tips
- Serving from the fridge – Before serving, give the pudding a good whisk to smooth it out and redistribute any liquid; if stored in one large container, stir well from the bottom so the texture is even.
- Cooling and preventing a skin – Transfer thickened pudding to a bowl or serving dishes, press plastic wrap directly onto the surface to prevent a skin, let cool to room temperature, then refrigerate.
- How long it lasts in the fridge – Stored tightly covered in the refrigerator, homemade vanilla pudding keeps well for about 3–4 days without losing its texture or flavor.
- Make-ahead instructions – This pudding is great to make 1–2 days ahead; if it becomes too thick in the fridge, whisk in a splash of cold milk just before serving to loosen it.
- Freezing guidance – Freezing isn’t ideal because the texture can separate and turn grainy; if you do freeze it, whisk thoroughly after thawing and plan to use it in layered desserts (like trifles) rather than as a stand-alone pudding.
Pro Tips and Substitutions
- Dairy – I used half and half for this recipe but you can use heavy cream for an ultra rich pudding or whole milk. Need a dairy free vanilla pudding, substitute the half and half with coconut milk or almond milk.
- Thickener – Cornstarch is used as a thickening agent but you can easily substitute with flour, arrowroot powder or Tapioca flour.
- Eggs – There are no eggs used in this recipe but for richness you can stir in one egg yolk along with the butter. This step will add a more yellow hue to your pudding, as well.
- Stir – Don’t stop stirring or whisking your pudding while cooking so the bottom of the pot doesn’t burn. You need to keep the dairy in constant motion to avoid scalding.
Be sure to use the best quality ingredients you can get your hands on. I love Vanilla Bean Paste for the pure vanilla flavor and gorgeous flecks. And I always use a European style butter for added richness.
The Very Best Vanilla Pudding would be fabulous with a little of this caramel sauce stirred in or alongside a stack of THESE chocolate chip cookies.
Kellie’s Pudding VARIATION Ideas
- Kid-friendly pudding cups – Pour warm pudding into small jars or cups, chill, then top with whipped cream, crushed cookies, sprinkles, or mini chocolate chips right before serving for an easy dessert.
- Chocolate vanilla pudding – Whisk 2–4 tablespoons unsweetened cocoa powder into the sugar and cornstarch before adding the liquid; for extra richness, stir in chopped chocolate or chocolate chips after the pudding has thickened and is off the heat.
- Banana pudding base – Use this vanilla pudding as the custard layer in Banana Pudding; in a dish or jars, layer cooled pudding with sliced bananas and vanilla wafers, then chill at least 4 hours (or overnight) so the wafers soften.
- Butterscotch-style pudding – Swap some or all of the granulated sugar for light brown sugar, then add a tiny splash of molasses and an extra pinch of salt for a deeper butterscotch flavor.
- Dairy-free vanilla pudding – Use full-fat canned coconut milk or a mix of coconut milk and almond/oat milk, increase cornstarch slightly if needed, and swap in dairy-free butter or coconut oil (noting it will have a mild coconut flavor).
- Lightened-up vanilla pudding – Use 2% milk instead of half and half and bump the cornstarch up slightly so it still sets nicely; the texture will be lighter and less rich but still creamy.
- Vanilla bean latte pudding – Replace about 1/2 cup of the half and half with strong cooled coffee or espresso, then add a little extra vanilla and a pinch of cinnamon for a coffee-shop inspired pudding.
More Easy Pudding Recipes
If you love this vanilla pudding, you may also like this Homemade Chocolate Pudding….it’s just as simple to make with the same richness and creamy factor. Also, be sure to try this Butterscotch Pudding, t’s amazing or my grandfather’s Rice Pudding.
Want to take it up a notch? This Banana Pudding recipe is a classic and so, so easy. You can even use this vanilla pudding for the base….win, win, win!
DON’T MISS A RECIPE! FOLLOW US ON INSTAGRAM AND FACEBOOK FOR MORE FAMILY FAVORITE TREATS!
Made this pudding? Tap the ⭐️ rating in the recipe card and tell me how it went – it helps more people find the recipe.
Best Vanilla Pudding Recipe
Equipment
- 1 saucepan
- rubber spatula
- whisk
Ingredients
- 2 1/2 cups half and half
- 1/2 cup granulated sugar
- 1/4 cup lightly packed light brown sugar
- 3 tablespoons unsalted butter
- 1 teaspoon vanilla bean paste or pure vanilla extract
- 2 1/2 tablespoons corn starch, add an extra tablespoon for a thicker consistency.
Instructions
- In a medium saucepan, bring 2 cups of half and half to a simmer (do not boil). Add both sugars and vanilla. Cook until the sugar is completely dissolved, stirring constantly to prevent scalding.
- Stir in the butter until melted. In a small bowl, whisk together the remaining half and half with the cornstarch.
- Slowly add the cornstarch mixture to the half and half whisking constantly. Continue cooking until the mixture has thickened and coats the back of a spoon.
- Transfer the mixture to a bowl and cover with plastic wrap being sure the plastic wrap is touching the top of the pudding. (This will prevent a skin from forming.)
- Refrigerate for 2 hours or up to 24 hours.
Notes
- Pudding will continue to thicken as it cools, so remove it from the heat as soon as it’s velvety and coats the back of a spoon.
- To prevent a skin from forming, press plastic wrap directly onto the surface of the hot pudding before chilling.
- If the pudding is too thick after refrigeration, whisk in a splash of cold milk until it’s silky again.
- You can swap the half and half for whole milk; add 1–2 extra teaspoons of cornstarch so it still sets nicely.
- For a dairy-free version, use full-fat canned coconut milk (or coconut + almond/oat milk) and dairy-free butter or coconut oil.
- This vanilla pudding works as a base for banana pudding or cream pies – just cook until extra thick before using as a filling.
Nutrition
Nutrition information is automatically calculated, so should only be used as an approximation.
Yes! Homemade vanilla pudding actually tastes even better after it chills. Make it up to 2 days in advance, press plastic wrap directly onto the surface to prevent a skin from forming, and store it in an airtight container in the refrigerator. Give it a good whisk before serving to smooth it back out.
Properly stored in an airtight container, homemade vanilla pudding will keep in the refrigerator for about 3–4 days. If it smells off, looks watery, or has been left out at room temperature for more than 2 hours, it’s best to discard it.
Technically you can freeze it, but I don’t recommend it if you care about texture. Freezing tends to make the pudding separate and turn grainy once it thaws. For the creamiest result, enjoy this pudding fresh or chilled from the fridge instead of freezing it.
If your pudding didn’t thicken, it was likely not cooked long enough or the cornstarch wasn’t fully activated. The mixture needs to come up to a gentle bubble and cook for a couple of minutes while you whisk constantly. As it cools, it will continue to thicken. If it’s still too thin after chilling, you can return it to the saucepan, whisk in a small slurry of cornstarch and cold milk, and cook again until it bubbles and thickens.
Lumps usually happen when the cornstarch or sugar isn’t fully whisked in, or if the pudding cooks too quickly. The easiest fix is to pour the hot pudding through a fine-mesh strainer into a clean bowl, using a spatula or spoon to press it through. You can also use a whisk or an immersion blender to smooth out small lumps while it’s still warm.
To keep your vanilla pudding silky-smooth, press a piece of plastic wrap directly onto the surface of the warm pudding before chilling. This keeps air from hitting the top and forming that thick “skin.” When you’re ready to serve, peel it off and give the pudding a quick stir.


Who knew Vanilla Pudding could be so delicious!!! I especially love it warm!
It’s so good warm! I’m happy you liked it, thank you for your comment!
I like the idea of homemade vanilla pudding, but this was way,way, way too sweet. How much sugar do you really need to make the recipe work?
Hi Hilde, we love things sweet here but you can definitely pull back as much as you want on the sugar.
Can the pudding be frozen?
Hi Isabella! I haven’t tried to freeze it so I can’t really say for certain. I’m sure it would freeze well but thawing may not turn out as hoped.
We made this last night in a double boiler and loved it. The flavor delicious and texture is silky smooth. I love that this is an eggless custard which is easier to work with. Thank you!!
Can proportions be doubled without affecting taste?
Thank you so much! You can definitely double it without ruining the recipe.
trying this out now! can i use granulated sugar instead of brown sugar or some other substitute?
You can use granulated sugar but not sure about the sugar substitute.
First time I have ever made home made pudding, and I only made it as I was looking for a recipe to use up 2 cups of half and half before its expiry date.
Easy instructions, easy ingredients (I had to use regular vanilla extract as I didn’t have paste), but still turned out great! Could only imagine what it would have tasted like with the quality ingredients.
Couldn’t resist a few spoonfuls warm from the pot 🙂
Thanks!
I’m so glad you loved it! It’s hard to not eat it straight from the pot….I totally agree!
I made this and used it in a yellow poke cake and topped it with fresh sliced peaches. Thank you! Great summer dessert!
That sounds wonderful! Thank you for your comment!
It is so creamy and tastes great but I think it needs berries to because it’s a little sweet so I can’t eat that much but I will totally make again yumm
Berries are great with this pudding!
I was scalding the milk when I realized the recipe didn’t have any eggs! Seems like a panna cota with cornstarch. I was too scared to go that route so I added three eggs and 3 1/2 T cornstarch. I was drawn to the use of brown sugar because I knew that would be an adult flavor. It does taste so much better than a packaged product and it didn’t take 20 minutes.
Panna cotta is usually made with buttermilk, in my experience. This is an egg free pudding. The eggs make it more of a custard but you do you. 🙂
Using this recipe for Thanksgiving, to offset the pumpkin. Hope it goes well. Thank-you for a wonderful recipe.
Thank you!!!!