This post may contain affiliate links. Please read our disclosure policy.
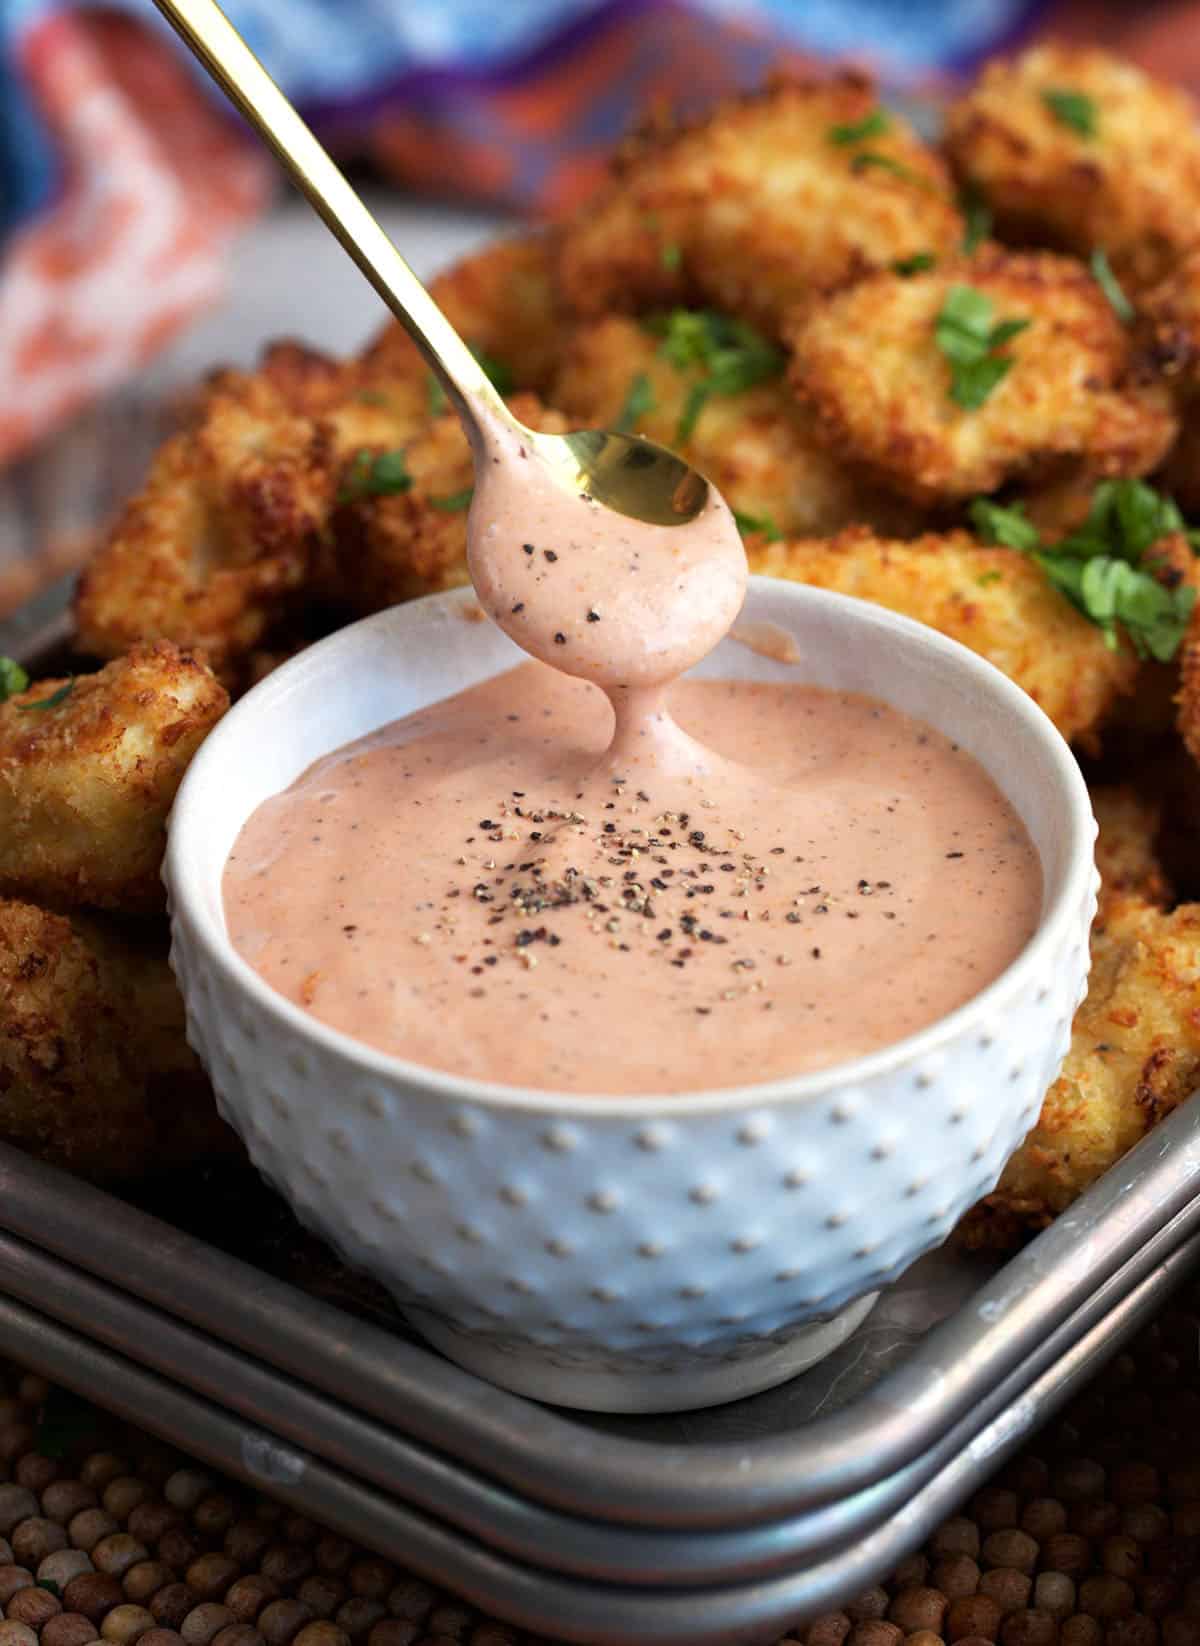
If you’ve ever rationed those little cups of Raising Cane’s Sauce like they’re liquid gold…hi, same. At my house, Cane’s night became “a thing” when my son fell hard for chicken tenders and that creamy, peppery dip, but the closest Cane’s is way too far for a casual weeknight run.
So I went into full recipe detective mode. After lots of mixing, tasting, and tweaking, this homemade Canes Sauce finally hit that perfect flavor moment. It’s quick, easy, and has that tangy-sweet, savory kick that makes nuggets and fries disappear.
(And yes—chilling is the secret that makes it taste “right.”)
Why You’ll Love My Canes Sauce
- Easy and accessible – It’s made with simple pantry/fridge staples, nothing weird.
- Dupe Perfect – It tastes like the classic Raising Cane’s Sauce you know and crave, creamy, tangy, and peppery with just enough savory punch.
- Quick and simple – It takes about 5 minutes to stir together (no blender, no cooking, no drama).
- Dunkable for all – It’s the ultimate chicken dipping sauce for nuggets, tenders, and frie’s happy sauce.
- Prep Ahead – You can make it ahead (and honestly, it gets even better after a chill).
Ingredients for Homemade Canes Sauce
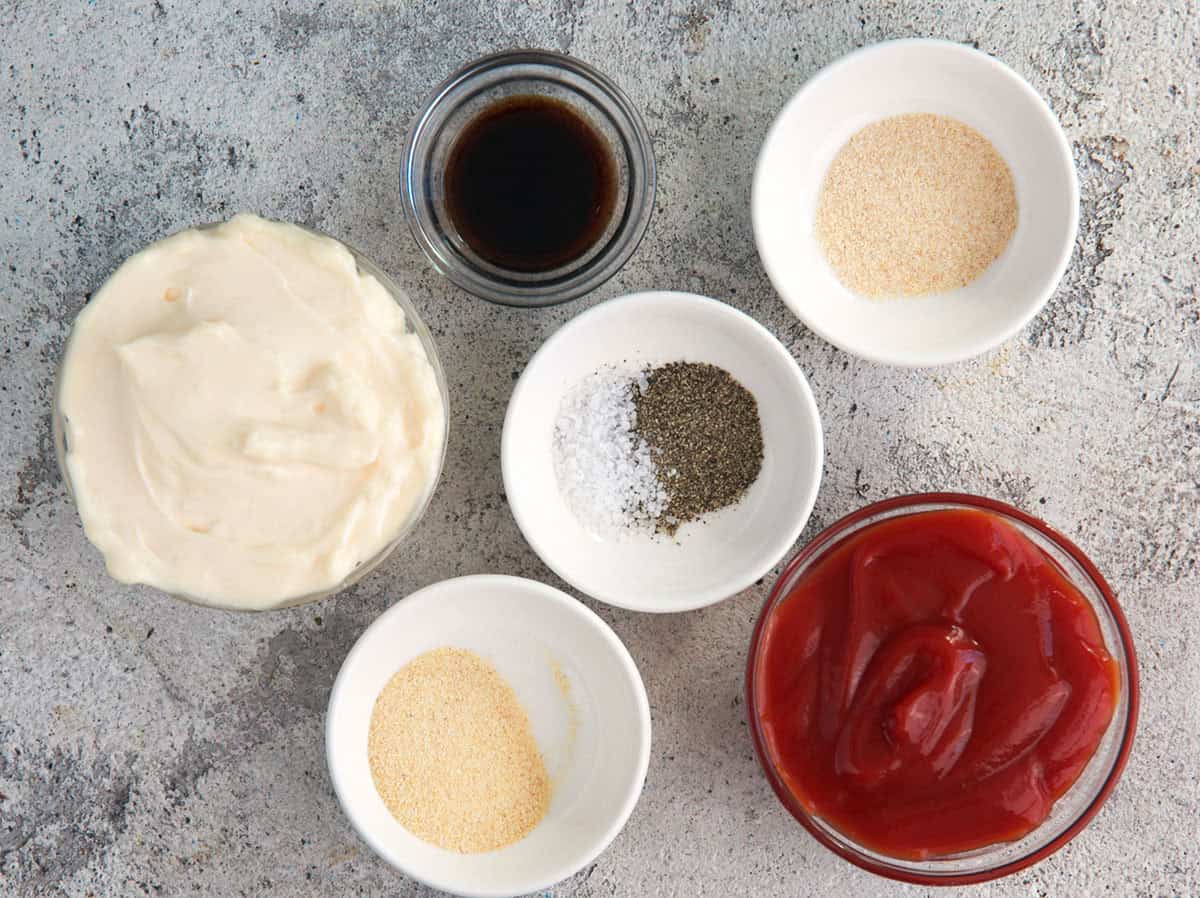
This Canes Sauce recipe uses simple pantry staples. Measurements are in the recipe card, here’s what you need (plus easy swaps).
- Mayonnaise: Creamy, rich, and makes the sauce cling. Light mayo works (less rich). Vegan mayo is great for egg-free.
- Ketchup: Adds tang, sweetness, and that classic color. Mild chili sauce works in a pinch. No-sugar ketchup is fine.
- Worcestershire sauce: The savory depth that makes it taste “restaurant.” A splash of soy sauce, or coconut aminos for soy-free.
- Garlic powder and onion powder: Classic “special sauce” flavor. Use what you have, just one is okay. Skip fresh garlic (it can get harsh after chilling).
- Black pepper: The signature bite. Freshly ground is best; start lighter for kids and add more after it chills.
- Salt (optional): Depends on your mayo and taste. Any salt works, kosher, sea salt, or seasoned salt for extra flavor.
How to Make Canes Sauce
This is truly a stir-and-done situation, but I’ll walk you through it so you get the exact texture and flavor you’re looking for.
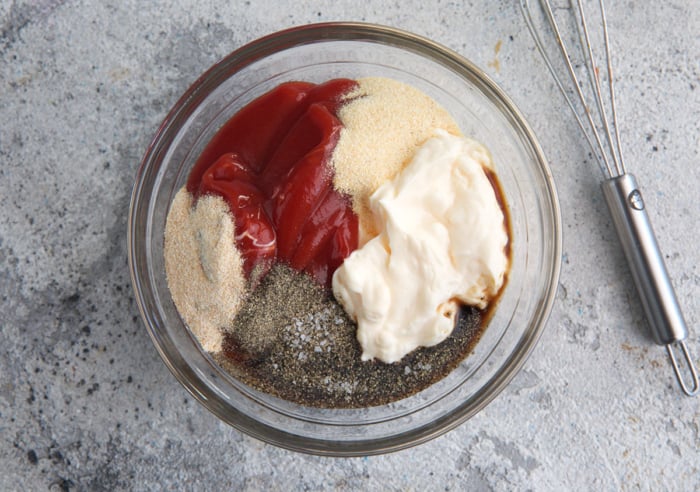
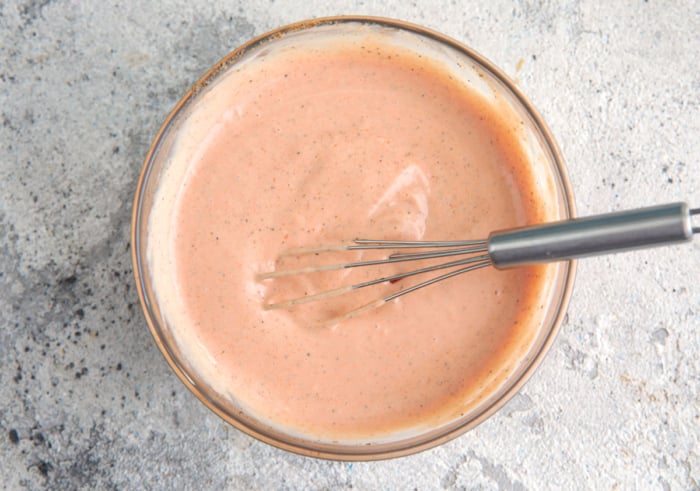
- Start with a bowl and a whisk (or even a fork). Add your mayo and ketchup first and whisk until it’s totally smooth and uniform, no streaks. You’re looking for a creamy, blush-colored base that already smells a little tangy.
- Add the Worcestershire and seasonings. When you whisk again, the sauce will deepen slightly in color and start to smell more savory and “restaurant-y.” Keep whisking until it looks glossy and silky, like it would happily cling to a chicken tender instead of sliding right off.
- The important part: chill it. Cover the bowl (or move it to a jar) and refrigerate for at least a couple hours. Overnight is even better because the flavors mellow and blend into that signature Cane’s vibe.
- Taste and tweak. After chilling, give it a taste with a fry (the most accurate test, obviously). If you want more bite, add pepper. If you want more tangy depth, add a tiny splash more Worcestershire. If you want it slightly sweeter, add a bit of honey or more ketchup.

Kellie’s Tips for the Best Canes Sauce
- Make it once, then make it yours. Some families love it extra-pepper, some like it a touch sweeter. The “taste and tweak” step is where you nail your perfect batch.
- Don’t skip the chill. I know it’s tempting to dive in immediately, but resting time is what makes the flavor taste “like the original.”
- Use full-fat mayo if you can. It gives you that richer, more authentic texture.
- Pepper matters. Start with the amount in the recipe, then adjust after chilling for that signature peppery finish.
- Whisk until silky-smooth. If it looks streaky, it’ll taste a little “separate.” Keep going until it’s combined and uniform.
How to Store Leftovers
Transfer your Canes Sauce to an airtight container (a little jar is perfect) and keep it in the refrigerator. It’ll stay fresh for about 7–10 days, depending on the freshness of your mayo.
A few tips:
- Always use a clean spoon (no double-dipping, this keeps it fresh longer).
- If you notice any separation, just stir it back together.
- I don’t recommend freezing, it can turn grainy once thawed.
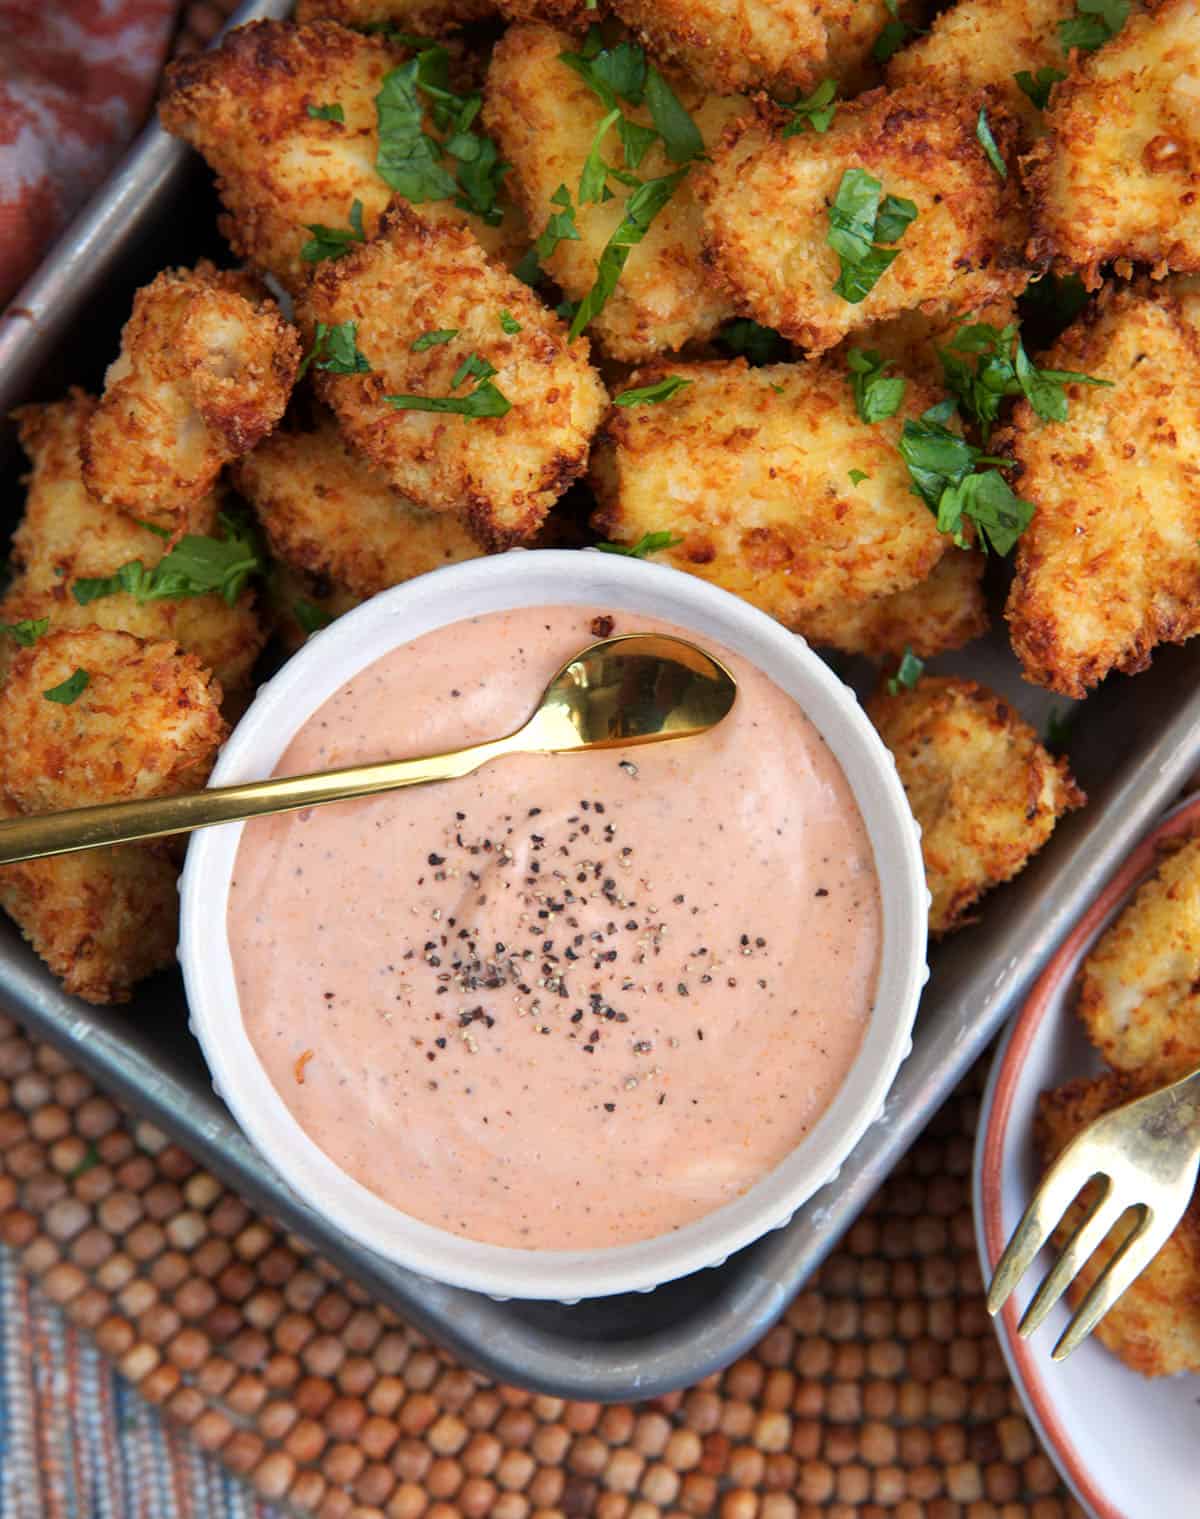
What To Serve with Canes Sauce
This is my go-to lineup:
- Chicken nuggets
- Chicken tenders (homemade or freezer aisle)
- French fries, waffle fries, sweet potato fries
- Onion rings or fried pickles
- Smash Burgers or chicken sandwiches (spread it on the bun)
- Wraps, sliders, and even as a dip for roasted red potatoes
More Easy Dipping Sauce Recipes
If your house is anything like mine, one good dip turns into five. Here are a few easy ones to add to your rotation:
- Honey Mustard Sauce
- Fry Sauce (the super quick burger-joint style)
- Yum Yum Sauce
- The Best Creamy Horseradish Sauce
- Spicy Mayo
- Homemade Ranch Dressing
Canes Sauce Recipe

Equipment
- whisk
- measuring spoon
Ingredients
- 1/2 cup mayonnaise, full-fat is best
- 1/4 cup ketchup
- 1 1/2 teaspoon Worcestershire sauce, Soy Sauce or Coconut Aminos
- 1 teaspoon garlic powder
- 1/2 teaspoon onion powder
- 1/2 teaspoon fine black pepper, add more to taste
- 1/4 teaspoon kosher salt, optional, to taste
Instructions
- In a bowl, whisk together the mayonnaise, ketchup, Worcestershire sauce, garlic powder, onion powder, black pepper, and salt (if using) until completely smooth.
- Cover and refrigerate for at least 2 hours (overnight is even better).
- After chilling, taste and adjust as needed: add more black pepper for bite, a tiny splash more Worcestershire for tang, or a touch of honey for sweetness.
Notes
- Chilling is key: the sauce tastes noticeably more like Raising Cane’s after a couple hours in the fridge.
- Full-fat mayo gives the best flavor and texture, but vegan mayo works if you need a vegetarian option
- Pepper level is personal: start with the recipe, then adjust after chilling for that signature bite.
- Storage: keep refrigerated in an airtight container for 7–10 days.
Nutrition
Nutrition information is automatically calculated, so should only be used as an approximation.