This post may contain affiliate links. Please read our disclosure policy.
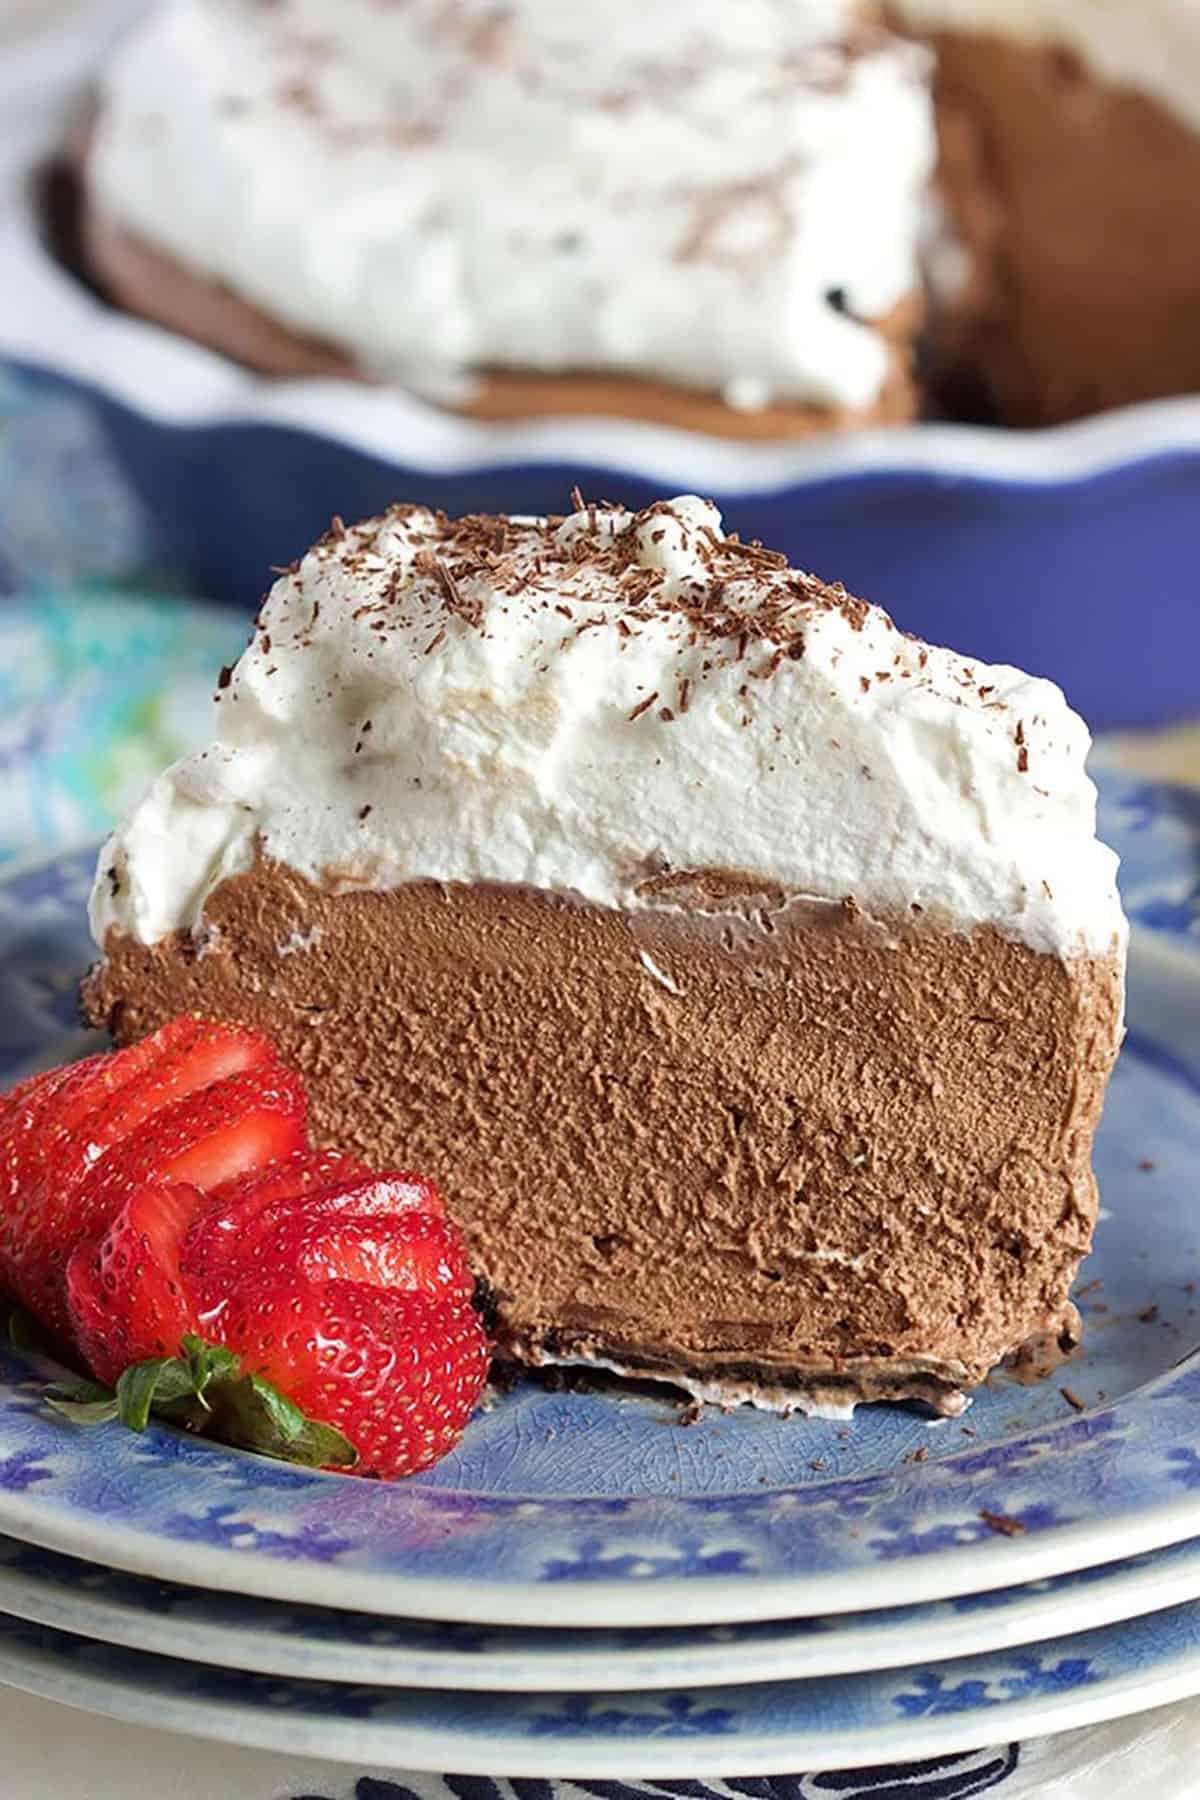
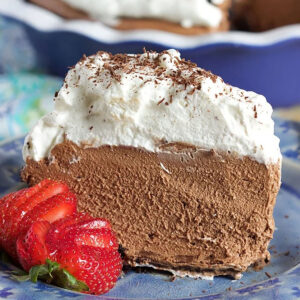
This No Bake Chocolate Mousse Pie is a rich, creamy chocolate mousse pie made with a chocolate cookie crust, fluffy homemade chocolate mousse, and a cloud of whipped cream. It chills in the refrigerator instead of baking, making it a perfect make-ahead dessert for summer parties, holidays, or any time you need a chocolate dessert that feels impressive but is simple to prep ahead.
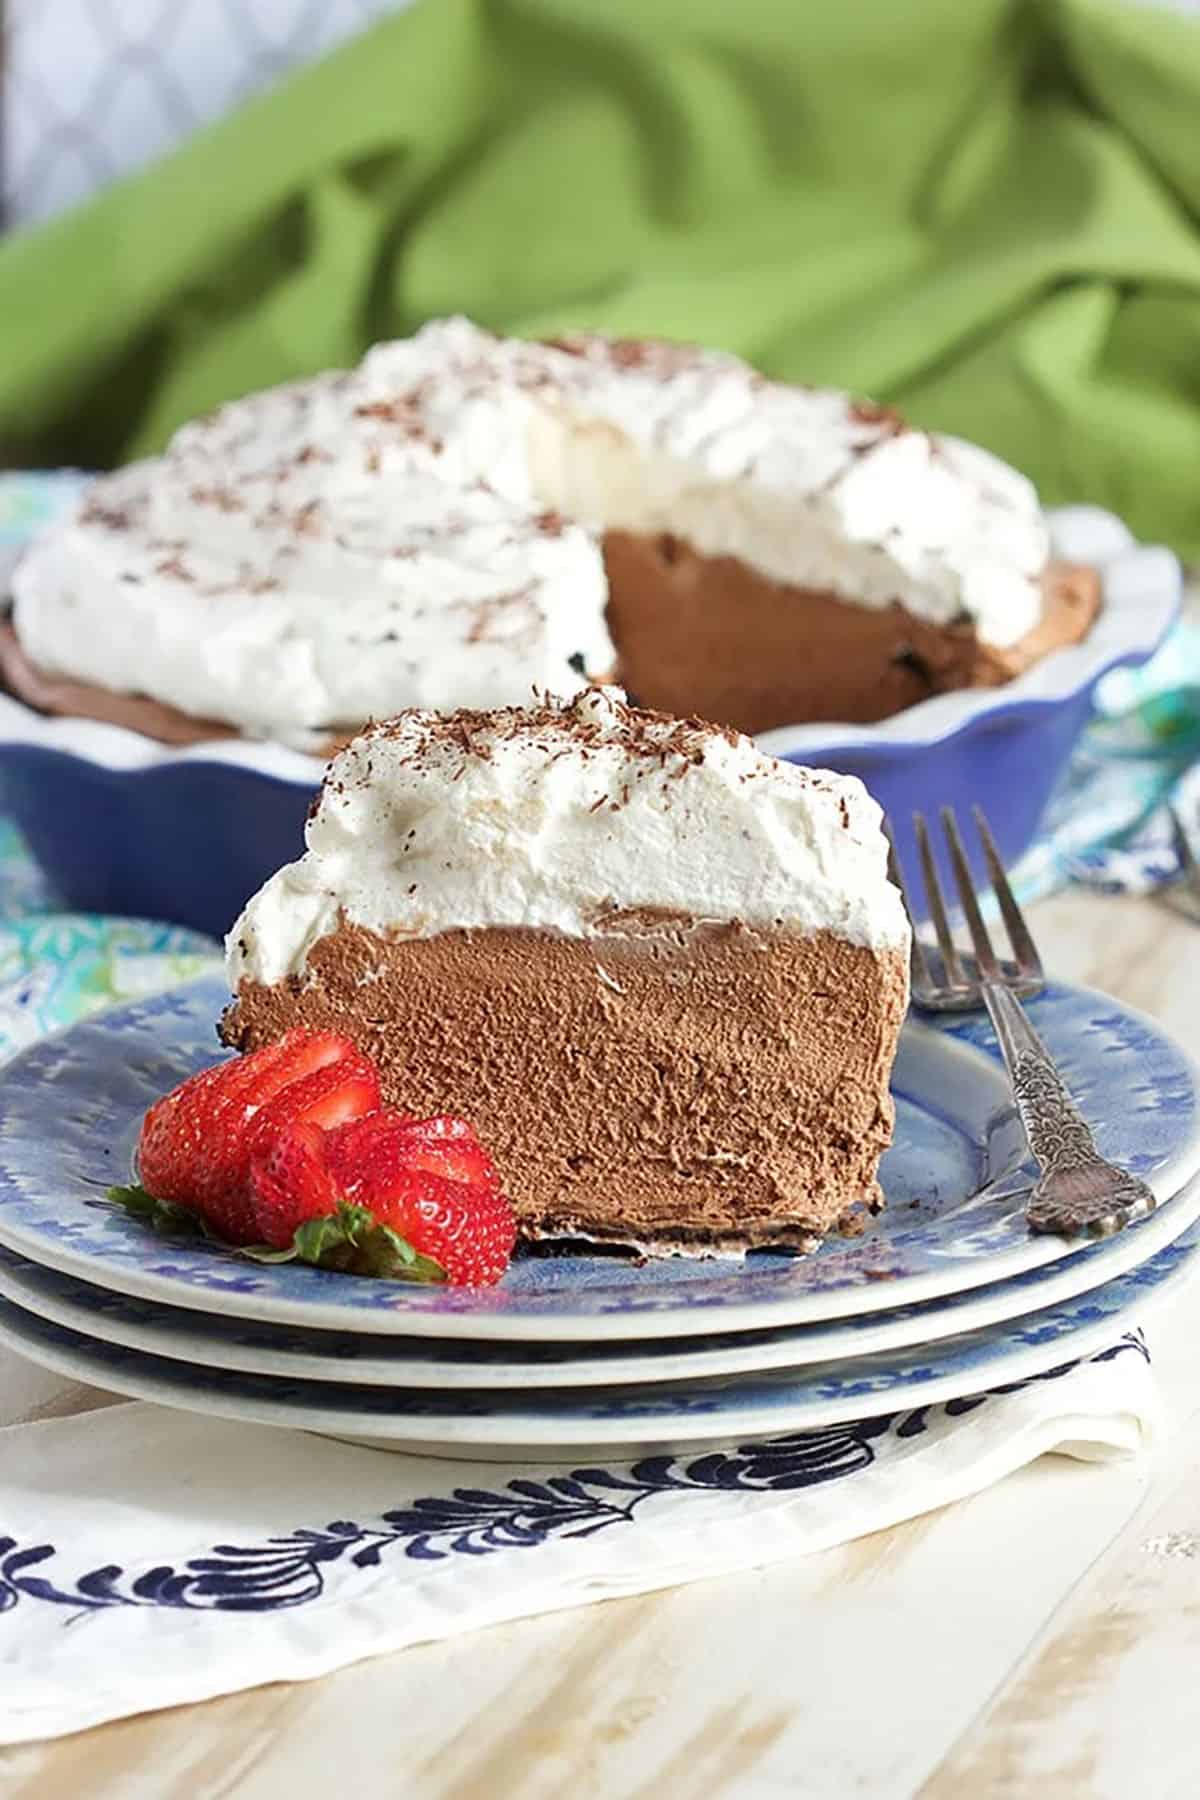
Table of Contents
- Kellie’s Note Easy As Pie
- Chocolate Mousse Pie Ingredients
- Substitutions and Variations
- How To Make Chocolate Mousse Pie
- Kellie’s Tips for the Best Chocolate Mousse Pie
- Why Is the Chocolate Layer Hard to Slice?
- How to Make in Advance
- Can You Freeze Chocolate Mousse Pie?
- How to Store Chocolate Mousse Pie
- More Easy Pie Recipes
- Chocolate Mousse Pie Recipe
Kellie’s Note
Easy As Pie

I grew up in a food-loving family, and chocolate mousse pie was always one of my favorite chocolate desserts. This version keeps everything cool and easy with a no-bake cookie crust, a decadent chocolate mousse filling, and a whipped cream topping that makes every slice feel light, fluffy, and special.
It’s simply heaven in a pie plate.

Chocolate Mousse Pie Ingredients
Here’s what makes this chocolate mousse pie so rich, fluffy, and easy to slice:
- Chocolate cookie crumbs: Chocolate wafer cookies or Oreo thins make a rich, sturdy crust. Crush them finely so the crust packs tightly into the pie plate.
- Salted butter: Melted butter binds the cookie crumbs together and helps the crust hold its shape.
- Semi-sweet chocolate: You’ll use chocolate in both the crust and the mousse. Use good-quality chocolate and melt it until completely smooth for the best texture.
- Heavy cream: Heavy cream gives the mousse its light, fluffy texture and creates the whipped cream topping.
- Egg whites: Whipped egg whites help make the mousse airy and cloud-like.
- Sugar: A small amount of sugar stabilizes and sweetens the whipped egg whites.
- Confectioners’ sugar: This sweetens the whipped cream topping without making it grainy.
- Chocolate shavings: These are optional, but they make the finished pie look bakery-worthy.
Substitutions and Variations
- Use a graham cracker crust: A graham cracker crust works well if you do not have chocolate cookies. The flavor will be less chocolatey, but still delicious.
- Use chocolate sandwich cookies: Chocolate sandwich cookies also work for the crust, though they will make it a little sweeter.
- Make it gluten-free: Use gluten-free chocolate sandwich cookies or gluten-free chocolate wafer cookies for the crust.
- Add a flavor boost: A pinch of cayenne or a little espresso powder can deepen the chocolate flavor.
- Change the topping: Finish the pie with chocolate shavings, Oreo crumbs, fresh berries, chocolate sauce, or caramel sauce.
How To Make Chocolate Mousse Pie
This no bake chocolate mousse pie is mostly an assemble-and-chill dessert, but a few simple details make a big difference.
- Top and garnish: Add whipped cream and finish with chocolate shavings before serving.
- Make the crust: Crush the chocolate cookies into fine crumbs, mix them with melted butter, and press the mixture firmly into a pie plate.
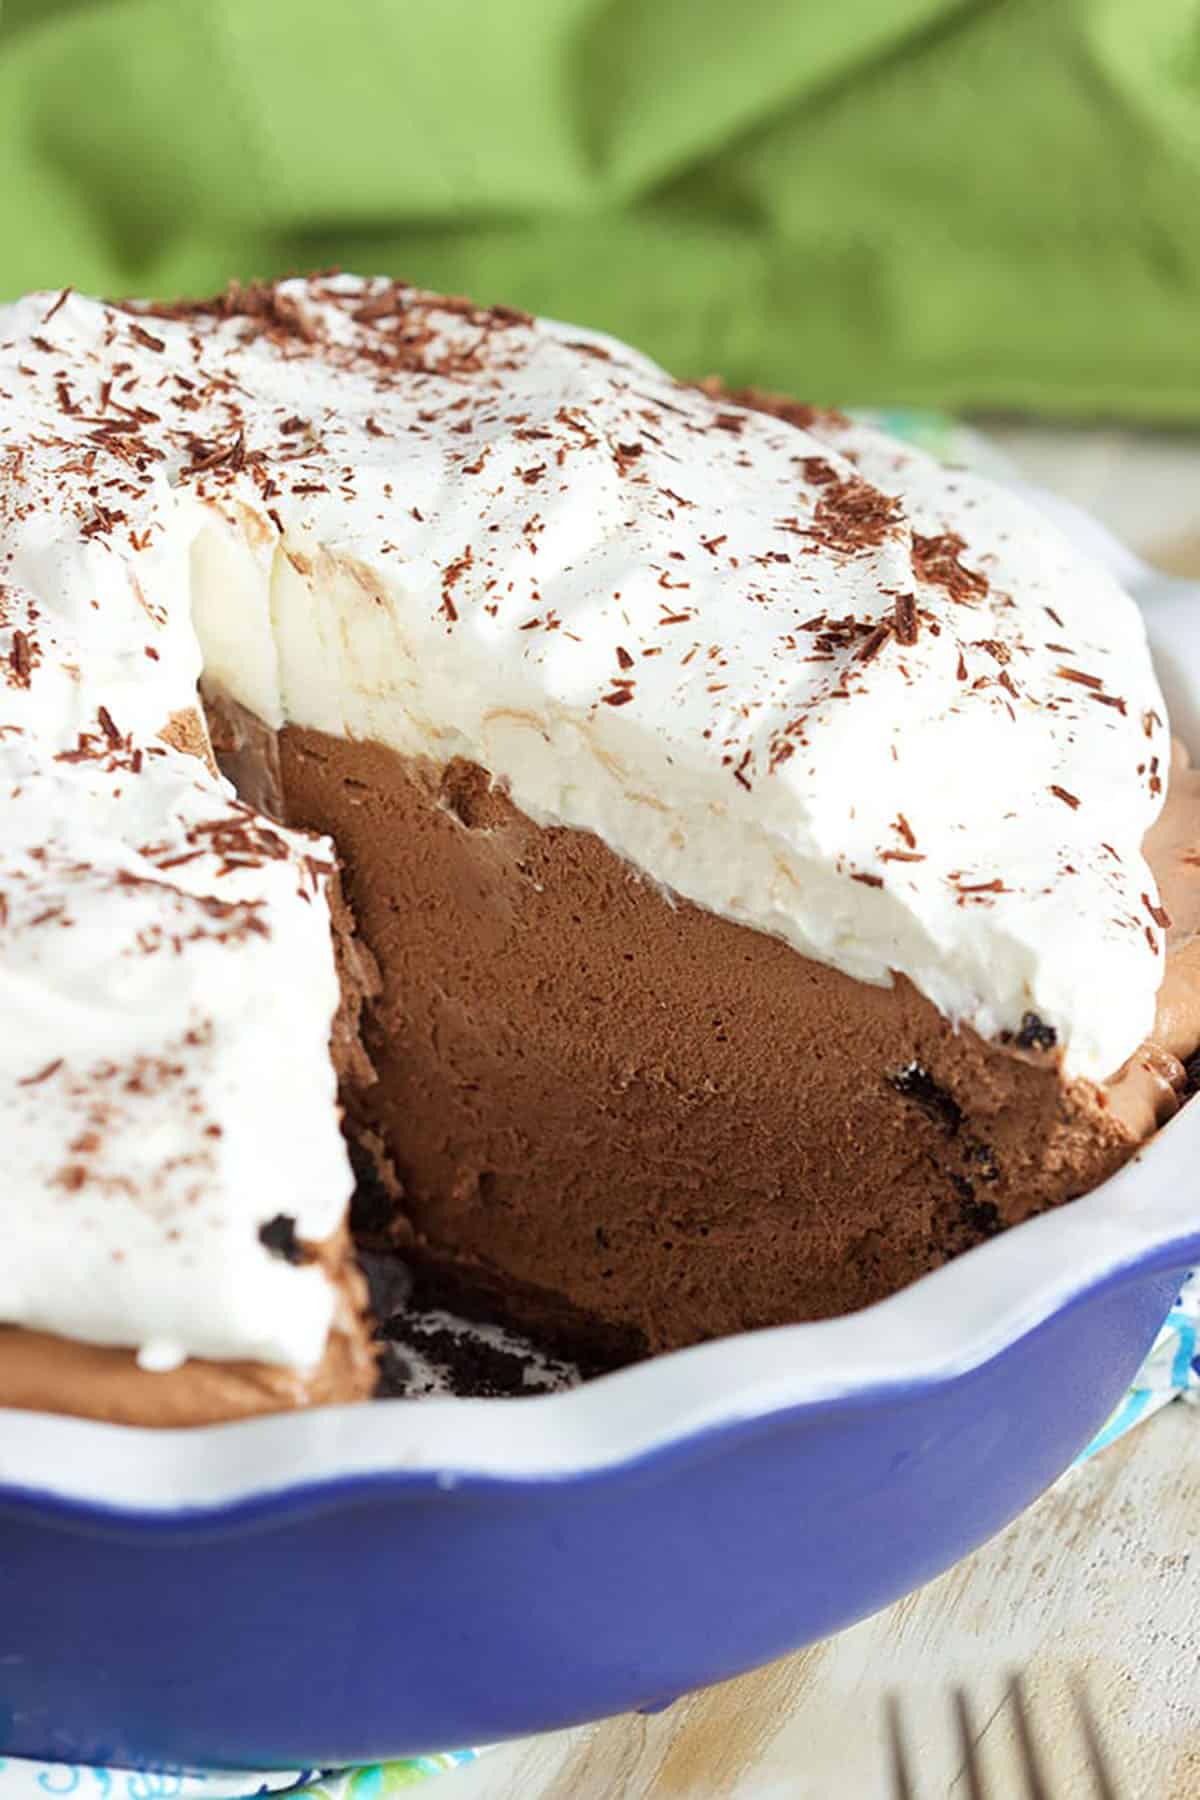
- Add the chocolate layer: Spread melted chocolate over the bottom of the crust, then chill until firm. This helps keep the crust from getting soggy.
- Make the chocolate mousse: Melt the chocolate until smooth, whip the cream, whip the egg whites, and gently fold everything together.
- Fill the crust: Spoon the chocolate mousse into the chilled crust and spread it into an even layer.
- Chill until set: Refrigerate the pie until the mousse is firm enough to slice cleanly.
Kellie’s Tips for the Best Chocolate Mousse Pie
- Melt the chocolate completely: The chocolate should be fully melted and smooth before it is folded into the mousse. If it is not melted enough, it can create small specks in the filling.
- Use good-quality chocolate: Since chocolate is the main flavor, better chocolate gives the pie a smoother texture and richer taste.
- Fold gently: Use a light hand when folding the whipped cream and egg whites into the chocolate so the mousse stays fluffy.
- Chill long enough: The pie needs time to set before slicing. Overnight chilling gives the cleanest slices.
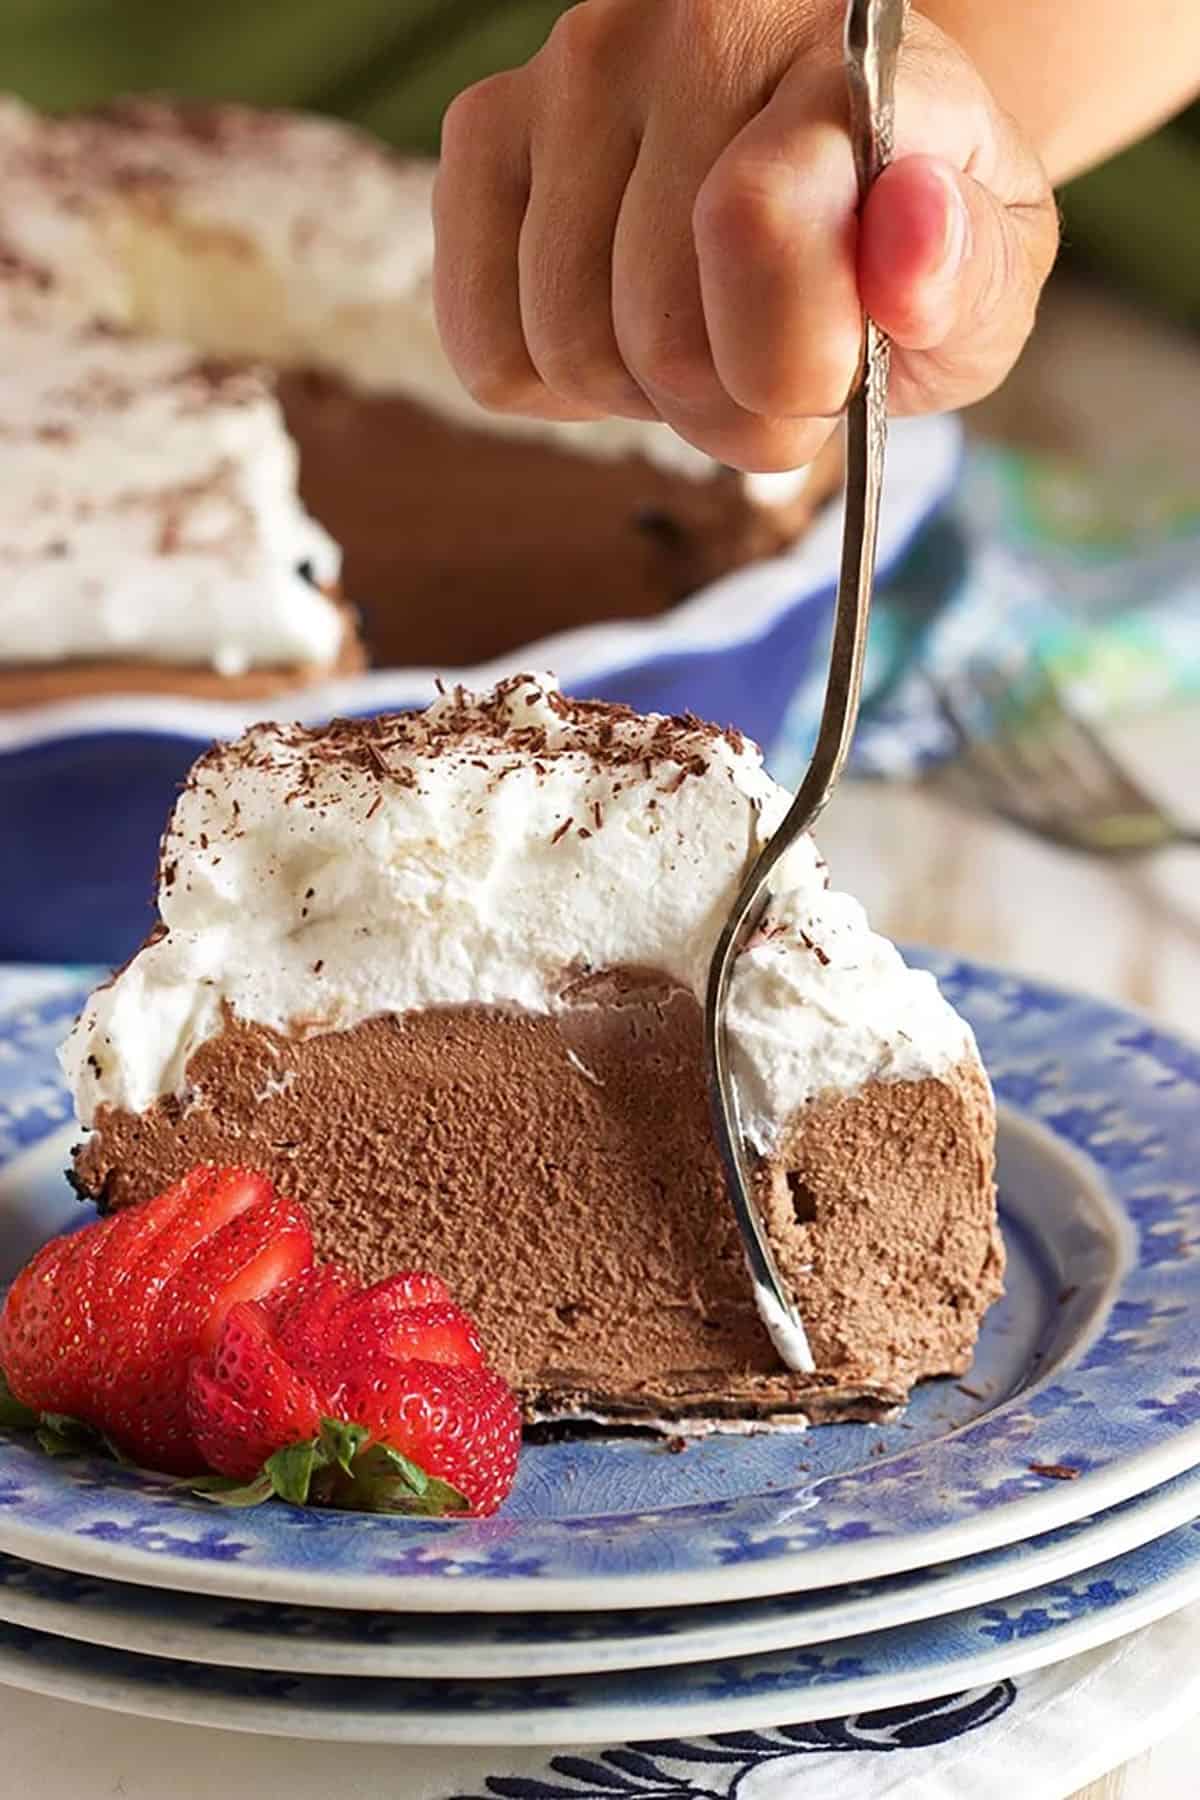
- Use a warm knife: Dip a sharp knife in hot water, wipe it dry, then slice for neater pieces.
- Let it sit before slicing: If the chocolate layer on the crust is very firm, let the pie sit at room temperature for about 20–30 minutes before slicing.
Why Is the Chocolate Layer Hard to Slice?
The thin chocolate layer helps protect the cookie crust from becoming soggy, but it can firm up in the refrigerator. If the pie is difficult to slice, let it sit at room temperature for about 20–30 minutes before cutting. A sharp knife warmed in hot water will also help you slice cleanly through the chocolate layer. This tip also addresses a reader concern from the comments, where the author recommended resting the pie and using a warm knife for easier slicing.
How to Make in Advance
This chocolate mousse pie is a great make-ahead dessert. You can prepare the mousse-filled pie up to 2 days in advance and keep it covered in the refrigerator. For the freshest look and texture, add the whipped cream topping and chocolate shavings closer to serving.
Can You Freeze Chocolate Mousse Pie?
Yes, chocolate mousse pie freezes well if you freeze it before adding the whipped cream topping.
- Assemble the pie without the whipped cream.
- Wrap the pie tightly with plastic wrap.
- Cover with foil.
- Freeze for up to 2 months.
- Thaw in the refrigerator for 24 hours.
- Add whipped cream and chocolate shavings before serving.
How to Store Chocolate Mousse Pie
Store leftover chocolate mousse pie covered in the refrigerator for up to 48 hours. Keep the pie chilled until shortly before serving so the mousse stays firm and sliceable.
If the chocolate layer on the crust feels too firm, let the pie sit at room temperature for a few minutes before slicing. For the cleanest slices, use a sharp knife dipped in hot water and wiped dry.
More Easy Pie Recipes
If you love easy make-ahead pies, try these reader-favorite pie recipes next:
- Easy Frozen Mudslide Pie Recipe
- Deep Dish Pumpkin Pie
- The VERY BEST Apple Pie
- How to make the BEST Pie Crust
- Fresh Strawberry Pie Recipe
- No Bake Banana Split Pie
- Classic Double Crust Cherry Pie
For another chocolate pie with a cool, creamy texture, try this chocolate haupia pie next.
Want even more easy recipe inspiration? Follow us over on Instagram!
Chocolate Mousse Pie Recipe
Equipment
- 1 hand mixer
- 1 9-inch pie plate
- mixing bowls
- Double boiler or heat-proof bowl and saucepan
- food processor or blender
- spatula
Ingredients
For the Crust
- 9 ounces chocolate wafer cookies, crushed into fine crumbs (Oreo thins or your favorite chocolate cookie works well, too.)
- 5 tablespoons salted butter, melted
- 6 ounces semi sweet chocolate, melted
For the Chocolate Mousse
- 6 ounces semisweet chocolate, broken into 1/2-ounce pieces
- 1 1/2 cups heavy cream
- 3 egg whites
- 2 tablespoons sugar
For the Whipped topping
- 1/4 cup confectioners sugar
- 1 cup heavy cream
- chocolate shavings, for garnish
Instructions
For the Crust
- In a medium bowl, stir together the cookie crumbs and butter until moistened. Press the mixture evenly into a 9 inch deep dish pie plate being sure to coat the bottom and the sides. Refrigerate for 30 minutes.
- Spread the melted chocolate evenly over the bottom of the crust and refrigerate until firm, approximately 5-10 minutes.
For the Chocolate Mousse Filling
- Heat 1-inch of water in the bottom half of a double boiler over medium heat. Place 6-ounces of semisweet chocolate in the top half of the double boiler. Tightly cover the top with film wrap.
- Allow the chocolate to melt slowly, about 9 to 10 minutes.
- Remove from the heat and stir until smooth keep at room temperature until needed.
- Place 1 1/2 cups heavy whipping cream in the well-chilled bowl of an electric mixer fitted with a well-chilled balloon whip.
- Whisk on high speed until peaks form, about 1 minute. Set aside for a few minutes until needed.
- Whisk 3 egg whites in a large stainless-steel bowl, until soft peaks form, about 3 minutes. Add 2 tablespoons sugar and continue to whisk until stiff peaks form, about 2 to 2 1/2 minutes.
- Add a 1/4 of the whipped cream to the chocolate and whisk quickly, vigorously, and thoroughly, then add to the egg whites. Now add the remaining whipped cream.
- Fold all together gently but thoroughly.
- Pour the chocolate mousse filling into the pie crust and spread evenly. Return the pie to the refrigerator and chill for 1 hour or overnight.
For the Whipped Cream Topping
- In a medium bowl, beat the confectioners’ sugar and cream together with an electric mixer until stiff peaks form.
- Spread the whipped cream over the top of the pie.
- Garnish with chocolate shavings, if desired.
- Chill for 30 minutes or overnight.
- Slice with a sharp knife warmed in hot water to make slicing easier.
Notes
- Chocolate Mousse Pie can be made up to 48 hours in advance. Cover and refrigerate until ready to serve.
- For the cleanest slices, dip a sharp knife in hot water, wipe it dry, then slice.
- If the chocolate layer on the crust is very firm, let the pie sit at room temperature for 20–30 minutes before slicing.
- A graham cracker crust can be used instead of the chocolate cookie crust.
- For a gluten-free version, use gluten-free chocolate sandwich cookies or gluten-free chocolate wafer cookies.
Nutrition
Nutrition information is automatically calculated, so should only be used as an approximation.
Yes. This pie is a great make-ahead dessert. You can make it the night before and keep it covered in the refrigerator until you are ready to serve.
Yes. A graham cracker crust works as a substitute for the chocolate cookie crust. The flavor will be less chocolatey, but it will still pair well with the mousse filling. A reader asked about this swap in the comments, and the author confirmed that graham cracker crust works well.
Yes. Use gluten-free chocolate sandwich cookies or gluten-free chocolate wafer cookies for the crust. Check all ingredient labels to make sure they are gluten-free.
The chocolate may not have been melted completely, or it may have cooled too much before being folded into the mousse. Use good-quality chocolate and make sure it is smooth before combining it with the whipped cream and egg whites.
Let the pie sit at room temperature for 20–30 minutes if the chocolate layer is very firm. Then slice with a sharp knife dipped in hot water and wiped dry.
Pasteurized egg whites can be used if you prefer them, but they may whip differently than fresh egg whites. Make sure they reach stiff peaks before folding them into the mousse.


This was AMAZING. It was good the day of, and also good a few days later. The crust stayed crisp in the refrigerator and it was SO enjoyed by all my family. Thank you for a great chocolate cream pie!
Hi there, this piece looks absolutely amazing!
Sorry for the silly question, but when you say chocolate wafer, do you mean the layered wafers with the filling in between the layers?
Thanks so much 🙂
It’s the Nabisco chocolate wafer cookies, they’re just plain chocolate cookies.
I made this for my lunch party and it was amazing. It really was.
Thank you so much, Darcia! It’s been of favorite of mine for years and I, finally, got to share it with all of you. So glad you liked it!
I’d like to dig into a slice of this right now. Looks perfectly creamy and chocolate-y.
What a delightful looking dessert. Great pictures.
Anyone try it ?
So much to love about this beautiful pie! Especially the chocolate mousse!
Thanks, Lauren!
I think that I would be a little bit nervous using uncooked egg whites unless they came from my own chickens. I think I would choose to use powdered egg whites for this one. Great recipe! I will make this!
Hi Clay! I used pasteurized eggs from Safest Choice so they are safe to consume when raw or undercooked. The powdered egg whites don’t really work as well as I like so I always buy Safest Choice for recipes like this one. There’s a link above to their website so you can read up on their process. Thank you so much for stopping by!
This looks amazing 🙂 But have been so nervous to use egg whites/yolks in a recipe that are not heated through the process. Would this be okay to consume.
This is definitely safe to consume…I use a pasteurized egg from Safest Choice. You can read more about them in the link I shared above, it’s all I used when making recipes that contain raw or undercooked eggs.
Wow! That pie looks so decadent. That texture! Drooling.
This pie looks amazing, Kellie! So creamy and chocolate-y! I just want to grab a fork and dive in!