This post may contain affiliate links. Please read our disclosure policy.
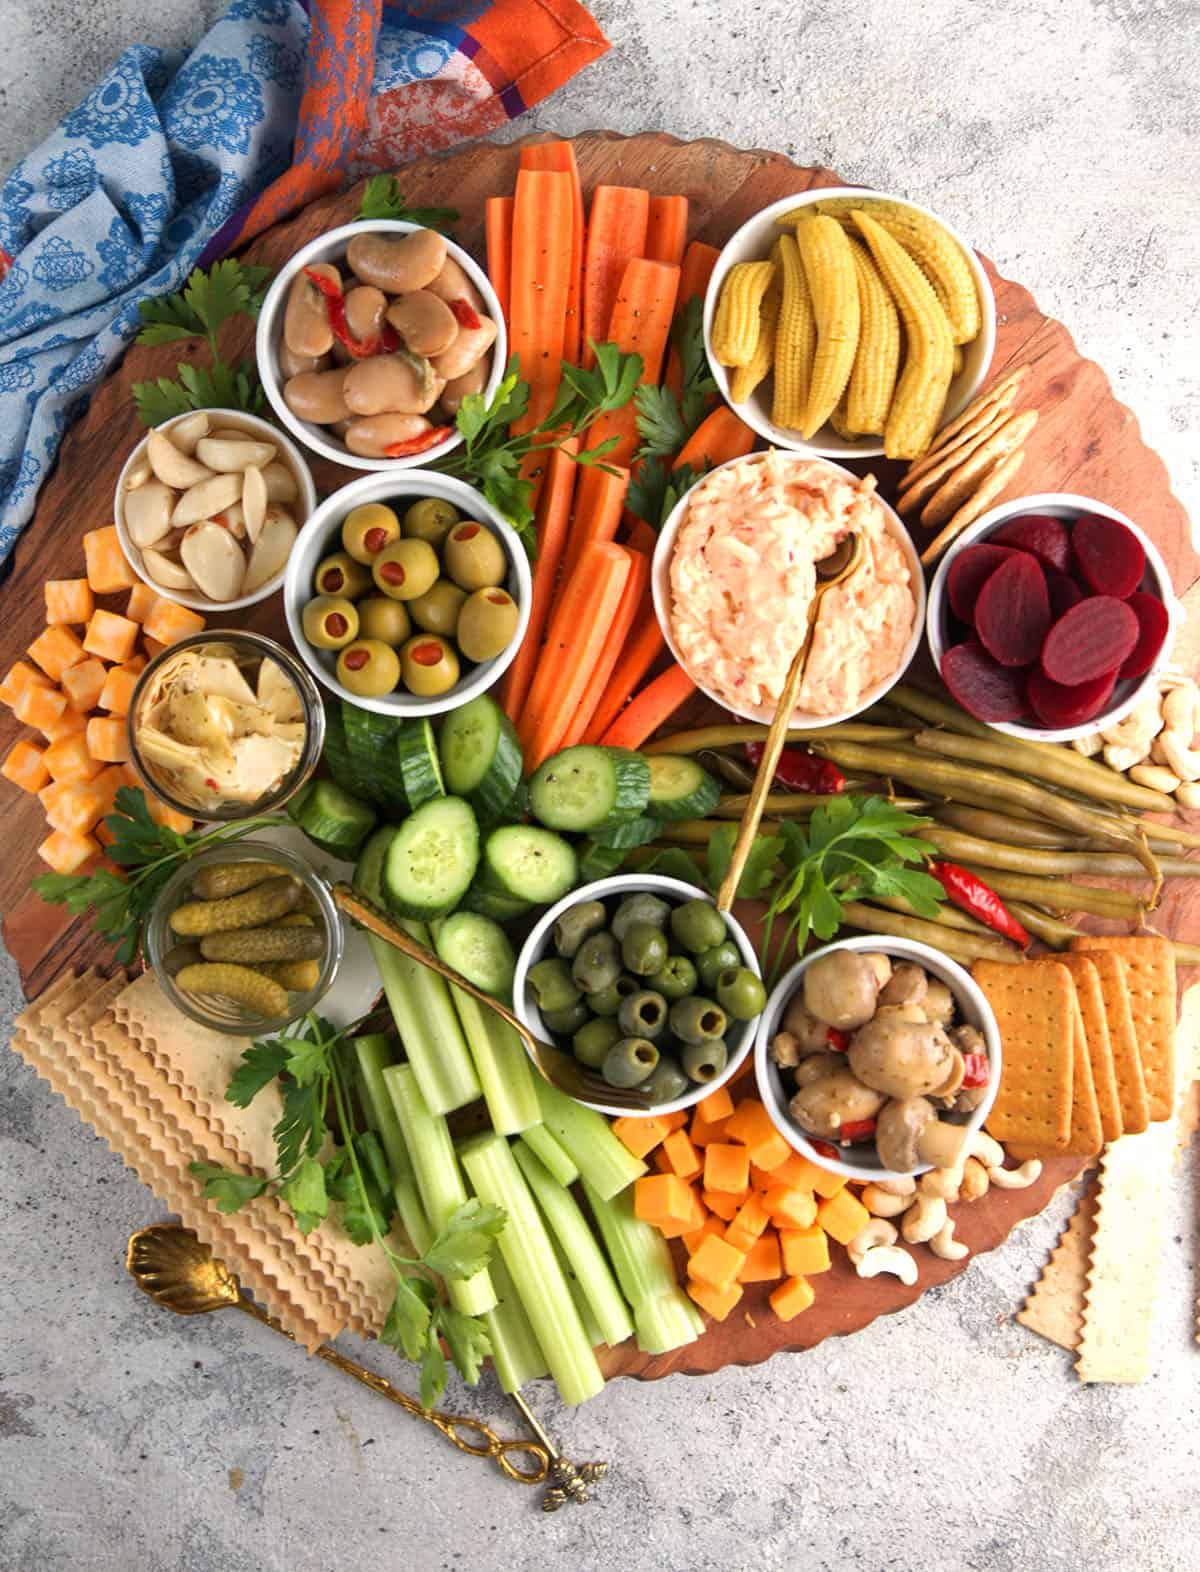
This easy Relish Tray is one of my favorite entertaining shortcuts. It’s fresh, crunchy, briny, and packed with all the things people actually reach for first – crisp veggies, olives, pickles, and a creamy dip in the middle. It’s the perfect appetizer for a buffet, brunch spread, holiday table, or grazing board when you want something lighter than a meat-heavy charcuterie board.
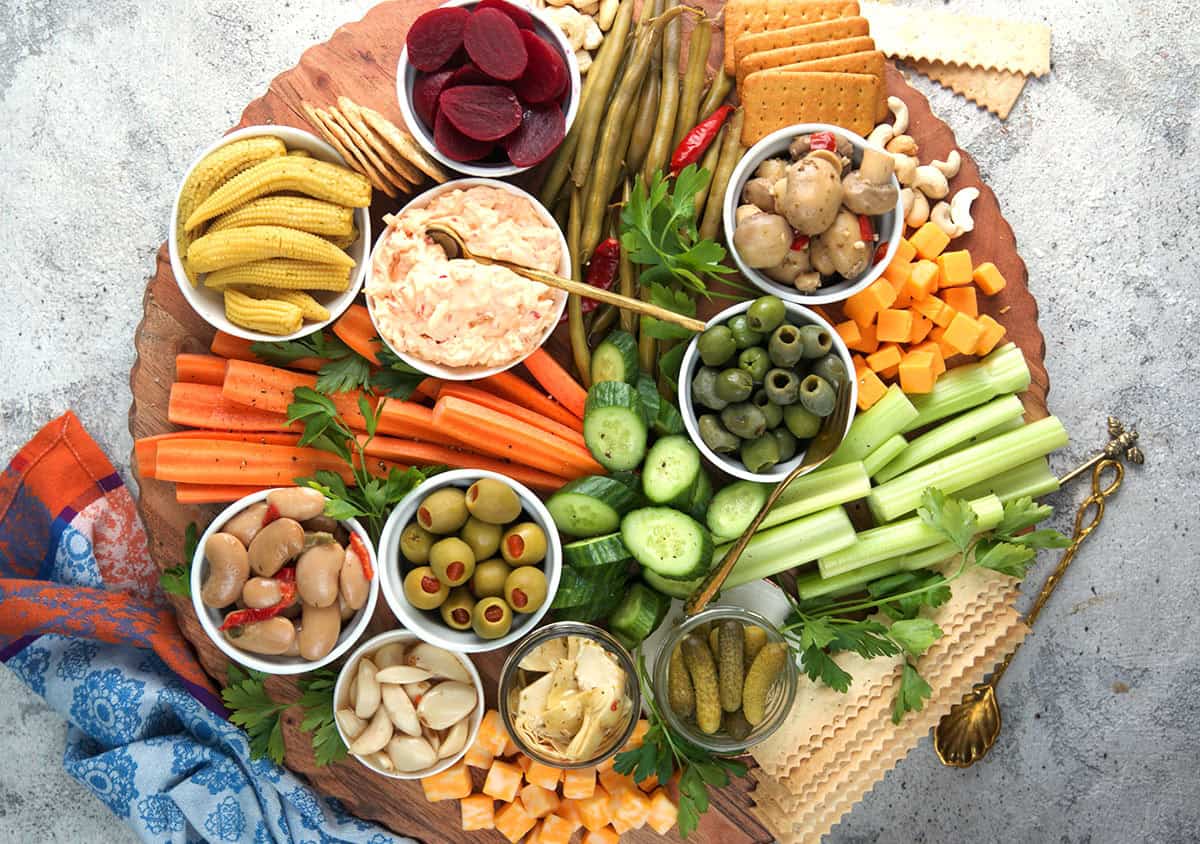
Table of Contents
Kellie’s Note
Relish the Moment

There are a few things I make on repeat when people come over, and a Relish Tray is always at the top of that list. It’s one of those old-school entertaining staples that never really goes out of style because it works. It gives everyone something to snack on the minute they walk in, it adds color to the table, and it balances out all the richer dishes that usually show up at parties.
I love serving a relish tray with a buffet or grazing table because it instantly makes the whole spread feel more generous without requiring a lot of extra work. And after years of building appetizer boards, holiday platters, brunch spreads, and casual snack tables, I’ve learned that guests always appreciate having something crisp, bright, and a little tangy to nibble on between bites of cheese, dips, casseroles, and finger foods. This version is classic, easy to scale, and built around the things people always come back for: crunchy vegetables, pickled favorites, salty little extras, and a creamy dip. It follows the same traditional structure in your recipe with fresh vegetables, pickles and olives, optional savory add-ins, and a simple creamy dip.

Why You’ll Love My Easy Relish Tray
- A good Relish Tray is one of the easiest ways to make a party table feel finished.
- It’s incredibly easy to customize based on the season, the occasion, or whatever you already have in the fridge.
- It’s make-ahead friendly, which is exactly what I want when I’m hosting.
- It gives your spread something fresh and crunchy, which is a nice contrast to rich appetizers and heavier holiday dishes.
- And maybe best of all, it works for just about everything. Add it next to a charcuterie board, pair it with a cheese board, set it out with brunch dishes like quiche and finger sandwiches, or tuck it into a holiday buffet. It always fits in.
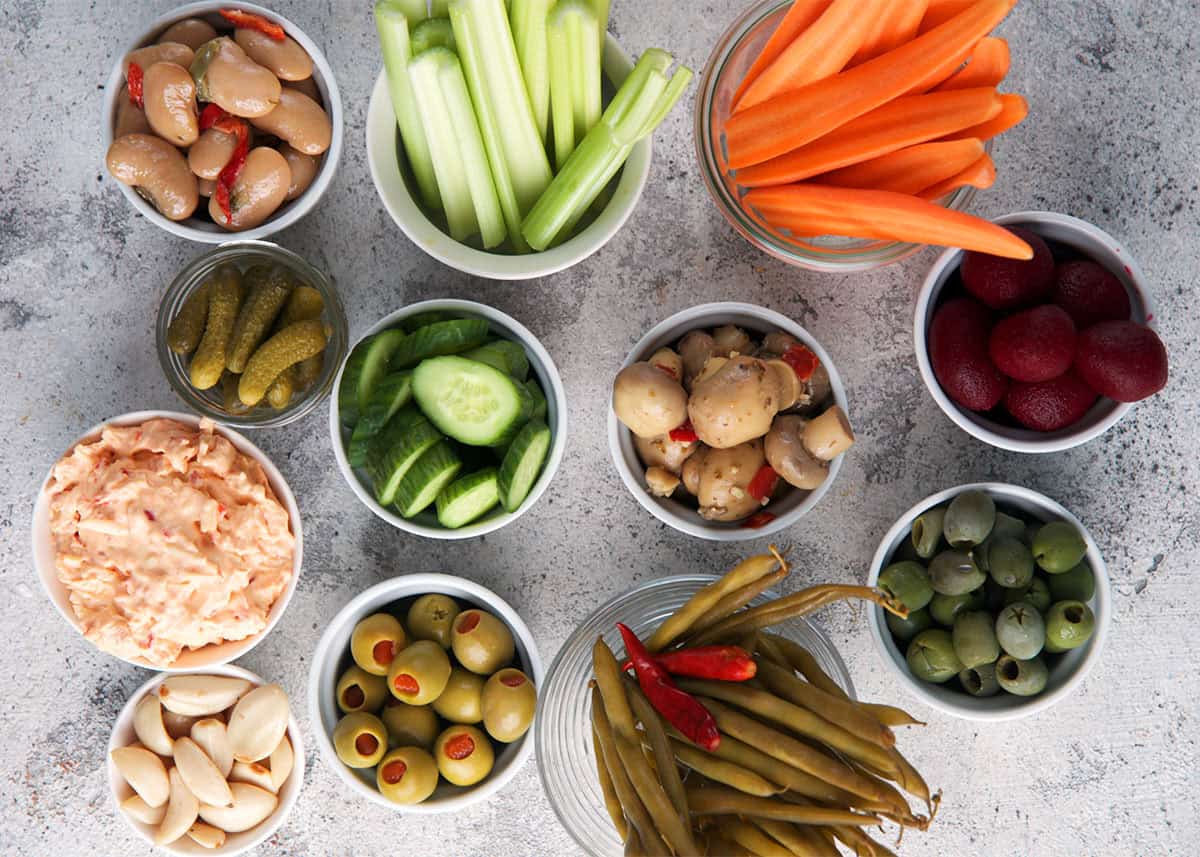
Ingredients For a Relish Tray
The beauty of a Relish Tray is that you’re really building a choose-your-own appetizer platter. You want a little crunch, a little salt, a little tang, and enough variety that everyone finds something they like.
- Fresh veggies – I like to start with the classics: celery, carrots, cucumbers, radishes, cherry tomatoes, bell peppers, broccoli, cauliflower, or scallions. Choose a mix of colors and textures so the tray looks abundant and feels balanced.
Substitutions: Swap in snap peas, fennel, blanched green beans, endive, jicama, or mini sweet peppers. - Pickles and briny bites – This is where the relish tray really earns its name. Dill pickles, sweet gherkins, cornichons, pepperoncini, pickled onions, or pickled okra all work beautifully.
Substitutions: Try giardiniera, pickled asparagus, pickled green beans, bread-and-butter pickles, or even pickled beets if you love a little retro flair. - Olives – A mix of green and black olives is always a safe bet, and Castelvetrano olives are especially good if you want something buttery and mild.
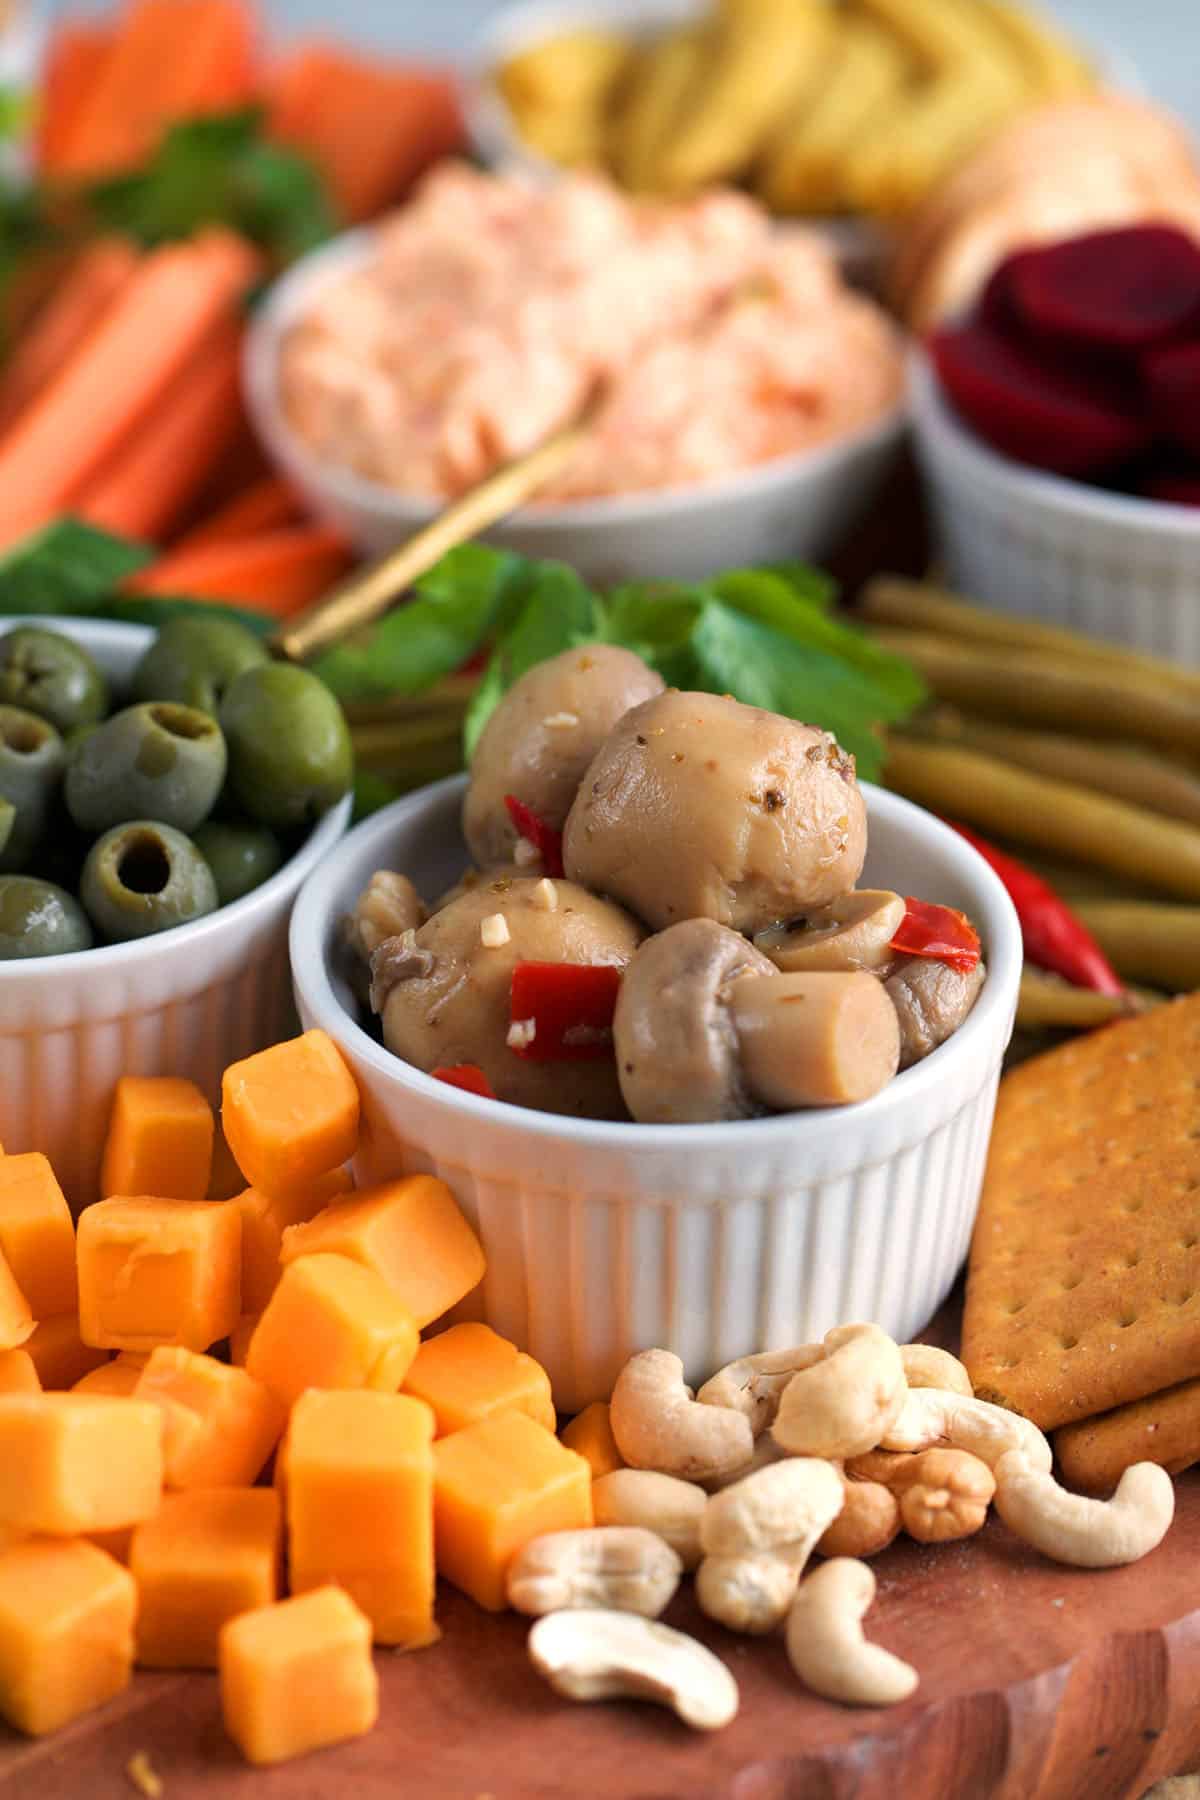
Substitutions: Kalamata, stuffed olives, marinated olives, or skip them entirely if your crowd isn’t into olives and add another pickled item instead. - Optional savory extras – These are the little add-ons that make the tray feel a bit more substantial. Marinated mushrooms, cheese cubes, sliced salami, pepperoni, or pickled peppers are all great options if you want to bulk things up.
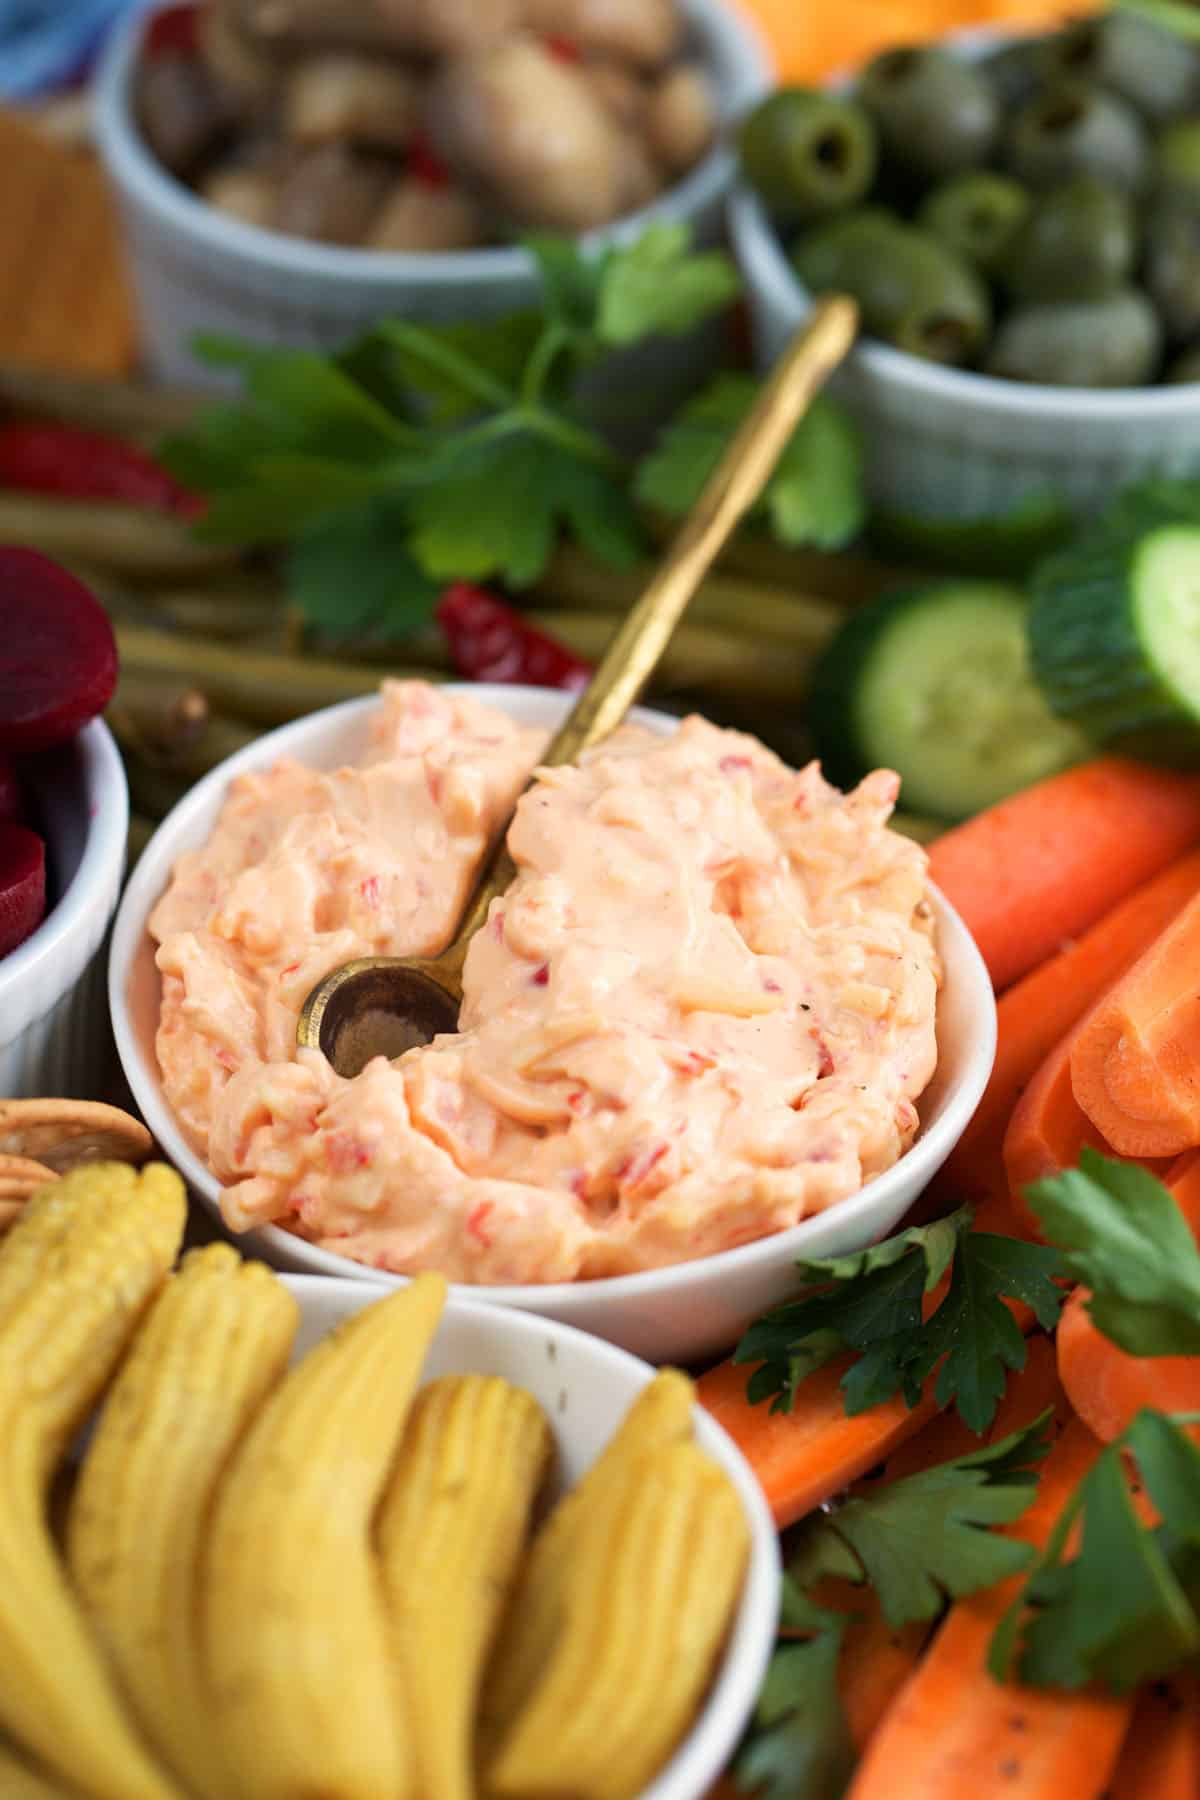
Substitutions: Cubed cheddar, Colby Jack, Swiss, marinated artichokes, deviled eggs, or a few crackers on the side. - Creamy dip – A cool, creamy dip in the center makes the whole platter feel complete. Your recipe uses a simple combination of sour cream, mayonnaise, lemon juice or vinegar, Worcestershire, garlic, dill or parsley, salt, and pepper for a classic dip that works with everything on the tray.
Substitutions: Greek yogurt for some or all of the sour cream, dried dill instead of fresh, parsley instead of dill, or a little extra lemon juice if you want the dip brighter.
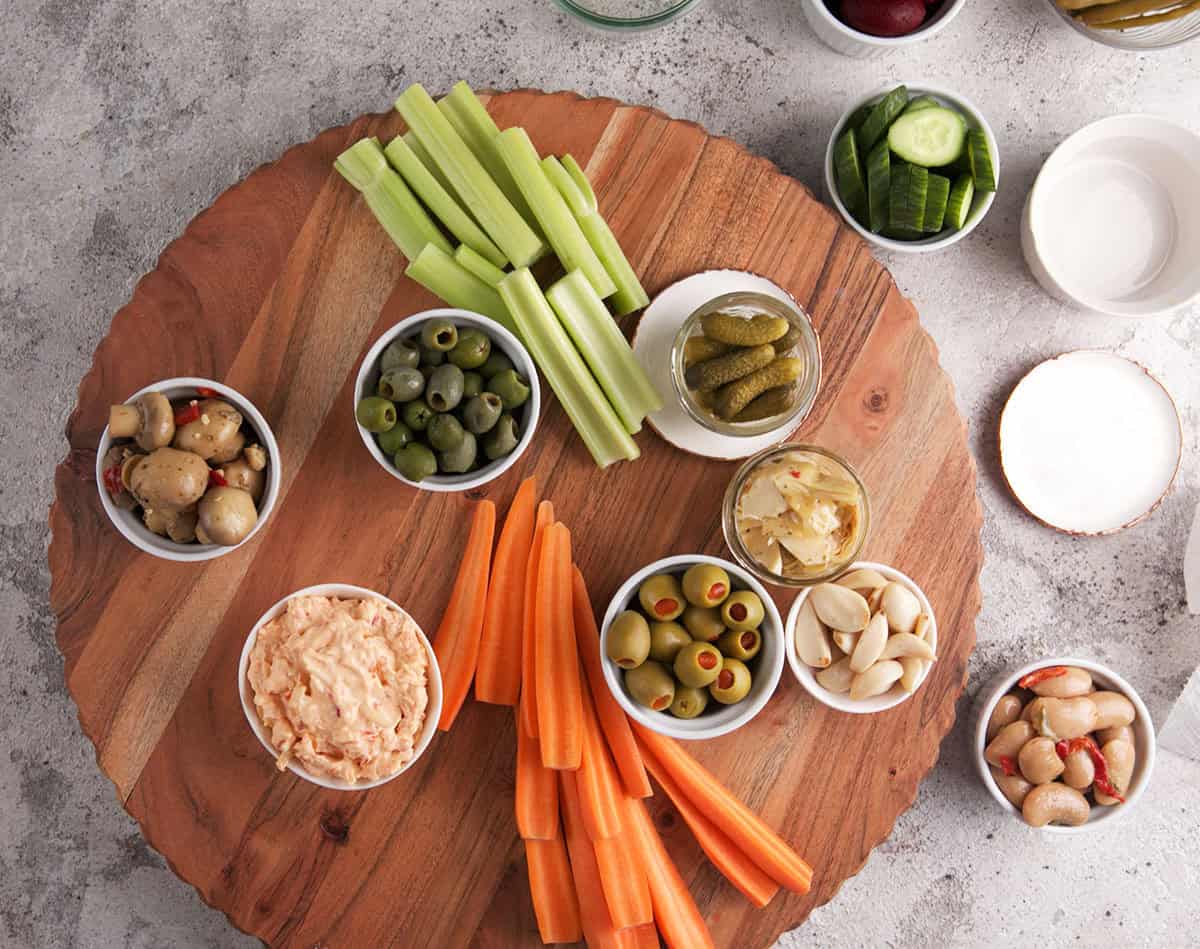
How to Make a Relish Tray
- Start with a large platter, sheet pan, or divided tray so everything has room to breathe.
- Wash and dry the vegetables really well, then cut them into easy, grab-and-go pieces. Crisp, dry veggies look fresher and hold onto the dip much better.
- Drain the pickles, olives, and any marinated vegetables so the tray stays neat instead of watery. If anything seems extra juicy, give it a quick pat dry.
- Mix the dip and spoon it into a small bowl, then place it in the center of the tray or off to one side.
- Arrange the vegetables, pickles, and olives in loose sections around the dip, mixing colors and textures as you go so the tray looks full, bright, and easy to snack from.
- Finish with a few herb sprigs, plus toothpicks or small forks for the pickled items, then chill until ready to serve.
How to Store Leftovers
Leftover components are easiest to store separately if you can.
- Fresh vegetables can be transferred to airtight containers and refrigerated for a few days. Carrots and celery stay especially crisp if you store them in cold water, then drain and dry them before serving again. Your recipe notes the same trick for keeping those vegetables extra crisp.
- The dip can be made ahead and kept in the refrigerator for up to 3 days. Pickled items and olives can go back into airtight containers or their original jars.
- If the tray is already assembled, cover it tightly and refrigerate. It’s best within a few hours for the freshest texture, though your recipe suggests assembling it within 1 to 2 hours of serving for peak crunch.
Kellie’s Tips for the Best Relish Tray
- Use a mix of fresh, briny, and salty. That contrast is what keeps the tray from feeling one-note.
- Don’t overcrowd the platter. A little space between each item makes the whole thing look prettier and easier to grab from.
- Dry everything well. Wet vegetables and briny puddles make a tray look tired fast.
- Cut ingredients into party-friendly pieces. No one wants to take a giant bite of celery while balancing a cocktail.
- Think in color blocks. Scatter the reds, greens, oranges, and whites around the tray so it feels balanced at a glance.
- Keep the wetter ingredients near the edge or in little bowls if needed. That’s a smart trick I use because it keeps the tray cleaner and more polished.
- A relish tray should feel generous, but not fussy. This is one of those recipes where “simple and full” is better than overly styled.
Variations for a Relish Tray
- Holiday Relish Tray – Lean into classic pickles, olives, celery, carrots, radishes, and a dill-forward dip. Add rosemary or parsley for a festive finish.
- Brunch Relish Tray – Use cucumbers, radishes, cherry tomatoes, scallions, olives, and a lighter dip. Serve it with quiche, tea sandwiches, Pimento cheese and fruit.
- Cheese Board Style Relish Tray – Add cheddar cubes, Swiss, marinated mushrooms, olives, and a few crackers to bridge the gap between a relish tray and a cheese board.
- Southern-Style Relish Tray – Add pickled okra, bread-and-butter pickles, Quick Pickled Garlic, pepperoncini, and pickled onions for a more old-fashioned spin.
- Modern Relish Tray – Include giardiniera, Castelvetrano olives, pickled asparagus, cornichons, and a whipped feta dip for a more updated board.
What to Serve with a Relish Tray
A Relish Tray is especially good with:
- Quiche Florentine (Spinach Quiche)
- Traditional Cucumber Sandwiches
- Tea sandwiches
- Ham biscuits
- The Best Million Dollar Deviled Eggs
- Chicken salad sliders
- Overnight Breakfast Casserole
- Crock Pot Ham with Pineapple Brown Sugar Glaze
- Roast Turkey Recipe
- Cocktails and mocktails
It’s especially useful next to richer foods because it adds crunch and acidity, which is one reason relish trays continue to show up in entertaining guides and holiday appetizer content.
More Easy Appetizer Recipes
If you’re building out a party spread, these are the kinds of recipes I’d pair with a Relish Tray:
- Cranberry Pecan Cheese Ball
- Simple Crudité Platter
- Bacon Horseradish Deviled Eggs
- Best Cold Crab Dip Recipe
- Knorr Spinach Dip
- The Best Hot Crab Dip
- Baked Brie with Fig Jam (Brie En Croute)
- Ham and Cheese Sliders
- Marinated Olives
- Pickled Radish
Classic Relish Tray Recipe
Equipment
- large board or platter
- assorted small bowls
- assorted bowls for pickles and marinated items
- small forks or spoons for serving
- chef's knife
- cutting board
Ingredients
What to Put on a Classic Relish Tray
Fresh Vegetables
- 4 Celery sticks, cut into 3–4-inch pieces
- 3 Carrots, peeled and cut into 3-4 inch pieces
- 1 cucumber, sliced into rounds
- 4 Radishes, halved if large
- 1 cup Cherry tomatoes
- 1 cup Bell pepper strips
- 1 cup Broccoli or cauliflower florets
- 4 Green onions or scallions
Pickles and Briny Bites
- 1 cup Dill pickle spears or chips
- 1 cup Sweet gherkins, or bread-and-butter pickles
- 1 cup Cornichons, optional but very classic
- 1 cup Green olives, Castelvetrano or “queen” olives
- 1 cup Black olives
- 1 cup Pickled peppers, pepperoncini
- 1/4 cup Pickled onions or okra, optional
Relish Tray Extras
- 1 cup Marinated mushrooms
- 1/2 cup Pickled beets
- 1 cup Pepperoni or salami, if you want it heartier
- 1 cup Cheese cubes, cheddar, Colby jack, Swiss
- 4 Lemon wedges, nice with olives/pickles
Instructions
How to Assemble the Relish Tray (Step-by-Step)
- Pick your platter: A large oval platter, sheet pan, or divided tray works great.
- Prep the veggies: Wash and dry everything well (dry veggies = dip clings better).
- Cut into grab-and-go sticks/spears. Keep pieces fairly similar in size for a neat look.
- Drain the briny items: Remove pickles/olives from jars and pat lightly so they don’t puddle on the tray.
- Add a dip: Put dip in a small bowl and place it in the center or one side of the platter.
- Arrange in sections: Group each item in its own little “pile” around the dip.
- Put wet items (pickles, peppers) toward the edges. Mix colors (green/red/orange/white) as you go for a classic, abundant look.
- Finish touches: Add fresh herb sprigs (dill/parsley) if you like. Add a small spoon/fork for olives and pickles, plus toothpicks.
Notes
- Dry the vegetables well before arranging so they stay crisp and the dip sticks better.
- Drain pickles, olives, and marinated vegetables well to avoid extra liquid on the platter.
- For the best texture, assemble the tray within 1 to 2 hours of serving.
- Carrots and celery can be stored in cold water ahead of time for extra crunch; just drain and dry before serving.
- The dip can be made up to 3 days in advance and refrigerated until ready to use.
Nutrition
Nutrition information is automatically calculated, so should only be used as an approximation.